Take Robby Home

Ok, we’ll stipulate it right up front: this isn’t a hack. But you have to admit, it would make a fine starting point for a truly epic one. Robby the Robot — the robot from the 1956 movie Forbidden Planet is up for sale. Well, technically he isn’t so much a robot as he is a suit with some animatronics. The auction lot includes Robby, his (non-functioning) vehicle, a control panel, and some other accouterments. If you have deep pockets, you’ll need to bid before November 21.

MGM reportedly spent $125,000 on Robby which was a crazy amount of money in the 1950s. In today’s currency, that would be well over a million bucks. They got their money’s worth, though, as Robby appeared in movies and TV shows including Lost in Space and several episodes of the Twilight Zone. He even made a motionless cameo on The Big Bang Theory.

Continue reading “Take Robby Home”

Build A Calculator, 1974 Style

Last month we touched upon the world of 1970s calculators with a teardown of a vintage Sinclair, and in the follow-up were sent an interesting link: a review of a classic Sinclair calculator kit from [John Boxall]. It’s a few years old now, from 2013, but since it passed us by at the time and there was clearly some interest in our recent teardown, it’s presented here for your interest.

It seems odd in 2017 that a calculator might be sold as a kit, but when you consider that in the early 1970s it would have represented an extremely expensive luxury purchase it makes some sense that electronics enthusiasts who were handy with a soldering iron might consider the cost saving of self-assembly to be worthwhile. The £24.95 price tag sounds pretty reasonable but translates to nearly £245 ($320) in today’s terms so was hardly cheap. The calculator in question is a Sinclair Cambridge, the arithmetic-only predecessor to the Sinclair Scientific we tore down, and judging by the date code on its display driver chip it dates from September 1974.

As a rare eBay find that had sat in storage for so long it was clear that some of the parts had suffered a little during the intervening years. The discrete components were replaced with modern equivalents, including a missing 1N914 diode, and the display was secured in its flush-fitting well in the board with wire links. The General Instrument calculator chip differs from the Texas Instruments part used in the Scientific, but otherwise the two calculators share many similarities. A full set of the notoriously fragile Sinclair battery clips are in place, with luck they’ll resist the urge to snap. A particularly neat touch is the inclusion of a length of solder and some solder wick, what seems straightforward to eyes used to surface-mount must have been impossibly fiddly to those brought up soldering tube bases.

The build raises an interesting question: is it sacrilege to take a rare survivor like this kit, and assemble it? Would you do it? We’d hesitate, maybe. But having done so it makes for a fascinating extra look at a Sinclair Cambridge, so is definitely worth a read. If you want to see the calculator in action he’s posted a video which we’ve put below the break, and if you need more detail including full-resolution pictures of the kit manual, he’s put up a Flickr gallery.

Continue reading “Build A Calculator, 1974 Style”

Programming An Oscilloscope Breakout Game In Pure Data

[S-ol] wrote in to share his sweet breakout game played on an oscilloscope. Built in a weekend as part of a game development jam, Plonat Atek is a polar breakout game where the player attacks the center and the ball bounces around the perimeter. You can play it either on an oscilloscope or using an online emulator. [S-ol] wrote the game in Pure Data, a visual programming language for audio. The software controls the audio out channels and uses sound to control the game graphics. He also made use of the Zexy extension for Pure Data.

One of the cool things about this setup is that since the game is programmed with sound, all the sound effects also double as visual effects

We love oscilloscopes, and not just because they’re useful as hell. They also make sweet vector displays, like this analog pong game that uses a scope for a display. Even when they’re not being used for retrogaming they can be capable of some pretty amazing graphics.

Homemade LED Clock Stands Test Of Time

In an era when you might get chastised if your mobile phone is more than two years old, it’s easy to forget that hardware was not always meant to be a temporary commodity. We acknowledge a few standout examples of classic hardware still surviving into the modern era, such as vintage computers, but they’re usually considered to be more of a novelty than an engineering goal. In a disposable society, many have forgotten that quality components and a well thought out design should give you a service life measured in decades, not months.

A perfect example of this principle is the beautiful LED clock built 40 years ago by [Davide Andrea]. A teenager at the time, [Davide] built this clock to be used by the local radio station, as clocks that showed seconds were important for timing radio shows. Finding it in storage recently, [Davide] took to the /r/electronics subreddit to report that it still works fine after all these years.

Cracking open the case shows a unique and highly functional construction style. Notches cut into the side panels of the case accept individual protoboards in a “blade” type configuration, with the blades connected by a handful of individual wires. No digging through the parts bin for a “worthless” old IDE cable to tear up back in the 1970’s.

Continue reading “Homemade LED Clock Stands Test Of Time”

3D Printing Belts For Vintage Hardware

It may be hard for some of the younger readers to believe, but there was a time when hardware was full of little rubber belts. Tape decks, VCRs, even some computers: they all had rotating parts that needed to transfer power to other components, and belts were a cheap and quiet way to do it. Unfortunately, now decades later we realize that these little belts are often the Achilles heel of classic hardware, getting brittle and breaking long before the rest of the components are ready to give up the fight.

Which is exactly what [FozzTexx] found when trying to revive his newly purchased Commodore PET 2001. The belt inside of the cassette drive had become hard and fallen to pieces, and rather than hunt around for a replacement, [FozzTexx] reasoned he might be able to print one out of a flexible 3D printer filament like NinjaFlex. Besides, this wasn’t the only piece of vintage tech in his house that needed a belt replacement, so he figured it would be a worthwhile experiment.

As the original belt was little more than dust, [FozzTexx] had to design his replacement from scratch. He started by cleverly replicating the path the belt would need to take with string, and then measuring the inside diameter of the string circle with his calipers. [FozzTexx] then reduced the diameter by 5% to take into account the stretching of the new belt.

The profile of the belt was square, which made modeling and 3D printing much easier. [FozzTexx] just subtracted a smaller circle from a larger one in 2D, and then extruded that circle into the third dimension by 1.18 mm to match the height of the original part. Careful measurement paid off, and the newly printed NinjaFlex belt had his Commodore loading and saving programs on the first try.

We’ve covered the difficulty in sourcing replacement belts for old hardware previously, so it will be interesting to see if others are able to make use of the research [FozzTexx] has done here. Of course, longevity concerns are always brought up when NinjaFlex is used, so hopefully [FozzTexx] keeps us updated.

Yellowing: The Plastic Equivalent Of A Sunburn

Your fancy white electronic brick of consumer electronics started off white, but after some time it yellowed and became brittle. This shouldn’t have happened; plastic is supposed to last forever. It turns out that plastic enclosures are vulnerable to the same things as skin, and the effects are similar. When they are stared at by the sun, the damage is done even though it might not be visible to you for quite some time.

Continue reading “Yellowing: The Plastic Equivalent Of A Sunburn”

ESP8266 As A Tape Drive

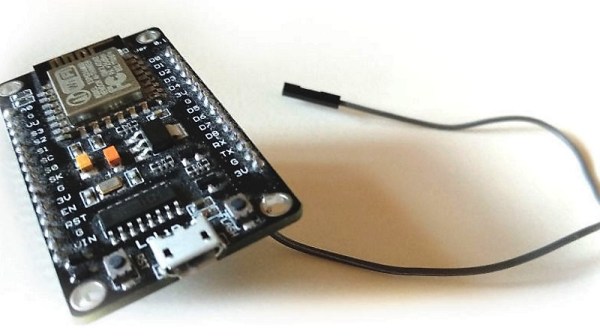
1976 was the year the Apple I was released, one of several computers based on the MOS 6502 chip. MOS itself released the KIM-1 (Keyboard Input Monitor) initially to demonstrate the power of the chip. The single board computer had two connectors on it, one of which could be used for a tape recorder for long-term storage. When [Willem Aandewiel] went to the Apple Museum Nederland in 2016, he saw one and felt nostalgic for his youth. He was able to get a replica, the microKIM, and build it but he wanted to use new technology to interface with this old technology, so he decided to use an ESP8266 as a solid state tape recorder.

One of the reasons the KIM-1 was so popular when it was released was that there was lots of documentation available. [Willem] used this documentation to figure out how the KIM-1 saves data to the recording device. An ATTiny85 is used to decode the pulse stream that the KIM-1 sends when saving because the timing was too tight to both “listen” and decode the bits as well as convert and store them. For loading programs, the data can be sent digitally as 1’s and 0’s to the KIM-1. This means that the ATTiny is only used for decoding and doesn’t have to re-encode the data.  Because of this, saving is slow, but loading is very quick.

To complete the project, [Willem] added four buttons, one each for rewind, record, play and fast-forward, and a screen so you can see which program is currently selected and can go from one program to another. As a nice throwback touch, record and play have to be pressed at the same time when saving. For more 6502 projects, check out this 6502 based DIY computer, or this 6502 built from discrete parts.

Continue reading “ESP8266 As A Tape Drive”