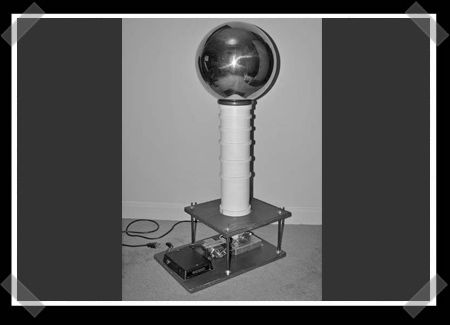
Minimalist LED Light Detecting Candle

[youtube=http://www.youtube.com/watch?v=sPe5RtUOOdc]

Our flickering LED circuit combined two known circuit, and certainly wasn’t graceful because of it. [sprite_tm] saw quite a few areas where the circuit could be reduced. He ended up taking it down to just two LEDs, a battery, and an ATtiny13. The first step was getting rid of the current limiting resistors. The datasheet shows that with a 3V supply the AVR will limit the current well below the maximum current. The light sensor was removed next. [sprite_tm] referenced an earlier post on sensing with LEDs. He measures the voltage across one of the LEDs while it is off to see how much light is hitting it. The current draw while on is 10mA and 50uA while off.

Multi-Color Fog Spreader

fog_spraed

Though we’re pretty sure this was meant for Halloween, we think it would be a perfect addition to your election night party. [marc92] shows us how he built a fog spreader with red or blue lighting. Fog machines generally spit out the fog from a single point, relying on the breeze to spread it around. [marc92] wanted it spread a little more evenly, as well as some nice mood lighting. He built a pipe system that would emit fog from a much larger area. Mounted on the pipe are red and blue LEDs.  Mix this with some of the election lighting systems and you’re set for a party. We know this is an extremely simple project, so it should give you plenty of time to get out and vote before the polls close.

Wooden Retro Keyboard Build

[phirzcol] sent us this cool step by step build of a retro looking keyboard, Inspired by [Von Slatt] and his work. [phirzcol] starts with a standard keyboard and removes the keys. He steams some wood to wrap the keyboard, then finishes it off nicely. The process of making the keys looks pretty grueling. Each key has 4 parts which have to be hand cut and assembled. A blue accent light is a nice touch as well.  The keyboard looks pretty good, but we’d like to try typing on it for a while to see how usable it is.  If it looks like too much effort, you can actually buy it on ebay.

Robot Fish CAD Models


[Bre] dug up this excellent robot fish prototype project. The PPF-O9 has three servos. One on the forward fins to control depth, one on the middle joint, and one final one drives the tail fin. The battery box is mounted to the underside. The control scheme is interesting: the right stick controls left/right and up/down while the left stick controls the frequency and amplitude of the motion. They say the robot is fairly stable, but swimming and turning can be slow. They’ve included CAD files for almost every component to help you with your own designs.

In June, we highlighted a robofish designed for swarm communication.

Flash Sync Port Hacking


Reader [Adrian] picked up a couple cheap wireless flash triggers on eBay. Unfortunately, his Sigma EF-500 DG Super strobe doesn’t have the necessary sync port to make use of these. He popped the device open to try to figure out a way to trigger the device manually. The first idea was to use the test button to fire the device. Thanks to lag, it didn’t work for anything under 1/20th. The solution was to go straight for the optical trigger. [Adrian] has posted some teardown pictures that will help you determine the appropriate solder points for your own mod. The only bit that’s left is adding a 3.5mm mono headphone jack as a sync port. He also has a post on modifying the flash for greater head movement.

Hexbug Brain Transplant

The Hex Bug, at $10, proves to be a perfect platform for building your own droid. Out of the box, it has pretty limited functionality. It walks forward until its antennae bump something, then it backs up and turns left. Applied inspirations shows us how you can replace the bug’s brains with a microcontroller to give it much more life. Instead of hacking into the existing electronics, they chose to completely replace the board. The final result, though still only able to turn one direction, is much more robust.  They discuss the ability to add numerous sensors as well as pre program different behaviours and personalities.

Flickering LED Circuit

Here’s a simple project for your Halloween celebration. The other day while looking through our box of Halloween decorations, we noticed that the incandescent lamp in one of the jack-o’-lanterns was burnt out. Instead of simply replacing the outdated bulb, we decided to build a small dark detecting circuit with 2 yellow LEDs based on this Evil Mad Scientist Laboratories design. After successfully building the circuit, we took the project one step further by incorporating an Atmel ATtiny13 microcontroller. The code switches the LEDs on and off randomly for a flickering effect and is based on this instructable. Below is the schematic we created in EAGLE and a parts list.

Continue reading “Flickering LED Circuit”