[Richard Sum] came up with a great looking 3D printer and put his project up as a campaign on IndieGoGo.
[Richard]’s ‘SUMPOD’ is based off the reprap like a lot of other 3D printers, but the SUMPOD has a look of professionalism to it; the printer looks like something that would come from a factory. We think a lot of thought went into the design and fabrication of this printer.
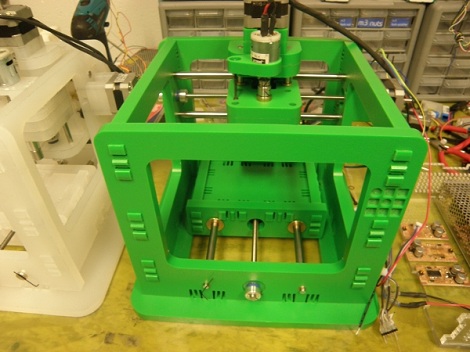
The specs of the machine aren’t too bad either. It’s build area is 150x150x100 mm, or nearly 2 inches than the Makerbot Thing-O-Matic. We asked [Richard] about the drive system of the machine, and he told us there is a linear bearing/belt setup for the x and y axes with a screw drive for the z axis. The electronics are standard NEMA 17 motors and reprap RAMPS fare, so everything electrical is tried and true.
[Richard] plans on adding a Dremel attachment for pcb and lithophane milling. We hope that some design files of the SUMPOD released, but in the mean time we’re really looking forward to seeing the progress of this project.