[Klakinoumi] wanted to use their Magsafe 1 charger from 2007 with their newer Macbook Pro Retina from 2012 — but it had a Magsafe 2 port. There were a few options on the table (buy an adapter, buy a new charger, cry) but those wouldn’t do. [Klakinoumi] went with the brute force option of grinding a Magsafe 1 charger to fit Magsafe 2.
Based on the existence of passive adapters that allow Magsafe 1 chargers to work with newer laptops, we’d assume that the older chargers are probably electrically similar to the newer models. That said, it’s not our gear and we’d definitely be checking first.
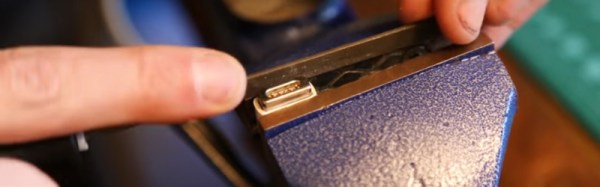
With that out of the way, it’s a simple enough modification — grind away the Magsafe 1’s magnet until it fits into a Magsafe 2 port. It really is that easy. The spring-loaded pins all seem to line up with the newer port’s pads. [Klakinoumi] reports it worked successfully in their tests with 2012, 2014 and 2015 Macbooks but that it should be attempted at your own risk — good advice, as laptops ain’t cheap.
When doing this mod, consider taking care not to overheat the connector during grinding. You could both melt plastic parts of the connector, or ruin the magnet by heating it past its Curie point.
Interested in the protocol Magsafe speaks over those little golden pins? Find out here.