Last month I started a series in which I try out different operating systems with the aim of using them for my everyday work, and my pick was Slackware 15, the latest version of the first Linux distro I tried back in the mid 1990s. I’ll be back with more Linux-based operating systems in due course, but the whole point of this series is to roam as far and wide as possible and try every reasonable OS I can. Thus today I’m making the obvious first sideways step and trying a BSD-based operating system. These are uncharted waters for me and there was a substantial choice to be made as to which one, so after reading around the subject I settled on FreeBSD as it seemed the most accessible.
First, A Bit Of Context
Most readers will be aware that the BSD operating systems trace their heritage in a direct line back to the original AT&T UNIX, while GNU/Linux is a pretty good UNIX clone originating with Linus Torvalds in the early 1990s and Richard Stallman’s GNU project from the 1980s onwards. This means that for Linux users there’s a difference in language to get used to.
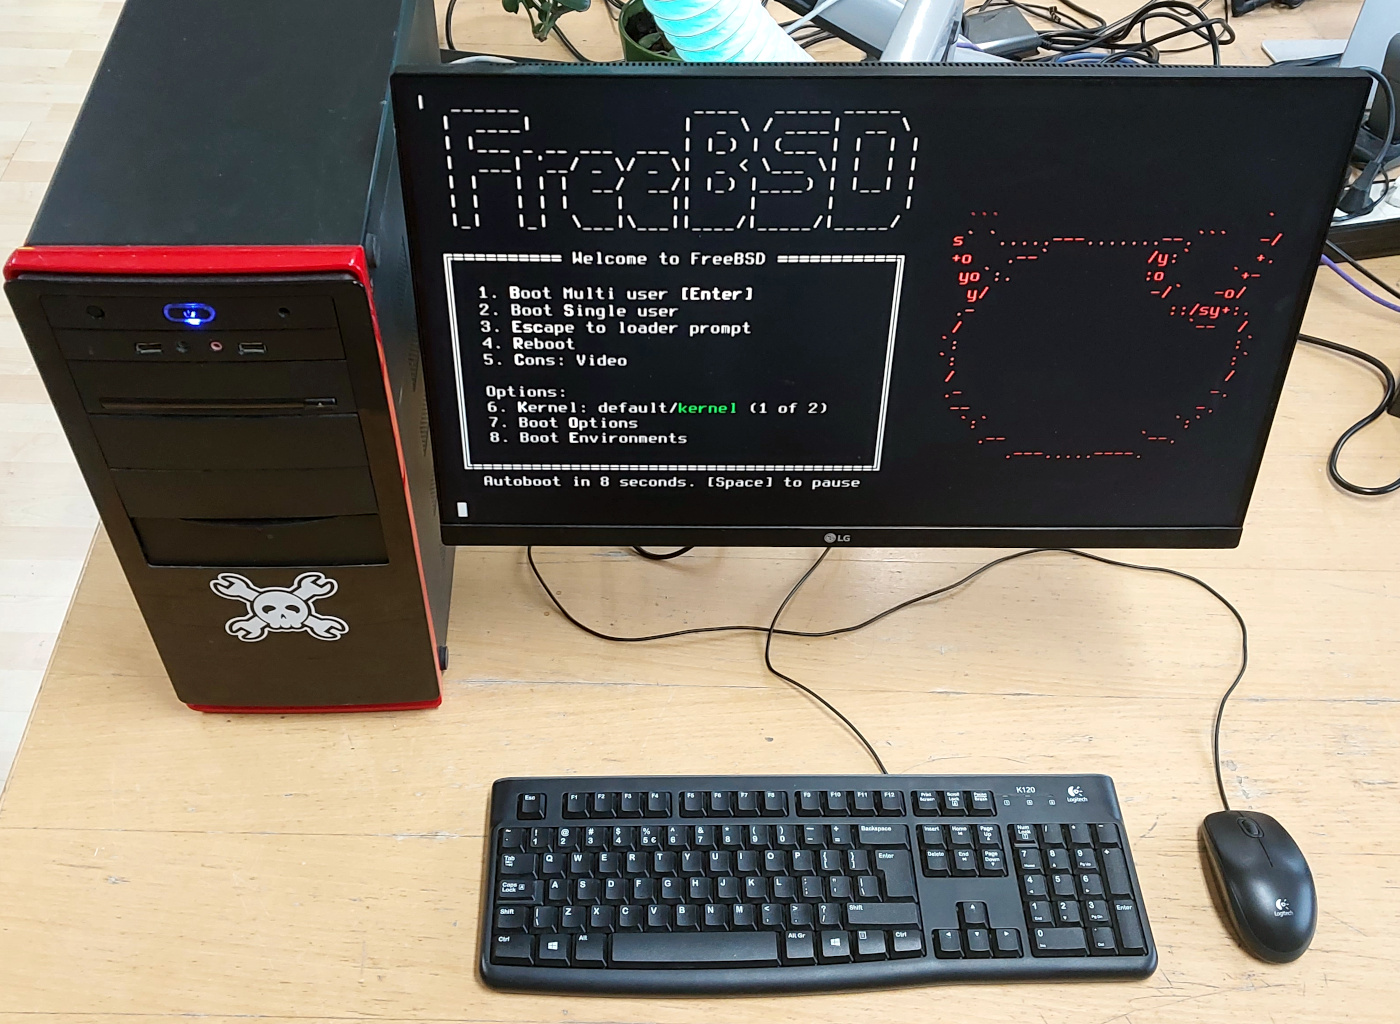
Where Linux is a kernel around which distributions are built with different implementations of the userland components, the various BSD operating systems are different operating systems in their own right. Thus we talk about for example Slackware and Debian as different Linux distributions, but by contrast NetBSD and FreeBSD are different operating systems even if they have a shared history. There are BSD distributions such as GhostBSD which use FreeBSD as its core, but it’s a far less common word in this context. So I snagged the FreeBSD 13.2 USB stick file from the torrent, and wrote it to a USB Flash drive. Out with the Hackaday test PC, and on with the show. Continue reading “Jenny’s Daily Drivers: FreeBSD 13.2”