Most readers will have some idea of how a camera works, with a lens placed in front of a piece of film or an electronic sensor, and the distance between the two adjusted until the images is in focus. The word “camera” is a shortening of “camera obscura”, the Latin for “dark room”, as some early such devices were darkened rooms in which the image was projected onto a rear wall. [David White], a lecturer at Falmouth University in the UK has created a modern-day portable camera obscura using a garden gazebo frame, and uniquely for a camera obscura, it can be used to take selfies.
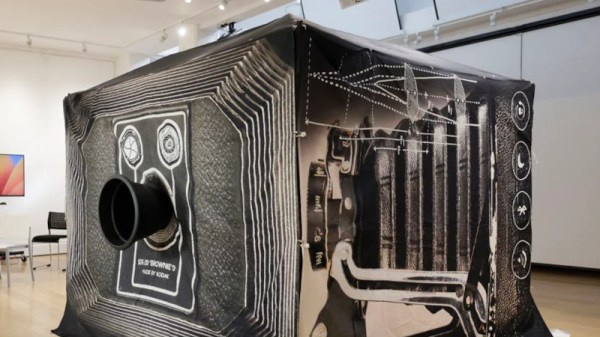
As might be expected the gazebo frame covered with a dark fabric forms the “room”, and the surface on which the image is formed comes from a projection screen. The lens is a custom-made 790 mm f/5.4, not exactly the type of lens found off-the-shelf. The selfie part comes from a Canon digital camera inside the gazebo focused on the frame, using its Wi-Fi control app a subject can sit at the appropriate point in front of the lens and take the selfie as they see fit.
The resulting images have a pleasing ethereal feel to them, and while it’s definitely not the most practical taker of snaps it’s still very much a camera to be impressed by. We’d be curious to see how it would perform as a pinhole camera, and even though it’s nowhere near the 2006 record pinhole image taken using an abandoned US Marine Corps aircraft hangar we think it would still deliver when given enough light. Meanwhile this isn’t the first time we’ve shown you a camera obscura, here’s one using the back of a U-Haul truck.