Think You Know CURL? Care To Prove It?

Do you happen to remember a browser-based game “You Can’t JavaScript Under Pressure”? It presented coding tasks of ever-increasing difficulty and challenged the player to complete them as quickly as possible. Inspired by that game, [Ben Cox] re-implemented it as You Can’t cURL Under Pressure!

In it, the user is challenged in their knowledge of how to use the ubiquitous curl in a variety of different ways. Perhaps this doesn’t sound terribly daunting, especially if your knowledge of curl is limited to knowing it is a command-line tool to fetch something from a web server. But curl has a staggering number of features. The man page is over 4500 lines in length. The software’s main site offers a (free) 250+ page guide on how to use curl and libcurl. Reflecting on this is exactly what led [Ben] to create his challenge.

It’s a wonderful piece of work, but things get really interesting once [Ben] starts talking about the infrastructure behind it all. At its core the game works by giving the user a problem and a virtual machine, and catching outgoing HTTP calls to see whether they look correct. If the outgoing HTTP call is the right solution for the problem, terminate the current VM and start up the next one with the next problem. He’s put a lot of work into getting suitable VMs up and running quickly, securely, and properly isolated. The code can be found on the project’s GitHub repository for those who want a closer look.

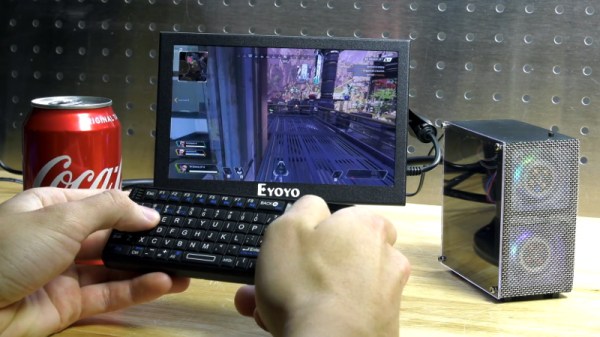
But that’s not all. [Ben] says that in the past he’s had a bad habit of presenting interactive features in his blog posts that can’t keep up with sudden demand. So to address that, the system auto-scales as needed with a small Linux cluster; small brick-sized PCs are started and shut down automatically to meet demand. Hey, the only thing cooler than a functioning cluster is a cluster doing an actual job, like this one that detects NSFW images.

Edge-Lit Ping Pong Paddle Lights Up The Fight

[George] and his coworkers like to blow off a little lunchtime steam on the company ping pong table. We might do the same, except it’d just be us versus the wall, and most of the exercise would consist of bending over to pick the ball up off the floor. When he found a scrap piece of acrylic out in their shop, [George] got the bright idea to make an edge-lit paddle featuring the company’s logo.

Not only does the paddle look cool, it works pretty well, too, even though it’s heavier and has smooth surfaces compared to a standard paddle. To begin, [George] found a regulation-size paddle outline and imported it into SolidWorks, then designed all the necessary cuts for the LEDs and other electronics. He also designed and printed ergonomic grips to protect the goods.

Continuing the stuff-on-hand theme, [George] used through-hole LEDs and dug into the abundance of battery clips and springs they have lying around for designing prototypes, instead of making it all fancy with SMT LEDs and a rechargeable battery pack. Slip on those sweatbands, because we’re serving up the build video after the break.

We see more ping pong balls than paddles around here, and that’s probably because they make great LED diffusers.

Continue reading “Edge-Lit Ping Pong Paddle Lights Up The Fight”

3D Printed Metro Charger Ready For The Wasteland

In the video game Metro 2033 and its subsequent sequels, players fight their way through a post-apocalyptic version of Russia using improvised weapons and tools cobbled together from the sort of bits and bobs the survivors of a nuclear war might be able to scavenge from the rubble. One of the most useful devices in the game is known as the “Universal Charger”: a hand-operated dynamo that the player must use periodically recharge their electrical devices.

The in-game Universal Charger

Being a fan of the series, [Nikola Petrov] wanted to build his own version of the Metro 2033 charger; but rather than going for an exact screen replica, he decided to explore the mechanism itself and see if he could 3D print a functional device.

As demonstrated in the video after the break, his charger manages to produce enough energy to light an LED on each squeeze of the trigger. Though if we were packing our gear to go fight mutated beasties in alternate-future Moscow, we might look for something with a bit more kick.

Beyond the 3D printed parts, the charger uses a couple short pieces of 8 mm rod, a NEMA 17 stepper motor, and a one-way bearing that’s usually used for pull starting small gasolene engines.

Interestingly, [Nikola Petrov] is no stranger to 3D printed electrical generation. If you’re interested in getting some real power out of a NEMA 17 stepper, his fantastic printed wind turbine is a must-see.

Continue reading “3D Printed Metro Charger Ready For The Wasteland”

Sleeper PlayStation Hides A Raspberry Pi 4

[Andreas Wilcox] wanted to get his brother a birthday gift that reflected their shared love for the early days of 3D gaming, but just handing him a second-hand original PlayStation lacked a certain style. So he decided to gut the classic system and replace its dated internals with a shiny new Raspberry Pi 4. But rather than taking the easy way out, he put in the time and effort to integrate the new hardware so seamlessly that the nearly 25 year old console still looks stock from the outside.

The fact that the front ports are functional and work with the original controllers really helps sell the stock look. [Andreas] found a USB to PlayStation controller adapter, liberated the PCB, and soldered it to the back of the system’s ports. Even the memory card slots got in on the action, thanks to female USB connectors installed where the original connector went. It was a tight fit, but the final result was well worth it.

We also love the GPIO-controlled cooling fan complete with a duct designed to blow across the notoriously toasty Pi, and check out that carefully designed holder for the power and reset buttons. This entire project is really a fantastic example of how 3D printed parts can give your projects a far cleaner and more professional look than the hacker’s old standby of hot glue; though of course it demands a considerable time investment.

This isn’t the first time we’ve seen a Raspberry Pi shoehorned into a classic video game console, but it’s absolutely one of the cleanest examples we’ve ever seen. Though if we lump Raspberry Pi portables into the running, the competition is considerably fiercer.

Code The Classics Is Coming

We feel sorry for youth of today. If you spend a few hours playing a modern video game and decide you want to write your own, there’s a big job ahead of you. Games now are as much performances as programs, with cinematic 3D renderings, polyphonic sound and music tracks, and detailed storylines. That wasn’t true 40 years ago, when you could play Pong and then think about writing your own version. The Raspberry Pi people must agree as they are taking preorders for a book called “Code the Classics.” In it, they interview designers of several classic arcade games and then show Python versions of the games you can run — and hack — yourself. You can see their video about the title, below.

The code is from Raspberry Pi founder [Eben Upton] and as you might expect the games aren’t necessarily faithful reproductions but inspired by the old arcade standards.

Continue reading “Code The Classics Is Coming”

Swapping The ROMs In Mini Arcade Cabinets

You’ve probably seen a few of these miniature arcade games online or in big box retailers: for $20 USD or so you get scaled-down version of a classic arcade cabinet, perfect for a desk toy or to throw up on a shelf as part of your gaming collection. Like any good Hackaday reader, you were probably curious about what makes them tick. Thanks to [wrongbaud], we don’t have to wonder anymore.

Over the course of several blog posts, [wrongbaud] walks readers through the hardware and software used in a few of these miniature games. For example, the Rampage cabinet is using a so-called “NES on a Chip” along with a SPI flash chip to hold the ROM, while Mortal Kombat is using a Genesis emulation solution and parallel flash. It wouldn’t be interesting if they didn’t throw you a few curves now and again, right?

But these are more than simple teardowns. Once [wrongbaud] gives an overview of the hardware, the next step is reading the respective flash storage and trying to make sense of the dumped data. These sort of games generally reuse the hardware among a number of titles, so by isolating where the game ROM is and replacing it, they can be made to play other games without hardware modification. Here, this capability is demonstrated by replacing the ROM data for Rampage with Yoshi’s Cookie. Naturally it’s one of those things that’s easier said than done, but it’s an interesting proof of concept.

The Mortal Kombat cabinet is a newer addition to the collection, so [wrongbaud] hasn’t progressed quite as far with that one. The parallel flash chip has been dumped with the help of an ESP32 and a MCP23017 I/O expander, and some Genesis ROM headers are identifiable in the data, but there’s still some sifting to be done before the firmware structure can be fully understood.

Even if you’re not in the market for a diminutive arcade experience, the information that [wrongbaud] has collected here is really phenomenal. From understanding protocols such as I2C and SPI to navigating firmware dumps with a hex editor, these posts are an invaluable resource for anyone looking to get started with reverse engineering.

An Epic Quest To Build The Perfect Retro Handheld

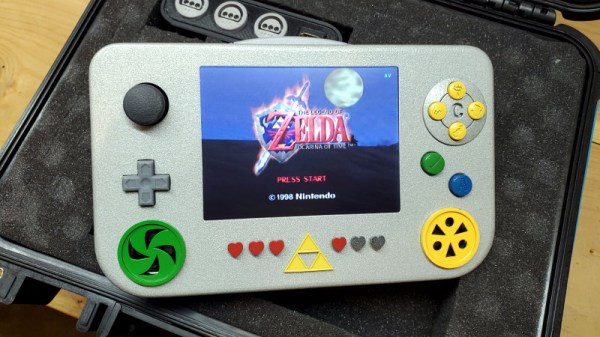
It’s a good time to be a fan of classic video games. Most of us carry around a smartphone that’s more than capable of emulating pretty much everything from the 32-bit era on down, and if you want something a little more official, the big players like Sony and Nintendo have started putting out “retro” versions of their consoles. But even still, [Mangy_Dog] wasn’t satisfied. To get the portable emulation system of his dreams, he realized he’d have to design and build it himself.

The resulting system, which he calls the “Playdog Blackbone”, is without a doubt one of the most impressive DIY builds we’ve ever seen. While there are still some issues that he’s planning on addressing in a later version of the hardware, it wouldn’t be an exaggeration to say that there’s commercially available game systems that didn’t have half as much thought put into them as the Blackbone.

Which is, incidentally, how this whole thing got started. The original plan was to buy one of those cheap emulation handhelds, which invariably seem to come in the form of a PSP clone, and fit it with a Raspberry Pi. But [Mangy_Dog] quickly realized that not only were they too small to get everything he wanted inside, but they also felt terrible in the hand. Since he wanted the final product to be comfortable to play, his first step was to design the case and get feedback on it from other retro game enthusiasts.

After a few iterations, he arrived at the design we see today. Once he printed the case out on his SLA printer, he could move on with fitting all of his electronics inside. This takes the form of a custom PCB “motherboard” which an Orange Pi Zero Plus2 (sorry Raspberry fans) connects to. There’s actually a surprising amount of room inside the case, enough for niceties like dual speakers and a fan complete with ducting to keep the board cool.

Unsurprisingly, [Mangy_Dog] says a lot of people have been asking him if they can buy their own version of the Blackbone, and have suggested he do a crowdfunding campaign to kick off mass production. While he’s looking at the possibility of resin or injection molding the case so he can produce a few more copies, on the whole, his attention has moved on to new projects. Which frankly, we can’t wait to see.

If you’re interested in slightly more modern games, we’ve seen a number of handhelds based on “trimmed” Nintendo Wii’s which you might be interested in. While they might not have the sleek external lines of the Blackbone, the work that goes into the electronics is nothing short of inspirational.

Continue reading “An Epic Quest To Build The Perfect Retro Handheld”