Who’s Watching The Kids?

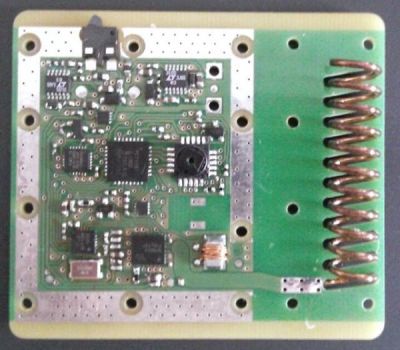
It wasn’t long ago that we saw the Echo bloom into existence as a standalone product from its conceptual roots as a smartphone utility. These little black columns have hardly collected their first film of dust on our coffee tables and we’re already seeing similar technology debut on the toy market, which causes me to raise an eye-brow.

There seems to be some appeal towards making toys smarter, with the intent being that they may help a child learn while they play. Fair enough. It was recently announced that a WiFi enabled, “Hello Barbie” doll will be released sometime this Fall. This new doll will not only be capable of responding to a child’s statements and questions by accessing the Internet at large, it will also log the likes and dislikes of its new BFF on a cloud database so that it can reference the information for later conversations. Neat, right? Because it’s totally safe to trust the Internet with information innocently surrendered by your child.

Similarly there is a Kickstarter going on right now for a re-skinned box-o-internet for kids in the shape of a dinosaur. The “GreenDino”, is the first in a new line called, CogniToys, from a company touted by IBM which has its supercomputer, Watson, working as a backbone to answer all of the questions a child might ask. In addition to acting as an informational steward, the GreenDino will also toss out questions, and upon receiving a correct answer, respond with praise.

Advancements in technology are stellar. Though I can see where a child version of myself would love having an infinitely smart robot dinosaur to bombard with questions, in the case of WiFi and cloud connectivity, the novelty doesn’t outweigh the potential hazards the technology is vulnerable to. Like what, you ask?

Whether on Facebook or some other platform, adults accept the unknown risks involved when we put personal information out on the Internet. Say for instance I allow some mega-corporation to store on their cloud that my favorite color is yellow. By doing so, I accept the potential outcome that I will be thrown into a demographic and advertised to… or in ten years be dragged to an internment camp by a corrupt yellow-hating government who subpoenaed information about me from the corporation I consensually surrendered it to.

The fact is that I understand those types of risks… no matter how extreme and silly they might seem. The child playing with the Barbie does not.

All worst case scenarios of personal data leakage and misuse aside, what happens when Barbie starts wanting accessories? Or says to their new BFF something like, “Wouldn’t we have so much more fun if I had a hot pink convertible?”


New Part Day: Time Of Flight Sensors

Every robotics project out there, it seems, needs a way to detect if it’s smashing into a wall repeatedly, acting like the brainless automaton it actually is. The Roomba has wall sensors, just about every robot kit has some way of detecting obstacles its running into, and for ‘wall-following robots’, detecting objects is all they do.

While the earliest of these robots used a piece of wire and a metal contact to act like a switch for these object detectors, ultrasonic sensors – the kind you can buy on eBay for a few bucks – have replaced this clever wire spring switch. Now there’s a new sensor for the same job – the VL6180 – and it measures the speed of light.

The sensors that are used for object and collision detection now use either ultrasonic or infrared light. They’re susceptible to noise, and if you’re doing anything automated, you really don’t want rogue measurements. A time of flight sensor clocks out photons and records how long it takes them to return at 299,792,458 meters per second. It’s less sensitive to noise, and if you can believe this SparkFun demo of this sensor, extremely accurate

This is not the first Time of Flight distance sensor on the market; earlier this week we saw a project use a sensor called the TeraRanger One. This sensor costs €150.00. The VL6180 sensor costs about $6 in quantity one from the usual suspects, and breakout boards with the proper level converters and regulators can be found for about $25. More expensive sensors have a greater range, naturally; the VL6180 is limited to somewhere between 10cm (on paper) and 25cm (in practice). But this is cheap, and it measures the time of flight of pulses of light. That’s just cool.

Retrotechtacular: Teleprinter Tour, Teardown

This week, we’re taking the wayback machine to 1940 for an informative, fast-paced look at the teleprinter. At the telegram office’s counter, [Mary] recites her well-wishes to the clerk. He fills out a form, stuffs it into a small canister, and sends it whooshing through a tube down to the instrument room. Here, an operator types up the telegram on a fascinating electro-mechanical device known as a teleprinter, and [Mary]’s congratulatory offering is transmitted over wires to her friend’s local telegraph office hundreds of miles away.

We see that the teleprinter is a transceiver that mechanically converts the operator’s key presses into a 5-digit binary code. For example, ‘y’ = 10101. This code is then transmitted as electrical pulses to teleprinters at distant offices, where they are translated back into alphanumerical data. This film does a fantastic job of explaining the methods by which all of this occurs and does so with an abstracted, color-coded model of the teleprinter’s innards.

The conversion from operator input to binary output is explained first, followed by the mechanical translation back to text on the receiving end. Here, it is typed out on a skinny paper tape by the type wheel shown above. Telegraphists in the receiving offices of this era cut and pasted the tape on a blank telegram in the form of meaningful prose. Finally, it is delivered to its intended recipient by a cheeky lad on a motorbike.

Continue reading “Retrotechtacular: Teleprinter Tour, Teardown” →

Hackaday Links Column Banner

Hackaday Links: February 15, 2015

[Matthias Wandel], also known as the genius/demigod that can make anything out of wood, put together a mount for a Raspberry Pi and a camera. Yes, it’s just a holder for a Raspi, but some of our readers who aren’t up to speed with [Matthias] might want to check out his Youtube channel. There are hundreds of awesome videos. Report back in a month.

[Evan], the guy working his butt off for the MidAtlantic Retro Computing Hobbyists, and the organizer for the Vintage Computer Festival East (we’re going, April 17-19, Wall, NJ) has been working on a book. It’s about mobile computing, and he’s crowdfunding it.

Your keyboard has buttons, and so does and Akai MPC. Daft PunKonsole! Press the space bar for  instrumental part. There is, as yet, no video of someone doing this correctly.

Valentine’s Day was yesterday, and that means Valentine’s Day builds started rolling in on the tip line. Here’s something that’s actually a very simple circuit that’s inspired from an old ‘Electronic Games and Toys’ book by [Len Buckwalter]. Here’s a video of it in action.

A few years ago the name of the game was tiny, credit card-sized ARM boards. It had to come to this: a 64-bit board. ARM Cortex A53 running at 1.2GHz. It also costs $120 and only has a gig of RAM, but there you go.

Hackaday Retro Edition: The Second Most Valuable Home Computer

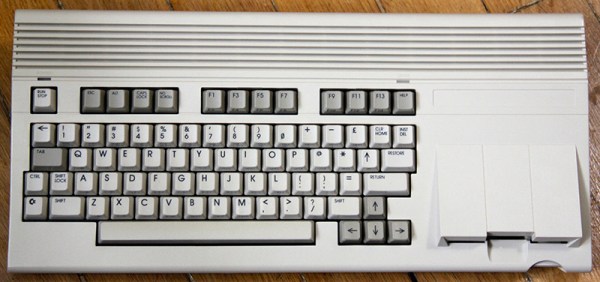
This will come to no surprise to anyone who has ever talked to me for more than a few minutes, but one of my guilty Internet pleasures is heading over to eBay’s ‘vintage computing’ category, sorting by highest price, and grabbing a cup of coffee. It’s really just window shopping and after a while you start seeing the same things over and over again; Mac 512s with a starting bid far more than what they’re worth, a bunch of old PC-compatible laptops, and a shocking amount of old software. For the last week I’ve been watching this auction. It’s a Commodore 65 prototype – one of between 50 and 200 that still exist – that has over 60 bids, the highest for over $20,000 USD. It’s the most successful vintage computer auction in recent memory, beating out the usual high-profile auctions like Mac 128s and Altair 8800s. The most valuable home computer is the Apple I, but if you’re wondering what the second most valuable one is, here you go.

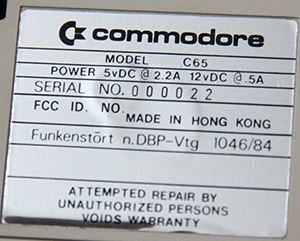
C65 serialThe C65 is not a contemporary of the C64, or even our own [Bil Herd]’s C128. This was the Amiga era, and the C65 was intended to be the last great 8-bit machine. From a page dedicated to the C65, it’s pretty much what you would expect: the CPU is based on a 6502, with the on-die addition of two 6526 CIA I/O controllers. The standard RAM is 128kB, expandable to 8MB by an Amiga 500-like belly port. Sound would be provided by two SIDs, and the video is based on the VIC-III, giving the C65 a pallette of up to 4096 colors and a resolution of up to 1280×400.

There’s still a little over five hours to go in the auction, but the current $21000 price should go even higher in the final hour; a C65 auction from a few years ago fetched $20100 for ‘a computer with missing parts’. This auction is for a complete, working system that has remained intact since it was discovered during the Commodore closing.

Update: Auction finished for $22,862.01 USD. For historical purposes, here’s a flickr album, a video, and another video.


vt100normal The Hackaday Retro Edition is our celebration of old computers doing something modern, in most cases loading the old, no CSS or Javascript version of our site.
If old and rare computers are your sort of thing, Hackaday will be at the VCF East this year.

If you have an old computer you’d like featured, just load up the retro site, snap some pictures, have them developed, and send them in.

Ask Hackaday: Are Conductive Inks Going To Make It?

It’s amazing how affordable PCB fabrication has become. It has long been economical (although not always simple) to fabricate your own singe and double-sided boards at home, the access to professional fabrication is becoming universal. The drive continues downward for both cost and turnaround time. But there is growing interest in the non-traditional.

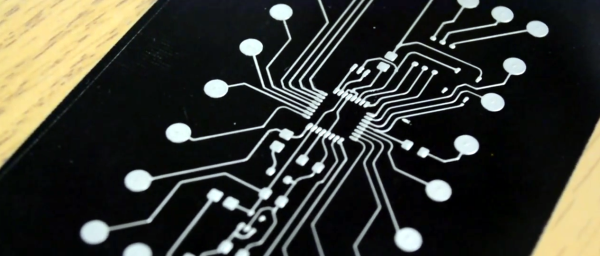
Over the last year we’ve seen a huge push for conductive-ink-based PCB techniques. These target small-run prototyping and utilize metals (usually silver) suspended in fluid (think glue) to draw traces rather than etching the traces out of a single thin layer of copper. Our question: do you think conductive in will become a viable prototyping option?

Voltera V-One Circuit Board Prototyping Machine

I recorded this interview at 2015 CES but was asked not to publish it until their crowd funding campaign went live. If you haven’t been paying attention, Voltera is at almost 400% of their $70k goal with 26 days remaining. This printer definitely works. You can print circuits, solder components or reflow them, and there’s even a second non-conductive ink that can be used to insulate between traces when they cross over one another. In the video [Alroy] suggests Voltera for small production runs of 10-20 boards. Would you see yourself using this for 10-20 boards?

Personally, I think I could solder point-to-point prototypes in less time. Consider this: the V-One will print your traces but you still must solder on the components yourself. If the board design reaches a high level of complexity, that timing may change, but how does the increased resistance of the ink compared to copper traces affect the viability of a board? I assume that something too complex to solder point-to-point would be delving into high-frequency communications (think parallel bus for LCD displays, etc.). Is my assumption correct? Do you think conductive ink will get to the point that this is both viable and desirable over etching your own prototypes and how long before we get there?

Now, I certainly do see some perfect use-cases for Voltera. For instance, introduction to circuit design classes. If you had one of these printers at the middle school or high school level it would jump-start interest in electronics engineering. Without the need for keeping chemical baths like Cuperic Chloride or Ferric Chloride on hand, you could walk students through simple board design and population, with the final product to take home with them. That’s a vision I can definitely get behind and one that I think will unlock the next generation of hardware hackers.

Correction: [Arachnidster] pointed out in the comments that Voltera is still working on being able to reflow boards printed by the V-One. On their Kickstarter page they mention: “(Reflow onto Voltera printed boards is currently under development)”

Hacklet 34 – Satellite Projects

Space. The final frontier. Every tinkerer, hacker, and maker has dreamed of flying out of Earth’s atmosphere and into the heavens. Last year one hard-working team got a chance to fly a member to space by winning the Hackaday prize. For the rest of us, we can still experience some of that excitement by contacting satellites in orbit, or even sending a bit of our own hardware into space. This week’s Hacklet focuses on the best satellite projects on Hackaday.io!

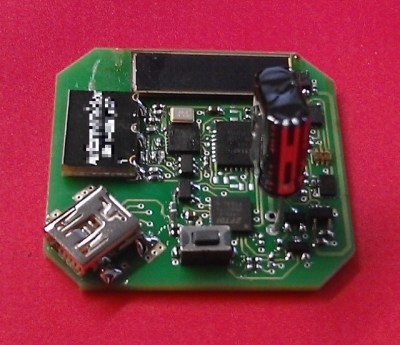
basicSatWe start with [movax] and Your satellite devkit and launch. Chipsat is a tiny satellite which runs BASIC code. Yes, BASIC in space! Chipsats will be stacked into a launcher and sent off into space in groups. The idea is to eventually have them launched from the International Space Station. Power is provided by a small solar cell which charges up a pair of super capacitors. When the capacitors are charged, the satellite will run for a few seconds. Connectivity with the ground is via a 433 MHz link. Chipsat doesn’t just float in space, three coils give it the ability to control its attitude and rotation. Chipsat will sense the space around it with a magnetometer and a light sensor.


satnogsv2

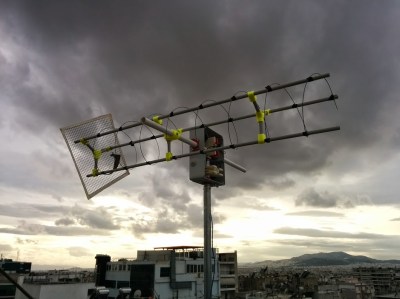
No satellite-themed Hacklet would be complete without [Pierros Papadeas] and his team’s work on SatNOGS – Global Network of Ground Stations. SatNOGS aims to create a global network of connected satellite ground stations. Think of it as a grass-roots version of NASA’s deep space network for satellites in earth orbit. This is more than just a great idea, as SatNOGS won the 2014 Hackaday Prize. You can check out our coverage of the project back in November, 2014. Since then, the SatNOGS team has been busy! They’ve just deployed the first SatNOGS V2 system above their hackerspace in Athens, Greece.

trsiNext up is TRSI PocketQub Satellite, another project by [movax]. TRSI is a satellite that sends data via images which can be viewed with a simple RTL-SDR stick using Hellschreiber mode. Hell mode means that images can be directly viewed in the waterfall display of whichever SDR application is running the receiver. Numbers or entire images snapped with TRSI’s cell phone style camera module can be encoded and displayed. Power is of course provided by solar cells, and the communications link will be on the coordinated 433 MHz band. The original TRSI hardware has actually morphed into a deployment machine for ChipSat, [morvax’s] other satellite project. He’s put the main TRSI program on hold until after the ChipSat campaign is complete.

pocketquRounding out our satellite special is [OzQube] with his project QubeCast Max. QubeCast is the first Australian version of the PocketQube PQ60 satellite form factor. After watching the success of $50Sat project, [OzQube] wanted to design a satellite of his own. Since he wanted to add sensors and send more data back to Earth than previous efforts, he needed a higher data rate than the current crop of satellites. This meant going to a high-powered radio. To achieve this, he’s using a  NiceRF RF4463F30 radio module. The module is based upon a Silicon Labs Si4463 RF ISM band chip, coupled with a power amplifier. The module outputs 1 watt, which is quite a bit of power for a tiny satellite!

Want more satellite goodness? Check out Hackaday.io’s freshly minted Satellite List.

The countdown is almost at 0, so that’s just about all the time we have for this episode of the Hacklet. See you next week.  Same hack time, same hack channel, bringing you the best of Hackaday.io!