While the proliferation of the smartphone has caused the personal music player (PMP) market to mostly evaporate, there are still those who prefer a standalone device for their music. The Melodio Self-Mate is one such spiritual successor to the iPod.
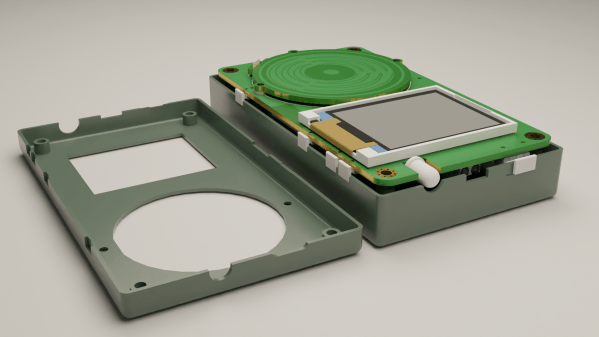
Music-only devices really benefit from the wheel interface pioneered by Apple, so we still see it in many of the new Open Source PMPs including this one and the Tangara. The Melodio uses the ubiquitous ESP32 for its brains coupled with a TI PCM5102A DAC and TI TPA6130A2 headphone amp for audio. A slider on the side of the device allows you to switch it between mass storage mode and programming mode for the ESP32.
Since this device packs a little more horsepower and connectivity than the original iPods, things like listening to Spotify are doable once assembled, instead of having to completely rebuild the device. Speaking of building, there are only renders on the GitHub, so we’re not sure if this project has made the jump IRL yet. With more people concerned about the distractions of smartphones, maybe this renaissance of open PMPs will lead to a new golden age of music on the go?
Miss the halcyon days of the iPod? They’re easier to hack now than ever, and if you really want to go old school, how about a podcast on a floppy?