The MakerBarn is a new makerspace between The Woodlands and Tomball, TX (north of Houston). [George Carlson], one of the founders and a retired design engineer, wanted to make sure only members certified on a machine could use it. He worked with [Kolja Windeler] to create the MACS or Makerspace Access Control System. He has one video explaining MACS and, after the break, another explaining the browser based user interface for the system.
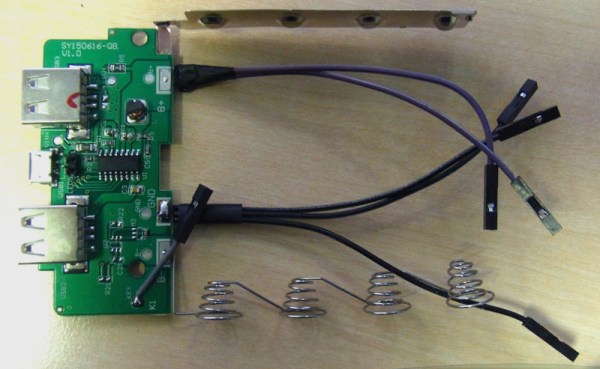
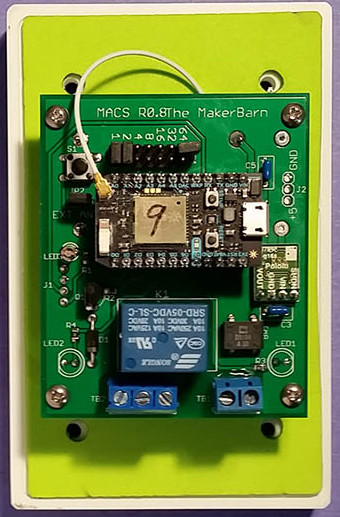 A control box, [George] calls them stations, controls the power to a machine. Member badges have an RFID tag that is read when inserted into the station’s reader. If the member is authorized to use the machine, the power is enabled. For safety, the member’s badge must remain in the reader to maintain power. The reader uses a Photon board from Particle with a WiFi link to a Raspberry Pi server.
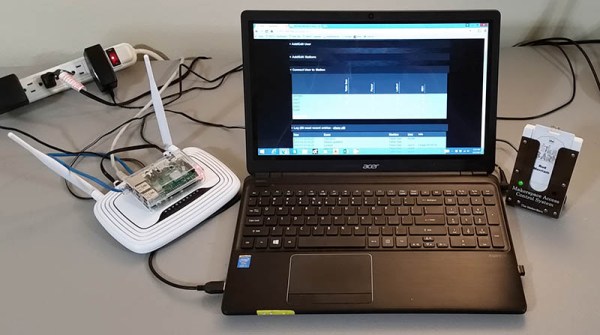
[Kolja] developed a Pi system to maintain a database of member numbers and the machines they can use. The list is sent to the stations periodically or when updates occur. The user interface is browser based on the MakerBarn’s LAN so it can be maintained by a computer or smartphone in the space. Presently 21 MACS modules have been built with some going to Hanover University in Germany for their auto hobby shop.
Not only did [George] lead the effort on creating MACS but has been key to getting the construction done inside a pole barn to make the MakerBarn a reality.
Continue reading “Maker Barn Organizer Creates Makerspace Access Control System”