Bringing A 50 Watt Laser Cutter To Life

This is the future and we live in a world of 3D printers and laser cutters. Have you ever pondered the question of getting yourself a laser cutter? Well [Erich Styger] just landed a 50 Watt Laser Cutter from AliExpress and has written up a detailed guide to his experience.

[Erich] had been wrestling with the idea of buying one for himself for some time but was put off by the difficulty in their operation. This changed when [Scorch] published the K40 Whisperer control software which allows for better control over these machines. With the hopes of an interesting weekend project, [Erich Styger] took a leap of faith and spent $900 on a model 4040 laser cutter.

In his blog, he goes through the steps in setting up the machine as well as calibrating the laser. With a plethora of images and a detailed look at each aspect of the leveling and testing, [Erich Styger] had a weekend well spent and a working K40 laser cutter for his workshop. But perhaps the more valuable part of the stories is the overall experience.

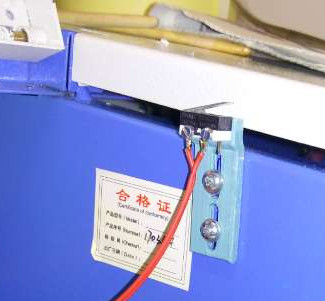
It was not a “what you see is what you get” order, but it did turn out to be a hacker’s “what you want is what you get” adventure. The machine didn’t look the same as the picture, it came with a burned CD-R with a box full of small parts (in addition to separate shipment of a USB thumb drive and silicone sealant), and there were some mechanical touchups plus a stuck switch requiring reassembly. He has done an excellent job of documenting from order to test-runs and the photos alone are worth taking a look.

Adding value to inexpensive laser cutters in an often-featured project around here. If you are looking for more details on these wonderful machines, be sure to check out more tales of Cheap Laser Cutters and our coverage of the K40 Whisperer software launch from last month.

Laser Cut Enclosures From Eagle Files

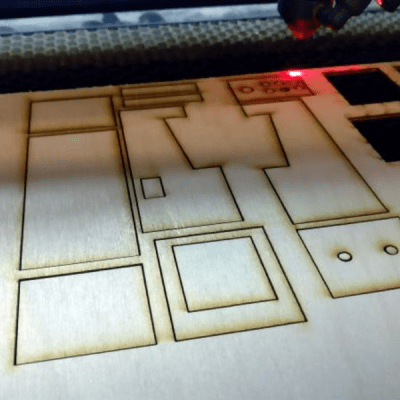
Once a project is finished, it might still need a decent enclosure. While it’s possible to throw a freshly soldered PCB in a standard enclosure, or piece of Tupperware, or cardboard box, these options don’t have the fit and finish of something custom-made. If you have a laser cutter sitting around, it’s a simple matter to cut your own enclosure, but now that process is much easier thanks to [Ray]’s latest project.

Since [Ray] was already using Eagle to design his PCBs, it seemed like a short step to using the Eagle files to design the enclosure as well. The script runs from those files and creates everything necessary to send to the laser cutter for manufacturing. Right now, [Ray] points out that the assembly time for each enclosure can be high, and this method might not be suited for large numbers of enclosures. Additionally, some of the calculations still need to be done by hand, but there are plans to automate everything in the future.

For single projects, though, this script could cut a lot of time off of designing an enclosure and building it from scratch, and could also help improve aesthetics over other options like 3D printed enclosures. Of course, if you have a quality 3D printer around but no laser cutter, there are options for custom enclosures as well.

Ink-Filled Machine Badges Score Respect For Your Gear

Remember the good old days when machines had a stout metal badge instead of cheap vinyl decals, and nameplates on motors were engraved in metal rather than printed on a label with a QR code? Neither do we, but these raised brass labels with color filled backgrounds look great, they’re surprisingly easy to make, and just the thing your gear needs to demand respect as a cherished piece of gear.

The ‘easy’ part of this only comes if you have access to a machine shop like [John] at NYC CNC does. To be fair, the only key machine for making these plates is a laser cutter, and even a guy like [John] needed to farm that out. The process is very straightforward — a brass plate is cleaned and coated with lacquer, which is then removed by the laser in the areas that are to be etched. The plate is dipped in an electrolyte solution for etching, cleaned, and powder coated. After curing the powder coat with a heat gun rather than an oven — a tip worth the price of admission by itself — the paint is sanded off the raised areas, the metal is polished, and a clear coat applied to protect the badge.

Plates like these would look great for a little retro-flair on a new build like this Nixie power meter, or allow you to restore a vintage machine like this classic forge blower.

Continue reading “Ink-Filled Machine Badges Score Respect For Your Gear”

Edge-lit Pendants Show Two Layers Are Better Than One

Engraved acrylic lights up nicely with LED lighting. Simply engrave clear acrylic with a laser engraver, then edge-light the acrylic and watch the engraving light up. This badge made by [Solarbotics] shows how they used this principle when creating some pendants for an event that performed particularly well in the dark.

The pendants they created have two engraved acrylic panels each, and that’s about it. Two LEDs and a CR2032 battery nestle into pre-cut holes, and the engraved sides are placed face-to-face, so the outer surfaces of the pendant are smooth. By using some color-cycling RGB LEDs on one panel and blue LEDs on the other panel, the effect is that of an edge-lit outer design with a central element that slowly changes color separately from the rest of the pendant.

The design stacks the LED leads and coin cells in such a way that a simple wrap of tape not only secures things physically, but also takes care of making a good electrical connection. No soldering or connectors of any kind required. [Solarbotics] found that CR2032 cells would last anywhere between a couple of days to a week, depending on the supplier.

This design is great for using a minimum of materials, but if that’s not a priority it’s possible to go much further with the concept. Multiple layers of edge-lit acrylic were used to make numeric 0-9 display modules as well as a full-color image.


Microorganisms Can’t Hide From DropoScope

The DropoScope is a water-drop projector that works by projecting a laser through a drop of water, ideally dirty water crawling with microorganisms. With the right adjustments, a bright spot of light is projected onto a nearby wall, revealing a magnified image of the tiny animals within. Single celled organisms show up only as dark spots, but larger creatures like mosquito larvae exhibit definite structure and detail.

While simple in concept and requiring nothing more high-tech than a syringe and a laser pointer, getting useful results can require a lot of fiddly adjustment. But all that is a thing of the past for anyone with access to a laser cutter, thanks to [ingggis].  His design for a laser-cut a fixture lets anyone make and effortlessly adjust their own water-drop projector.

If you’d like to see some microorganisms in action, embedded below is video from a different water-drop projector (one identical in operation, but not lucky enough to benefit from [ingggis]’s design.)

Continue reading “Microorganisms Can’t Hide From DropoScope”

Laser Exposing PCBs With A Blu-Ray Laser

For those of us whose introduction to PCB making came decades ago and who share fond memories of permanent markers and crêpe paper sticky tape, the array of techniques available to PCB artists of today seem nothing short of magical. Toner transfer and peroxide etchant mixtures might seem run-of-the-mill to many readers, but even they are streets ahead of their predecessors from times past.

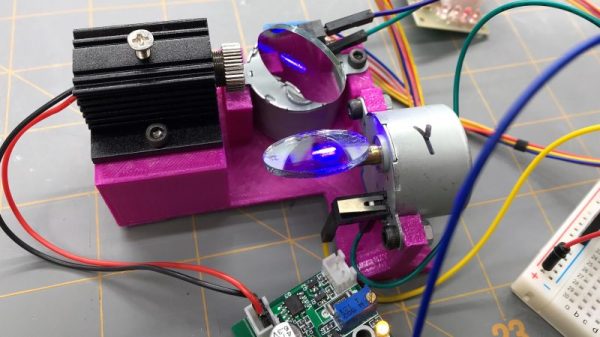
Photographic exposure of  etch-resist coating has traditionally been performed with a UV lamp through a sheet of acetate film, but there is no reason why that should be the only way it can be performed. There have been plenty of projects using lasers or LEDs to draw a PCB design onto the coating as a raster, and a rather nice example from [Terje Io] using a Blu-Ray laser diode is the subject of the video below the break.

The diode is mounted on a gantry with a THK KR33 linear actuator that he tells us was unsuitable for his CNC mill due to backlash. This gives a claimed 1200 dpi resolution, over a 100 mm x 160 mm exposure area. Software is provided in a GitHub repository, taking a PNG image exported through a PDF printer. And since it’s got a UV laser, it can be used in a second pass to process UV-responsive soldermask film. ([Terje] cheats and uses a separate CNC mill to drill out the holes.) The result looks great.

Continue reading “Laser Exposing PCBs With A Blu-Ray Laser”

Improved Game Tokens With Laser Cutting And Clever Design

[Martin Raynsford] is a prolific project maker, especially when it comes to using a laser cutter. These laser-cut token counters for the board game Tigris & Euphrates demonstrate some clever design, and show that some simple touches can make a big difference.

In the digital version of the game, the tokens conveniently display a number representing their total power value. [Martin] liked this feature, and set out to design a replacement token for the tabletop version that could display a number while still keeping the aesthetic of the originals. The tokens were designed as a dial with a small cutout window to show a number, but the surface of the token showing color and icon is still mostly unchanged.

Magnets hold the top and bottom together, and because of the small size of the assembly, no detents are needed. Friction is enough to keep things from moving unintentionally. The second noteworthy design feature is the material for the top layer of the token. This layer is made from 0.8 mm birch plywood; a nice and thin top layer means a wider viewing angle because the number is nearer to the surface. If the top layer were thicker, the number would be recessed and harder to see.

[Martin] made the design file available should anyone wish to try it out. No stranger to games, he even once game-ified the laser itself, turning it into a physical version of Space Invaders. Be sure to check it out!