Optical Tweezers Investigate Tiny Particles

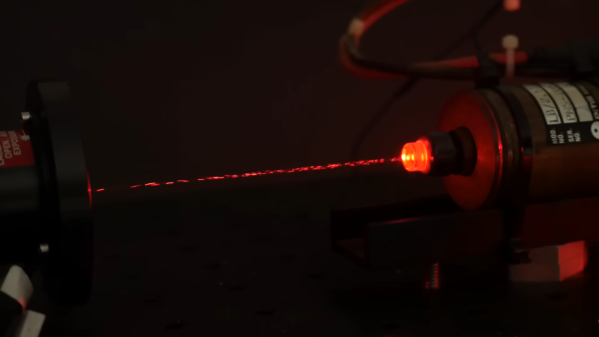
No matter how small you make a pair of tweezers, there will always be things that tweezers aren’t great at handling. Among those are various fluids, and especially aerosolized droplets, which can’t be easily picked apart and examined by a blunt tool like tweezers. For that you’ll want to reach for a specialized tool like this laser-based tool which can illuminate and manipulate tiny droplets and other particles.

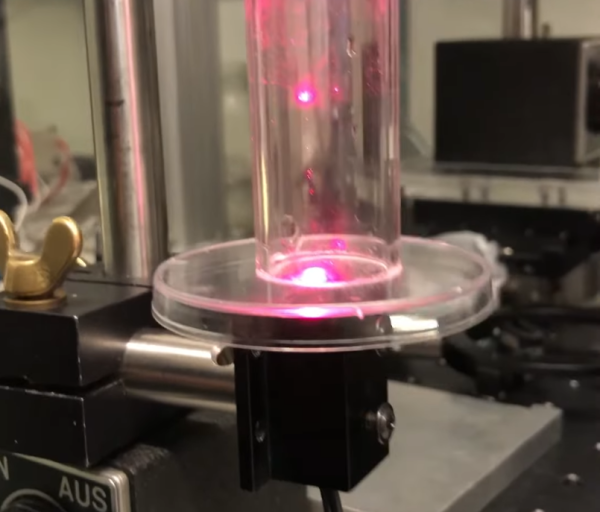
[Janis]’s optical tweezers use both a 170 milliwatt laser from a DVD burner and a second, more powerful half-watt blue laser. Using these lasers a mist of fine particles, in this case glycerol, can be investigated for particle size among other physical characteristics. First, he looks for a location in a test tube where movement of the particles from convective heating the chimney effect is minimized. Once a favorable location is found, a specific particle can be trapped by the laser and will exhibit diffraction rings, or a scattering of the laser light in a specific way which can provide more information about the trapped particle.

Admittedly this is a niche tool that might not get a lot of attention outside of certain interests but for those working with proteins, individual molecules, measuring and studying cells, or, like this project, investigating colloidal particles it can be indispensable. It’s also interesting how one can be built largely from used optical drives, like this laser engraver that uses more than just the laser, or even this scanning laser microscope.

Continue reading “Optical Tweezers Investigate Tiny Particles”

Wooden Desk Lamp Uses Unusual Dimmer

One of the problems with laser cutting projects is that while they look good, they often look like they were laser cut. [Timber Rough] has a wooden desk lamp that not only looks good but has one of the most unusual dimming features we’ve seen.

One thing that stands out is the lamp is made of different kinds of wood, and that helps. But the dimmer is a magnet and Hall effect sensor that levitates. It is hard to explain, but a quick look at the video below will clarify it.

Continue reading “Wooden Desk Lamp Uses Unusual Dimmer”

This Unique Flip-Flop Uses Chemistry And Lasers

One of the first logic circuits most of us learn about is the humble flip-flop. They’re easy enough to build with just a couple of NOR or NAND gates, and even building one up from discrete components isn’t too much of a chore. But building a flip-flop from chemicals and lasers is another thing entirely.

That’s the path [Markus Bindhammer] took for his photochromic molecular switch. We suspect this is less of an attempt at a practical optical logic component and more of a demonstration project, but either way, it’s pretty cool. Photochromism is the property by which molecules reversibly rearrange themselves and change color upon exposure to light, the most common example being glass that darkens automatically in the sun. This principle can be used to create an optical flip-flop, which [Markus] refers to as an “RS” type but we’re pretty sure he means “SR.”

The electronics for this are pretty simple, with two laser modules and their drivers, a power supply, and an Arduino to run everything. The optics are straightforward as well — a beam splitter that directs the beams from each laser onto the target, which is a glass cuvette filled with a clear epoxy resin mixed with a photochromic chemical. [Markus] chose spiropyran as the pigment, which when bathed in UV light undergoes an intramolecular carbon-oxygen bond breakage that turns it into the dark blue pigment merocyanine. Hitting the spot with a red laser or heating the cuvette causes the C-O bond to reform, fading the blue spot.

The video below shows the intensely blue dot spot developing under UV light and rapidly fading thanks to just the ambient temperature. To make the effect last longer, [Markus] cools the target with a spritz from a CO2 cartridge. We imagine other photochromic chemicals could also be employed here, as could some kind of photometric sensor to read the current state of the flip-flop. Even as it is, though, this is an interesting way to put chemistry and optics to work.

Continue reading “This Unique Flip-Flop Uses Chemistry And Lasers”

Homemade Raman Laser Is Shaken, Not Stirred

You wouldn’t think that shaking something in just the right way would be the recipe for creating laser light, but as [Les Wright] explains in his new video, that’s pretty much how his DIY Raman laser works.

Of course, “shaking” is probably a gross oversimplification of Raman scattering, which lies at the heart of this laser. [Les] spends the first half of the video explaining Raman scattering and stimulated Raman scattering. It’s an excellent treatment of the subject matter, but at the end of the day, when certain crystals and liquids are pumped with a high-intensity laser they’ll emit coherent, monochromatic light at a lower frequency than the pumping laser. By carefully selecting the gain medium and the pumping laser wavelength, Raman lasers can emit almost any wavelength.

Most gain media for Raman lasers are somewhat exotic, but luckily some easily available materials will work just fine too. [Les] chose the common solvent dimethylsulfoxide (DMSO) for his laser, which was made from a length of aluminum hex stock. Bored out, capped with quartz windows, and fitted with a port to fill it with DMSO, the laser — or more correctly, a resonator — is placed in the path of [Les]’ high-power tattoo removal laser. Laser light at 532 nm from the pumping laser passes through a focusing lens into the DMSO where the stimulated Raman scattering takes place, and 628 nm light comes out. [Les] measured the wavelengths with his Raspberry Pi spectrometer, and found that the emitted wavelength was exactly as predicted by the Raman spectrum of DMSO.

It’s always a treat to see one of [Les]’ videos pop up in our feed; he’s got the coolest toys, and he not only knows what to do with them, but how to explain what’s going on with the physics. It’s a rare treat to watch a video and come away feeling smarter than when you started.

Continue reading “Homemade Raman Laser Is Shaken, Not Stirred”

This Laser-Cut One-Piece Wedge Tenon Locks Wood Joints Tight

Woodworkers have always been very clever about making strong and attractive joints — think of the strength of a mortise and tenon, or the artistry of a well-made dovetail. These joints have been around for ages and can be executed with nothing more than chisels and a hand saw, plus a lot of practice, of course. But new tools bring new challenges and new opportunities in joinery, like this interesting “hammer joint” that can be made with a laser cutter.

This interesting joint comes to us from [Jiskar Schmitz], who designed it for quick, solid, joints without the need for glue or fasteners. It’s a variation on a wedged mortise and tenon joint, which strengthens the standard version of the joint by using a wedge to expand the tenon outward to make firm contact with the walls of the tenon.

The hammer joint takes advantage of the thin kerf of a laser cutter and its ability to make blind cuts to produce a tenon with a built-in wedge. The wedge is attached to a slot in the tenon by a couple of thin connectors and stands proud of the top of the tenon. The tenon is inserted into a through-hole mortise, and a firm hammer blow on the wedge breaks it free and drives it into the slot. This expands the tenon and locks it tightly into the mortise, creating a fairly bulletproof joint. The video below tells the tale.

While the hammer joint seems mainly aimed at birch plywood, [Jiskar] mentions testing it in other materials, such as bamboo, MDF, and even acrylic, although wood seems to be the best application. [Jiskar] also mentions a potential improvement: the addition of a ratchet and pawl shape between the wedge and the slot in the tenon, which might serve to lock the wedge down and prevent it from backing out.

Continue reading “This Laser-Cut One-Piece Wedge Tenon Locks Wood Joints Tight”

What The Artisan 3-in-1 CNC Offers (If One Has The Table Space)

I never feel like I have enough space in my workshop. The promise of consolidating tools to make the most of limited space drew me to the Snapmaker Artisan, a plus-sized 3-in-1 tool combining 3D printer, laser engraver, and CNC machine.

Smaller than three separate tools, but still big.

Jacks of all trades may be masters of none, but it is also true that a tool does not need to be a master of its functions to be useful. For many jobs, it enough to simply be serviceable. Does a machine like the Artisan offer something useful to a workshop?

Snapmaker was kind enough to send me an Artisan that I have by now spent a fair bit of time with. While I have come to expect the occasional glitch, having access to multiple functions is great for prototyping and desktop manufacturing.

This is especially true when it allows doing a job in-house where one previously had to outsource, or simply go without. This combo machine does have something to offer, as long as one can give it generous table space in return.

What It Is

The Artisan is a large dual-extrusion 3D printer, CNC router, and diode-based laser engraver. To change functions, one physically swaps toolheads and beds. Very thankfully, there are quick-change fixtures for this.

Driving the Artisan is Snapmaker’s software Luban (GitHub respository). Named for the ancient Chinese master craftsman, it is responsible for job setup and control. For laser and CNC work, there are convenient built-in profiles for a variety of paper, plastic, leather, and wood products.

The unit is enclosed, nicely designed, and — while I have come to expect the occasional glitch — serviceable at all three of its functions. The size and stature of the machine warrants some special mention, however.

Continue reading “What The Artisan 3-in-1 CNC Offers (If One Has The Table Space)”

Particle Accelerator… On A Chip

When you think of a particle accelerator, you usually think of some giant cyclotron with heavy-duty equipment in a massive mad-science lab. But scientists now believe they can create particle accelerators that can fit on a chip smaller than a penny. The device uses lasers and dielectrics instead of electric fields and metal. The conventional accelerators are limited by the peak fields the metallic surfaces can withstand. Dielectric materials can withstand much higher fields but, of course, don’t conduct electricity.

Physicists fabricated a 225 nanometers wide channel in various sizes up to 0.5 millimeters long. An electron beam moves through the channel. Very short infrared laser pulses on top of the channels accelerate the electrons down it using tiny silicon pillars.

The electron beam entered the channel at 28,400 electron volts. They exited at 40,700 electron volts, a substantial increase. The tiny pillars are only two microns high, so fabrication is tricky. Possible applications include cancer treatment, electron microscopy, and the creation of compact high-energy lasers.

The nanofabrication required for these devices won’t be in our garage any time soon. However, we hope this might lead to a new class of devices that we can use to build exciting new things. After all, remember how it used to be hard to build things using a laser?

We’ve seen laser-based accelerators before. If you want a history of particle accelerators, we can help you there, too.