A Colorful Way To Play Chess On An ATmega328

We’ve all seen those chess computers that consist out of a physical playing field, and a built-in computer that would indicate where you should put its pieces while inputting the position of your pieces in some way. These systems are usually found in a dusty cardboard box in a back room’s closet, as playing like this is fairly cumbersome, and a lot depends on the built-in chess computer.

This take by [andrei.erdei] on this decades-old concept involves an ATmega328p-based Arduino Pro Mini board, a nice wooden frame, and 4 WS2812-based 65×65 mm RGB 8×8 LED matrices, as well as some TTP223 touch sensors that allow one to control the on-board cursor. This is the sole form of input: using the UP and RIGHT buttons to select the piece to move, confirm with OK, then move to the new position. The chess program will then calculate its next position and indicate it on the LED matrix.

Using physical chess pieces isn’t required either: each 4×4 grid uses a special pattern that indicates the piece that occupies it.  This makes it highly portable, but perhaps not as fun as using physical pieces. It also kills the sheer joy of building up that collection of enemy pieces when you’ve hit that winning streak. You can look at the embedded gameplay video after the break and judge for yourself.

Continue reading “A Colorful Way To Play Chess On An ATmega328”

This Rubik’s Cube Lamp Has Some Serious Retro Style

The reassembly is handled with super glue and acrylic to diffuse the light.

There’s an easy way to signal to your friends and family that you’re a successful, urbane member of society – by decorating your home with tasteful references to popular culture. A classy oil painting of Yoda or a framed Tarantino movie poster is a great way to go. Alternatively, consider building yourself a swanky Rubik’s Cube lamp.

The build starts by disassembling the cube, as if you were going to cheat and reassemble it in the correct order. Instead, the cube is then gutted to make room for electronics. Inside, a ping pong ball covered in LEDs is installed, along with lithium batteries and a power board cribbed from a USB power bank. The whole assembly is laced back together with glue and frosted acrylic which acts as an retro-styled grid-like diffuser. The power button is even sneakily hidden in one of the squares!

It’s a sweet retro build that would make an excellent addition to any hip lounge room. We’re a big fan of self-contained glowing cubes here at Hackaday – we’ve covered nuclear powered and infinity designs before. Video after the break.

Continue reading “This Rubik’s Cube Lamp Has Some Serious Retro Style”

LED Triangle Looks Cool; Someone Tell Alt-J

For the average person, decorating at home is as simple as a few choice picks from the IKEA catalogue. Makers are a different breed, though – preferring something customized and glowing. This LED triangle is a particularly great example of the form, and the latest benchmark for excellence to come out of [scanlime’s] workshop.

Hailing from the recent past of 2014, it’s a design that is well-suited to the average makerspace. Built out of layers of lasercut chipboard and acrylic, it creates 16 seperate pockets for LEDs with very little bleed in between. A black bezel is fitted to complete the effect, along with frosted white acrylic diffusers for each triangle element.

The build uses WS2812B LEDs, controlled by [scanlime’s] Fadecandy controller. Fadecandy is a combination of hardware and software designed specifically for LED art projects, providing high-quality control of dithering and other effects to help make glowables prettier. It tends to turn up wherever head-turning visualizations are needed. In this application, it does a great job, with the pseudo-random flickering of the pixels being almost hypnotizing in nature.

It’s a great cyberpunk art piece, and we’d love to have one on our coffee table at home. If you’re sick of LED cubes, triangle-based builds may reignite your passion. Video after the break.

Continue reading “LED Triangle Looks Cool; Someone Tell Alt-J”

DIY ZigBee Therapy Lights Are Hue Compatible

Working on a project into the wee hours is hardly uncommon for us hackers, but if you’re consistently sleeping until the afternoon, it’s possible you’re suffering from a condition known as Delayed Phase Sleep Disorder (DPSD). Put simply, your body’s internal clock is out of alignment with the world around you. One of the ways to treat this condition is to expose yourself to bright light in the morning, which can help you wake up and feel more refreshed. Unfortunately, these so-called “Bright Light Therapy” boxes tend to be pretty expensive.

Looking for a way to treat his own DPSD, [Edward Shin] decided to build his own light box based on the research he’d done on the various commercial offerings out there. After all, a box full of bright lights that operates on a timer doesn’t seem particularly complex. Of course, in reality there’s a bit more to it than that, but so far the results are certainly promising.

The first decision [Edward] had to make was what kind of light he wanted. Classic light therapy devices, often used to treat Seasonal Affective Disorder (SAD), tend to be full spectrum lights that try and simulate sunlight. But in his research, he found a paper from Nature that explained the melanopsin in the human eye responds primarily to blue and green light. But as intense blue light can apparently lead to macular degeneration, he decided to go with green.

Since [Edward] already uses the Philips Hue system for his home’s lighting, he wanted to bring his therapy light into that ecosystem. The idea was that he could easily schedule his new green light box to go on when he wanted to wake up in the morning. So he used the Mesh Bee from Seeed Studio which not only supports ZigBee, but for which software is available to emulate a Hue bulb. Then he just needed to pair that with a sufficiently beefy LED driver and some 510 nm emitters. Everything is enclosed in a box made of laser cut wood that’s designed to hang from the headboard and shine down onto his face.

Over the years we’ve seen a number of similar projects trying to address SAD, so the idea of a hacker tweaking the concept to tackle DPSD seems a natural enough evolution of the idea. Just remember to speak with a medical professional before coming up with a homebrew treatment plan.

Great Artificial Daylight Via Broken TVs

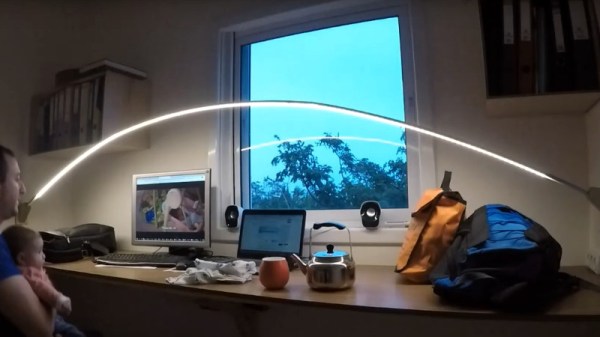
[DIY Perks] has long been a fan of lights that accurately mimic real daylight. Often choosing high-quality LEDs for his projects, lately he’s taken a different tack – using broken televisions to produce attractive home lighting solutions.

The hack involves removing the backlight from the damaged television or monitor. These have a powerful white light inside, but the real key is that they also features a Fresnel lens. This helps the backlight appear very similar to a real skylight, due to the way it scatters light around the room.

Due to the difficulty of driving most LED and CCFL backlights, the project strips the original lighting out and replaces it with a set of high-CRI LED strips readily available off eBay. These are easily driven from 12 volts and give a white light more similar to actual daylight compared to most backlights. With the LEDs in place, the monitor’s original diffusers and Fresnel lens are put back in place, and the light is finished off with an aluminium frame.

Fitted to an angled ceiling, the light really does look as if actual sunlight is streaming through a window on a rainy day. It’s a pleasant effect that does a great job of lighting a room, and we suspect it would be excellent for general video work, too. [DIY Perks] is no stranger to a good studio light build, after all. Video after the break.

Continue reading “Great Artificial Daylight Via Broken TVs”

A Custom Milled Jig For Smart Bulb Programming

Who would have thought that some day we’d need programming jigs for our light bulbs? But progress marches on, and as there’s currently a number of affordable Internet-controlled bulbs powered by the ESP8266 on the market, we’re at the point where a tool to help update the firmware on the light over your kitchen sink might be something nice to have. Which is why [cperiod] created this programming jig for AiLight smart bulbs.

Flashing the AiLight bulbs is easy enough, there’s a series of test points right on the face of the PCB that you can hook up to. But if you’re updating more than one of them, you don’t want to have to solder your programmer up to each bulb individually. That’s where the jig comes in. [cperiod] says there are already some 3D printed designs out there, but they proved to be a bit finicky.

The design that [cperiod] came up with and eventually milled out on a 1610 CNC router is quite simple. It’s effectively just a holder to keep the five pogo pins where they need to be, and a jumper that lets you toggle the chip’s programming mode (useful for debugging).

The neat trick here are the “alignment pins”, which are actually two pieces of 14 gauge copper wire that have had their ends rounded off. It turns out these will slip perfectly into holes on the AliLight PCB, ensuring that the pogo pins end up on target. It works well enough that you can hold the bulb and jig in one hand while programming, it just needs a little downwards pressure to make good contact.

We’ve previously seen how easily you can replace the firmware on some of these ESP8266 bulbs. While there’s certainly a downside to these bulbs being so simple to modify, it’s hard to deny their hackability makes them very appealing for anyone looking to roll their own network-controlled lighting system.

Individual Neopixels Make Up This Lightsaber’s Blade

The lightsaber is an iconic weapon from the Star Wars franchise, designed in all sorts of shapes and colors. Several fan-made versions have been built as well, quite a few of which use the almost ubiquitous neopixel. [Tirenoth] decided to build his first lightsaber using a series of neopixels, but decided on a unique build method.

Instead of the usual strip of neopixels, [Tirenoth] chose to use a bunch of neopixels in the 5mm LED form-factor. [Tirenoth] soldered each LED’s 5v pins and GND pins to the same pins on the next, rotating each LED 180 degrees, building a tower of pixels. The data in and out pins are soldered to the next (and previous) LED as well. This allows the series of LEDs to be a bit more stable physically, and allows them to be stacked close together, one on top of the other.

To control the neopixels, a Proffieboard is used, an open-source lightsaber controller. The Proffieboard uses an STM32 microcontroller and allows you to hook up LEDs or neopixels as well as a speaker. Its open-source software allows the animation of the pixels and the playing of sounds. It’s designed specifically for lightsaber builds and is programmed via the Arduino IDE.

[Tirenoth] has some nice pictures of the build in process and, of course some nice pics of the final result. He suggests that the blade would be the first to break in battle, though. There’s been a few lightsaber builds over the years, like this lightsaber with rave mode, or this lightsaber made with real lasers.

via Reddit.