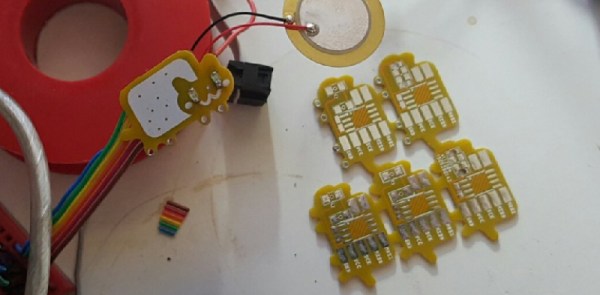
Over on Hackaday.io, there’s an unofficial contest to cram as much electronics and awesome as possible into a single square inch of PCB. While the measurement system is logical, the Internet is not: it feeds on cats and is entertained by rainbows. [Radomir]’s project feeds into this bizarre fixation with the Nyan Board, a Pop Tart cat that poops rainbows, all the while playing bleeps and boops that would fit well in a Nintendo game.
[Radomir] built this square inch of twee for the square inch project, an unofficial contest to fit the coolest project on a 1×1 inch square PCB. Prizes are credits for the Hackaday Store and OSHPark. This entry uses an ATtiny85 microcontroller, a few resistors, LEDs, and a buzzer to play the strange, syncopated Nyan theme song. Power is delivered over a colorful ribbon cable that emulates the rainbow tail of the Pop Tart cat.
This isn’t the only project in the Square Inch Project, or even the most blinky; there’s also a RRROYYYYgYgGGBgBPW LED, a square inch quadcopter, and a device that detects the world’s smallest bat. All very interesting projects, and we can’t wait to see all the entries finished.


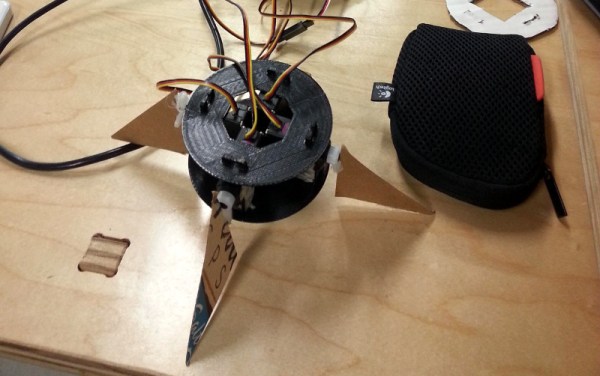
 [Arsenio]’s design targets amateur rockets with a fuselage diameter of four inches or so. The main control module is just a cylinder with four servos mounted along the perimeter and some fancy 3D printed fins bolted onto the servo. These are controlled by an Arduino and a 6DOF IMU that’s able to keep the rocket pointing straight up.


