Mario Doorbell Guaranteed To Drive A-You A-Crazy

marioDoorbell

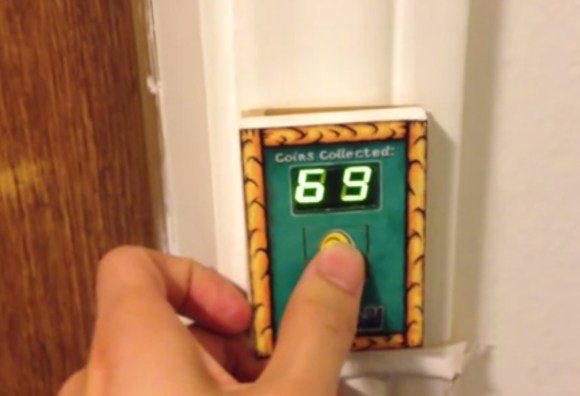
Is your doorbell not exciting enough for your guests? [Joe] wanted to provide a little entertainment for his visitors, so he redesigned his doorbell with a Mario theme.

Whenever someone presses the button—which carries the Mario coin image—the segment display increments and the Mario coin sound plays. To add variety, the life-up sound plays at every 10 coins and the mushroom upgrade sound plays upon reaching 100. [Joe] tried putting the life-up sound at its appropriate 100’s place and the mushroom sound at every 10, but he decided the brevity of life-up was more tolerable in the 10’s slot.

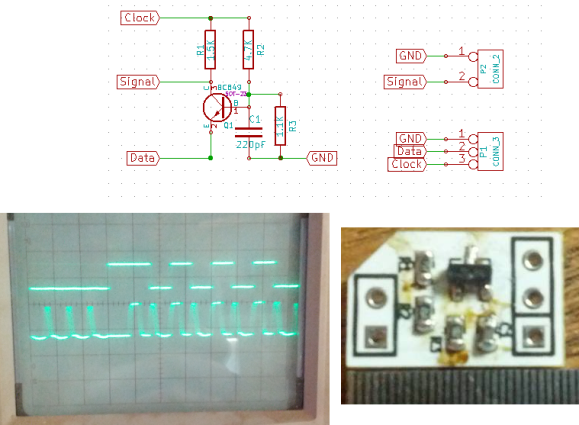
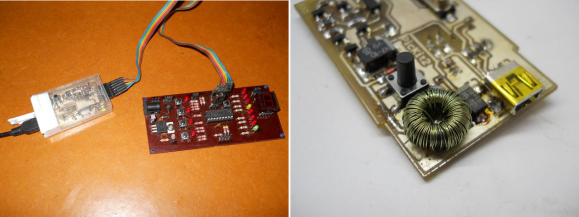
The project was divided into two components. The door button has a PIC16F628A microcontroller with a dual 7-segment LED display, a button, and a homemade circuit board. All this lives in a simple box covered by a Yoshi’s Island-themed decal. The button’s board connects to a separate ringer board—based around a PIC16F87—with a MCP4822 DAC and a 25LC1024 EEPROM. Button presses on the first board prompt a request for a sound clip read on the EEPROM. Keep clicking for a demo video below.

Continue reading “Mario Doorbell Guaranteed To Drive A-You A-Crazy”

Tic Tac PIC Pack: A Pocket Programmer

Sure, mint tin housings are great. But you have to defend against shorts, and cutting out holes for ports and buttons is dangerous business. [Daniel] prefers plastic, and he tipped us off about a PICKit2 clone that he designed to fit inside of a tic tac box.

Almost all of the components were salvaged except for the microcontroller and the connectors. He wound his own inductor using the ferrite core from a CFL. [Daniel] had to make a few improvisations for this project. He didn’t have a 20MHz crystal, so he used a 12MHz crystal and tweaked the fuse bits after burning the firmware.

To save space on the board, he soldered wires to RESET, VCC, GND, PGD, and PGC to program the firmware and then removed the wires. The only trouble he had with it was more or less easily solved by replacing two transistors.

You may remember that we linked to his USBasp programmer in a mentos container a few months back. We figure [Daniel] must have some pretty fresh breath.

WS2811 SPI Driver Using One Transistor And Passives

ws2811-spi-driver

We love the WS28xx projects because even if we never plan to use them, the signal timing is like the most addictive puzzle game ever. For instance, check out this WS2811A driver which uses hardware SPI to generate the signals.

The WS28xx offerings place a microcontroller inside an RGB LED, allowing them to be individually addressed in very long chains or large matrices (still a chain but different layout). But the timing scheme used to address them doesn’t play well with traditionally available microcontroller peripherals. [Brett] had been intrigued by some of the attempts to bend hardware SPI to the will of the WS2811 — notably [Cunning_Fellow’s] work featured in this post. He took it a great step forward by simplifying the driver to just one transistor, three resistors, and a capacitor.

Click through the link above for his step-by-step description of how the circuit works (it’s not worth re-explaining here as he does a very concise job himself). The oscilloscope above shows the SPI signal on top and the resulting timing signal below. You will notice the edges aren’t very clean, which requires the first pixel to be very close to the driver or risk further degradation. But, since the WS28xx drivers feature a repeater which cleans up signals like this, it’s smooth sailing after the first pixel.


A Better USI I2C Library For The MSP430

USI

TI’s MSP430 chips are rather interesting – they’re low power, very capable, and available for under a dollar in most cases. Some of these chips, though, don’t have native SPI or I2C interfaces; instead, everything is done through a USI, or Universal Serial Interface module. [Jan] found the stock I2C USI module was a little rough around the edges, so he created his own.

[Jan] found the TI example code for using the USI as an I2C device overly complicated and something that an intern whipped up in a week and was never touched again. In response to this, he created a much, much simpler USI/I2C module that’s actually readable. It’s available over on the GitHub if you want to grab it for yourself.

Compared to the TI code, [Jan]’s library is dead simple. There are only two functions, one for initialization, and another for sending and receiving. Easy, small, and it works. Can’t do much better than that.

ATMega & ATtiny Core Temperature Sensors

temp

We don’t know if this will come as a surprise to the regular Hackaday reader, but a whole bunch of Atmel microcontrollers have a very cool feature hidden away in their datasheets. Most of them – everything from the ATMega 168, 328, 32u4, to the ATtiny85 and  84 have a temperature sensor right on the chip. [Connor] did a little bit of research on this sensor and came up with a little bit of code that spits out the core temperature of these Atmel chips over the serial port.

The temperature sensor on these Atmel chips is accessed by writing a code – ‘100111’ for the Mega32u4 and ‘100010’ for the tiny84, for example – into the ADMUX register on the chip. According to the datasheet, the returned temperature is accurate to +- 10°C, but that can be easily calibrated by holding an ice cube (in a plastic bag, of course) up to the chip.

With a little more code, [Connor] is able to output the temperature of the microcontroller core over a serial port. In testing, his chip started out at 20°C and reached equilibrium at 24°C after about a minute. Pretty neat, and could be used as a temperature sensor for a project in a pinch.

Automatically Sorting Beads By Color

beadsorter

[Tomas] wanted to try building something mechanical with electronic control, and ended up with this sorter that organizes beads into one of two containers based on color. He built most of the structure from popular interlocking plastic bricks, then added a stepper motor salvaged from an old scanner and two plastic discs.

The two discs sit on top of each other. The bottom one is stationary and has two holes drilled in it, with a container sitting below each hole. The top disc has a smaller, bead-sized hole and rotates from its starting position—where it collects one bead—to a camera for analysis. After the camera determines the color of the bead, the disc rotates again to position itself over one of the two sorting holes in the disc below, and the bead falls into the awaiting container. The device is controlled by the MSP430 microcontroller on a FITKit (translated), which is the development platform of choice for [Tomas’s] school.

[Tomas] originally attempted to determine the color of beads by using 3 different color LEDs and a light-dependent resistor, but switched to using a webcam and a Java program to capture images and calculating average hues. You can find more details and the source code on his site, but first see the short video below.

Continue reading “Automatically Sorting Beads By Color”

3D Printed Netduino Remote Controlled Car

netduinocar

[Matt] lives in South Africa, where homes have smallish crawlspaces (some only 30cm high!) that he can’t quite squeeze himself into. Even if he could, he probably wouldn’t: they’re apparently vacation homes for the local rats. He did, however, want to explore these spaces to get a better idea what’s going on inside, so he built a Windows Phone-controlled car with a Netduino and 3D-printed parts.

Such a specialized application requires unique parts, so [Matt] designed and 3D-printed the wheels and frame from scratch. You’ve probably noticed that the wheels aren’t your typical cylinders. The terrain [Matt] faces is sand, so the spiked shape provides better grip. The body’s design required extra attention because it holds the motors, the Netduino, the motor driver, and the battery.

A Bluetooth module connects to the Netduino and allows [Matt] to drive the car with his Windows Phone, and an inexpensive 5V LED board provides some light for those dark corners. How does it see once inside the crawlspace? It looks like [Matt’s] getting to that part. His plan is to simply mount a second phone running Skype and watch the stream. Stick around after the break to see [Matt] use the car to both confuse and excite his dog.

Continue reading “3D Printed Netduino Remote Controlled Car”