Since the ESP8266 came on the scene a few years ago and revolutionized the way microcontrollers communicate with other devices, incremental progress on this chip has occurred at a relatively even pace. First there was the realization that code could be run on the chip itself. Next the ESP32 was released which built more on that foundation. The next step in that process of improvement may be here now as well, with this project which turns the ESP32 into a USB host.
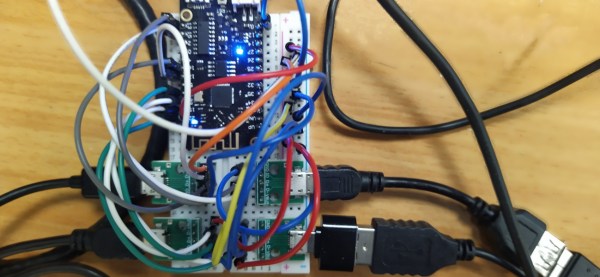
USB is not a native feature on all microcontrollers or even Arduino-compatible boards. While some do have it built in like those based on the 32u4 for example, most either don’t have it at all or rely on a separate on-board chip to do some form of translating. The ESP32 is lacking this advanced feature so the USB needs to be cobbled together from scratch if you want this specific board to be able to interface directly with peripherals. This project does just that, allowing for four USB 1.1 devices to be connected directly to the ESP32 without a separate dedicated chip.
If you’ve been waiting for USB on this tiny, capable microcontroller this might be your chance to try it out. All of the project’s code is available on the project page. And, while it is limited in scope, it’s easily able to handle a keyboard or mouse. This might be a more cost-effective way of doing something like a KVM switch rather than doing it with three Arduinos.