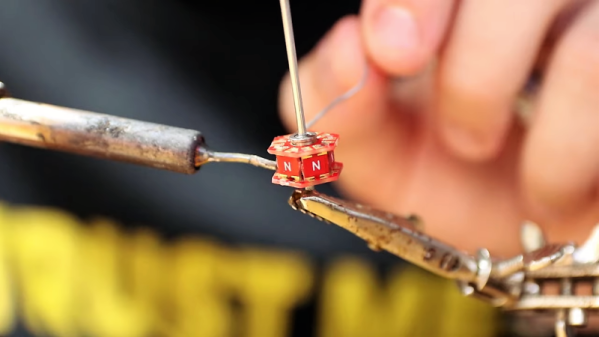
Electronics in clear epoxy pyramid

Epoxy Embedded Electronic Art Running On Pyramid Power

We sometimes get our inspirations from art. When [kodera2t] saw some Japanese art of fish drawings embedded in clear epoxy he just had to make his own. But while skilled in electronics, he wasn’t skilled at drawing. We’d still call him an artist, though, after seeing what he came up with in his electronics embedded in crystal clear epoxy.

Controlling epoxy-empedded leds through BluetoothHis first works of electronic art were a couple of transistors and some ICs, including an 80386, encased in epoxy. But then he realized that he wanted the electronics to do something interesting. However, once encased in epoxy, how do you keep the electronics powered forever?

He tried a solar cell charging a battery which then powered an LED but he didn’t like the idea of chemical batteries encased in epoxy for a long time.

He then switched to wireless power transmission with a receiving coil in the base of epoxy pyramids. For one of them, the coil powers a BLE board with an attached LED which he can control from his phone. And his latest contains an ESP32-PICO with an OLED display. The code allows him to upload new firmware over the air but on his Hackaday.io page, he shows the difference between code which can brick the ESP32 versus code which won’t. But don’t take our word for it. Check out the video below to see his artistry for yourself.

While embedding electronics in epoxy is new to [kodera2t], we’ve seen it a few times before. once in the form of an amplifier circuit done beautifully, dead bug style, and a more experimental attempt with a solar lantern.

Continue reading “Epoxy Embedded Electronic Art Running On Pyramid Power”

New Mooltipass Begins Development With Call For Collaborators

One of the most interesting aspects of our modern world is the ability to work collaboratively despite the challenges of geography and time zones. Distributed engineering is a trend which we’ve watched pick up steam over the years. One such example is the Mooltipass offline password keeper which was built by a distributed engineering team from all over the world. The project is back, and this time the goal is to add BLE to the mini version of the hardware. The call for collaborators was just posted on the project page so head over and check out how the collaboration works.

The key to the hardware is the use of a smartcard with proven encryption to store your passwords. Mooltipass is a secure interface between this card and a computer via USB. The new version will be a challenge as it introduces BLE for connectivity with smart phones. To help mitigate security risks, a second microcontroller is added to the existing design to act as a gatekeeper between the secure hardware and the BLE connection.

Mathieu Stephan is the driving force behind the Mooltipass project, which was one of the first projects on Hackaday.io and has been wildly successful in crowd funding and on Tindie. Mathieu and five other team members already have a proof of concept for the hardware. However, more collaborators are needed to help see all aspects of the project — hardware, firmware, and software — through to the end. This is a product, and in addition to building something awesome, the goal is to turn a profit.

How do you reconcile work on an Open Source project with a share of the spoils? Their plan is to log hours spent bringing the new Mooltipass to life and share the revenue using a site like colony.io. This is a tool built on the Ethereum blockchain to track contributions to open projects, assigning tokens that equate to value in the project. It’s an interesting approach and we’re excited to see how it takes shape.

You can catch up on the last few years of the Mooltipass adventure my checking out Mathieu’s talk during the 2017 Hackaday Superconference. If this article has you as excited about distributed engineer as we are, you need to check out the crew that’s building this year’s Open Hardware Summit badge!

Perf Board Pyrotechnics Courtesy Of A High-Voltage Supply

You may have asked yourself at one time or another, “Self, what happens when you pass 100 thousand volts through a printed circuit board?” It’s a good question, and [styropyro] put together this fascinating bit of destructive testing to find out.

Luckily, [styropyro] is well-positioned to explore the high-voltage realm. His YouTube stock-in-trade is lasers, ranging from a ridiculously overpowered diode-laser bazooka to a bottle-busting ruby laser. The latter requires high voltage, of course, and his Frankenstein’s lab yielded the necessary components for this destructive diversion. A chopper drives dual automotive ignition coils to step the voltage up to a respectable 100 kV. The arcs across an air gap are impressive enough, but when applied to a big piece of copper-clad protoboard, the light show is amazing. The arcs take a seemingly different path across the board for each discharge, lighting up the path with an eerie blue glow accompanied by a menacing buzz. Each discharge path may be random, but they all are composed of long stretches across the rows and columns of copper pads that never take the more direct diagonal path. [styropyro]’s explanation of the math governing this behavior is feasible, but really we just liked looking at the pretty and dangerous display. Now if only the board had been populated with components…

No, there’s not much of a hack here, but it’s cool nonetheless. And it’s probably a well-earned distraction from his more serious stuff, like his recent thorough debunking of the “Chinese laser rifle” that was all over the news a while back.

Continue reading “Perf Board Pyrotechnics Courtesy Of A High-Voltage Supply”

Two Bit Circus Took The Tech We Love And Built An Amusement Park

Carnival games are simple to pick up, designed to provide a little bit of entertainment in exchange for your game ticket. Given that the main point is just to have some silly fun with your friends, most game vendors have little reason to innovate. But we are people who play with microcontrollers and gratuitous LEDs. We look at these games and imagine bringing them into the 21st century. Well, there’s good news: the people of Two Bit Circus have been working along these lines, and they’re getting ready to invite the whole world to come and play with them.

“Interactive Entertainment” is how Two Bit Circus describe what they do, by employing the kinds of technology that frequent pages of Hackaday. But while we love hacks for their own sake here, Two Bit Circus applies them to amuse and engage everyone regardless of their technical knowledge. For the past few years they’ve been building on behalf of others for events like trade shows and private parties. Then they worked to put together their own event, a STEAM Carnival to spread love of technology, art, and fun. The problem? They are only temporary and for a limited audience, hence the desire for a permanent facility open to the public. Your Hackaday scribe had the opportunity to take a peek as they were putting on the finishing touches.

Continue reading “Two Bit Circus Took The Tech We Love And Built An Amusement Park”

Low-Quality Capacitors Turned Into High-Quality Temperature Sensors

When life hands you a bunch of crummy capacitors, what do you do? Make a whole bunch of temperature sensors, apparently.

The less-than-stellar caps in question came to [pyromaniac303] by way of one of those all-in-one assortment kits we so love to buy. Stocked with capacitors of many values, kits like these are great to have around, especially when they’ve got high-quality components in them. But not all ceramic caps are created equal, and [pyromaniac303] was determined not to let the lesser-quality units go to waste. A quick look at the data sheets revealed that the caps with the Y5V dielectric had a suitably egregious temperature coefficient to serve as a useful sensor. A fleck of perf-board holds a cap and a series resistor; the capacitor is charged by an Arduino output pin through the resistor, and the time it takes for the input pin connected to the other side of the cap to go high is measured. Charge time is proportional to temperature, and a few calibration runs showed that the response is pretty linear. Unfortunately the temperature coefficient peaks at 10°C and drops sharply below that point, making the sensor useful only on one side of the peak. Still, it’s an interesting way to put otherwise unloved parts to use, and a handy tip to keep in mind.

Temperature sensing isn’t the only trick capacitors can do. We’ve seen them turned into touch sensors before, and used to turn a 3D-printer into a 3D-scanner.

Custom Split-Flap Display Is A Unique Way To Show The Weather

There’s little doubt about the charms of a split-flap display. Watching a display build up a clear, legible message by flipping cards can be mesmerizing, whether on a retro clock radio from the 70s or as part of a big arrival and departure display at an airport or train station. But a weather station with a split-flap display? That’s something you don’t see often.

We usually see projects using split-flap units harvested from some kind of commercial display, but [gabbapeople] decided to go custom and build these displays from the ground up. The frame and mechanicals for each display are made from laser-cut acrylic, as are the flip-card halves. Each cell can display a full alphanumeric character set on 36 cards, with each display driven by its own stepper. An Arduino fetches current conditions from a weather API and translates the description of the weather into a four-character code. The codes shown in the video below seem a little cryptic, but the abbreviation list posted with the project makes things a bit clearer. Bonus points if you can figure out what “HMOO” is without looking at the list.

We like the look and feel of this, but we wonder if split-flap icons might be a neat way to display weather too. It seems like it would be easy enough to do with [gabbapeople]’s detailed instructions. Or you could always look at one of the many other custom split-flap displays we’ve featured for more inspiration.

Continue reading “Custom Split-Flap Display Is A Unique Way To Show The Weather”

Bench Power Supply Packs A Lot Into A DIN-Rail Package

We’re not sure why we’ve got a thing for DIN-rail mounted projects, but we do. Perhaps it’s because we’ve seen so many cool industrial control cabinets, or maybe the forced neatness of DIN-mounted components resonates on some deep level. Whatever it is, if it’s DIN-rail mounted, chances are good that we’ll like it.

Take this DIN-mounted bench power supply, for instance. On the face of it, [TD-er]’s project is yet another bench supply built around those ubiquitous DPS switching power supply modules, the ones with the colorful displays. Simply throwing one of those in a DIN-mount enclosure isn’t much to write home about, but there’s more to this project than that. [TD-er] needed some fixed voltages in addition to the adjustable output, so a multi-voltage DC-DC converter board was included inside the case as well. The supply has 3.3, 5, and 12 volt fixed outputs along with the adjustable supply, and thanks to an enclosed Bluetooth module, the whole thing can be controlled from his phone. Plus it fits nicely in a compact work area, which is a nice feature.

We haven’t seen a lot of DIN-rail love around these pages — just this recent rotary phase converter with very tidy DIN-mounted controls. That’s a shame, we’d love to see more.