Consider the humble ball bearing. Ubiquitous, useful, and presently annoying teachers the world over in the form of fidget spinners. One thing ball bearings aren’t is easily 3D printed. It’s hard to print a good sphere, but that doesn’t mean you can’t print your own slew bearings for fun and profit.
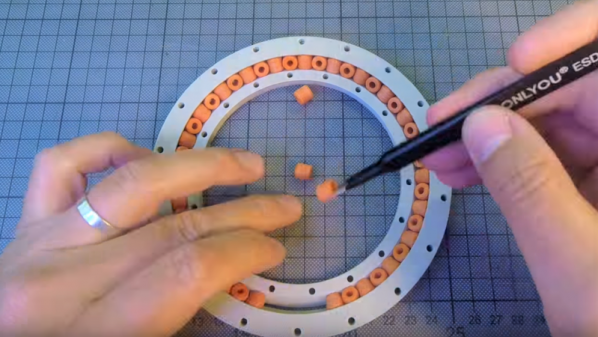
As [Christoph Laimer] explains, slew bearings consist of a series of cylindrical rollers alternately arranged at 90° angles around an inner and outer race, and are therefore more approachable to 3D printing. Slew bearings often find application in large, slowly rotating applications like crane platforms or the bearings between a wind turbine nacelle and tower. In the video below, [Christoph] walks us through his parametric design in Fusion 360; for those of us not well-versed in the app, it looks a little like magic. Thankfully he has provided both the CAD files and a selection of STLs for different size bearings.
[Christoph] is no stranger to complex 3D-printable designs, like his recent brushless DC motor or an older clock build. The clock is cool, but the bearings and motors really get us — we’ll need such designs to get to self-replicating machines.