Annoy Your Neighbors With MIDI Musical Siren

[Yannick], aka [Gigawipf] brings us this (mostly) musical delicacy: a 3D-printed siren that’s driven by a brushless quadcopter motor, and capable of playing (mostly) any music that you’ve got the MIDI score for. This is a fantastic quickie project for any of you out there with a busted quad, or even some spare parts, and a 3D printer. Despite the apparent level of difficulty, this would actually be a great quickie weekend build.

Continue reading “Annoy Your Neighbors With MIDI Musical Siren”

Robo-Flute Whistles MIDI

We aren’t sure this technically qualifies as music synthesis, but what else do you call a computer playing music? In this case, the computer is a Teensy, and the music comes from a common classroom instrument: a plastic recorder. The mistaken “flute” label comes from the original project. The contraption uses solenoids to operate 3D printed “fingers” and an air pump — this is much easier with a recorder since (unlike a flute) it just needs reasonable air pressure to generate sound.
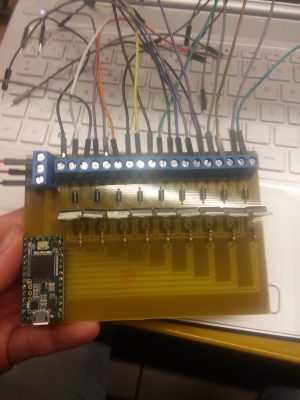
automated-recorder-solenoid-driverA Teensy 3.2 programmed using the Teensyduino IDE drives the solenoids. The board reads MIDI command sent over USB from a PC and translates them into the commands for this excellent driver board. It connects TIP31C transistors, along with flyback diodes, to the solenoids via a terminal strip.

On the PC, a program called Ableton sends the MIDI messages to the Teensy. MIDI message have three parts: one sets the message type and channel, another sets the velocity, and one sets the pitch. The code here only looks at the pitch.

This is one of those projects that would be a lot harder without a 3D printer. There are other ways to actuate the finger holes, but being able to make an exact-fitting bracket is very useful. Alas, we couldn’t find a video demo. If you know of one, please drop the link in the comments below.

We have seen bagpipe robots (in fact, we’ve seen several). We’ve also seen hammering shotguns into flutes, which is certainly more melodious than plowshares.

A Violin Bow Lightsaber

[Bithead942]’s ten-year-old niece is a huge Star Wars fan, and also a violinist. Which of course has led her to learn to play some of the music from the film franchise, and then to ask her uncle to make her violin bow light up like a lightsaber.

His solution might seem fairly straightforward at first sight, simply attach a strip of DotStar addressable LEDs to a bow and drive them from an Arduino Pro Mini to gain the required animation of a saber power-up. But of course, there’s another dimension to this project. Not only does the bow have to do its lightsaber trick, it also has to be a playable bow. The electronics must not impede the musician by being too heavy or intrusive, but the result must have enough power in reserve to keep the lights burning for the duration of a performance.

After experimentation with AAA cells and CR2032s the power requirement was satisfied by a tiny Li-po cell attached to the top of the end of the bow with industrial Velcro, and the LED strip was glued and further secured using tiny rubber bands of the type used by orthodontists.

A short demonstration of the bow’s lightsaber action is shown below the break, we’re sure it’ll impress the young violinist’s audience.

Continue reading “A Violin Bow Lightsaber”

LED Strip Display Gives You Two Ways To See The Music

What to call this LED strip music visualizer is a puzzler. It lights up and pulsates in time with music similar to the light organs of 1970s psychedelia fame, but it’s more than that. Is it more like the Larson Scanner that graced the front of [David Hasselhoff]’s ride on Knight Rider? A little, but not quite.

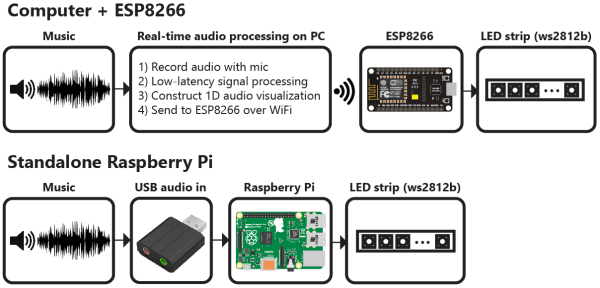
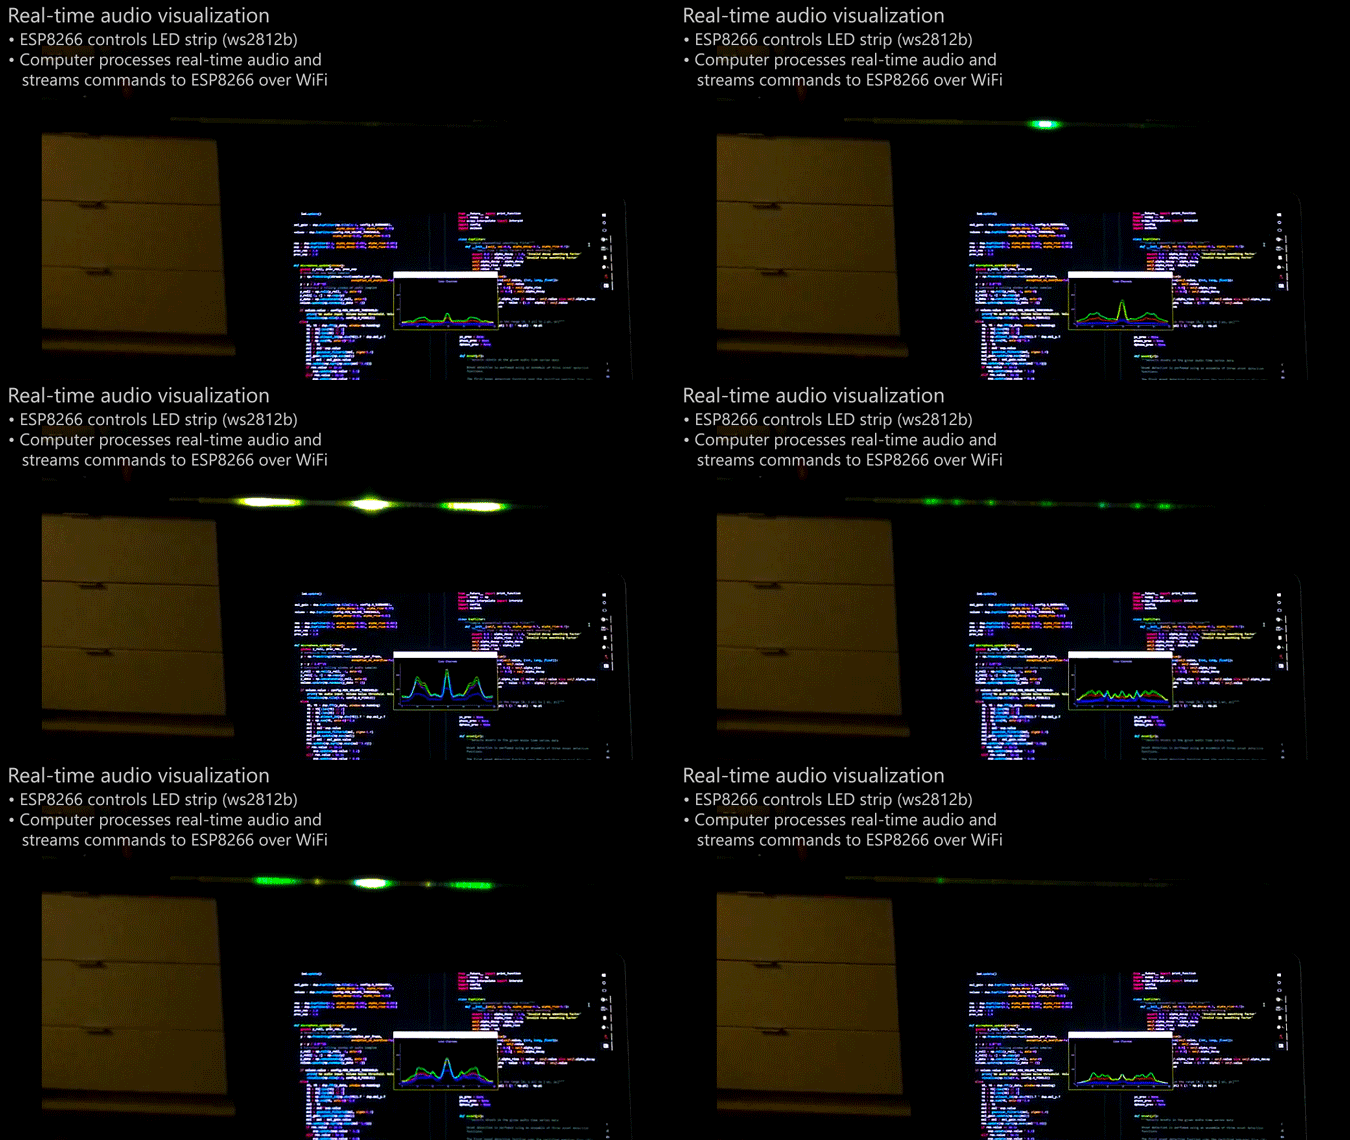
description-croppedWhatever you decide to call this thing, it looks pretty cool, and [Scott Lawson] provides not one but two ways to build it. The business end is a simple strip of WS2812b addressable LEDs. It looks like the first incarnation of the project had an ESP8266 driving the LEDs in response to commands sent to it from a PC running the visualization code, written in Python. That setup keeps the computationally intensive visualization code separate from the display, but limits the display to 256 pixels and probably has to deal with network latency. The Raspberry Pi version both crunches the numbers and drives the display, but the Pi doesn’t have the oomph to run both the LEDs and the GUI, which is pretty interesting to look at by itself. The video below shows the different visualization modes available — we’re partial to the “energy effect” at the end.

Take your pick of hardware and throw a couple of these things together for your next rave. And if you need a little more background on the aforementioned Larson Scanner, we’ve got you covered.

Continue reading “LED Strip Display Gives You Two Ways To See The Music”

3D Print Your E-Drum Pads

The concept behind DIY electronic drum kits is fairly simple — small piezoelectric elements are used to generate a voltage when the drumpads are struck. That’s easy enough, but the mechanical design can be a difficult problem to approach. To solve that, [ryo.kosaka.10] decided to design an E-drum pad made with paper & 3D printed parts.

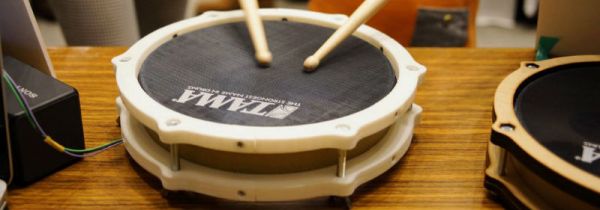
As far as E-drum triggers go, it follows the basic rules — a piezo element used as a trigger with some foam used for damping. For the striking surface, a Tama-brand mesh drum head is used. Being an off-the-shelf drum head, it has a good feel and playability. But the shell is where the creativity really shines through. While the top and bottom parts are 3D printed in the usual way, the main shell of the drum is made with several layers of thick paper laminated together with glue. This creates a surprisingly strong, sturdy shell and is also much faster and less wasteful than waiting for a similar part to 3D print.

To round out the guide, instructions are given on how to wire the piezo triggers up for either a regular E-drum sound module or an Arduino. It’s a nice touch, as those inexperienced with E-drums may not be entirely familiar with how they work – this way, anyone can give the project a try.

Keen for something bigger? Back in 2014 we saw this awesome 5-piece e-drum kit built out of buckets.

Ardu McDuino Plays The Bagpipes

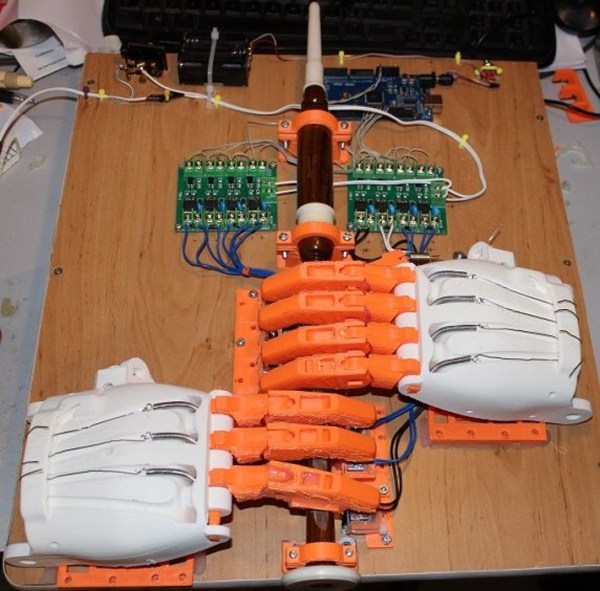
To “pipe in” the new year, [John] decided to build a bagpipe-playing robot. Unlike other instrument-playing robots that we’ve seen before, this one is somewhat anatomically correct as well. John went the extra mile and 3D printed fingers and hands to play his set of pipes.

The brains of the robot are handled by an Arduino Mega 2560, which drives a set of solenoids through a driver board. The hands themselves are printed from the open source Enabling the Future project which is an organization that 3D prints prosthetic hands for matched recipients, especially people who can’t otherwise afford prosthetics. He had to scale up his hands by 171% to get them to play the pipes correctly, but from there it was a fairly straightforward matter of providing air to the bag (via a human being) and programming the Arduino to play a few songs.

The bagpipe isn’t a particularly common instrument (at least in parts of the world that aren’t Scottish) so it’s interesting to see a robot built to play one. Of course, your music-playing robot might be able to make music with something that’s not generally considered a musical instrument at all. And if none of these suit your needs, you can always build your own purpose-built semi-robotic instrument as well.

Continue reading “Ardu McDuino Plays The Bagpipes”

MIDI DAC For Vintage Synth Hacks

A lot of classic synthesizers rely on analog control voltages to vary parameters; this is a problem for the modern musician who may want to integrate such hardware with a MIDI setup. For just this problem, [little-scale] has built a MIDI-controllable DAC for generating control voltages.

It’s a simple enough build – a Teensy 2 is used to speak USB MIDI to a laptop. This allows the DAC to be used with just about any modern MIDI capable software. The Teensy then controls a Microchip MCP4922 over SPI to generate the requisite control voltages. [little-scale]’s video covers the basic assembly of the hardware on a breadboard, and goes on to demonstrate its use with a performance using the MIDI DAC to control a Moog Mother 32 synth. [little-scale] has also made the code available, making it easy to spin up your own.

We can see this project being indispensable to electronic musicians working with banks of modular synths, making it much easier to tie them in with automation in their DAW of choice. This isn’t the first MIDI interfacing hack we’ve seen either – check out this setup to interface an iPad to guitar pedals.

Continue reading “MIDI DAC For Vintage Synth Hacks”