Cutting Records Out Of CDs

3D Printed Record Lathe

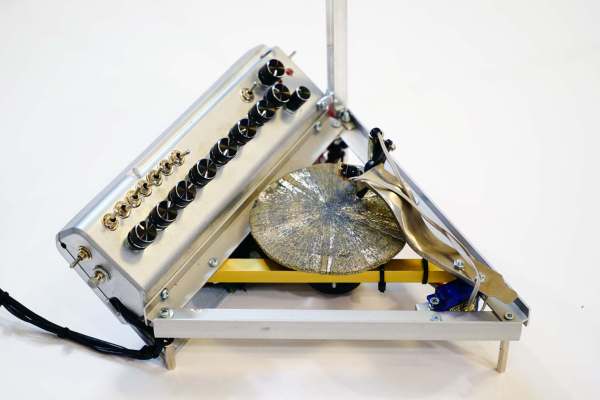
Lovers of records rejoice! Did you know you can cut your own vinyl using something called a record lathe? [Beau Walker] just put the finishing touches on his 3D printed record lathe, and the results speak for themselves!

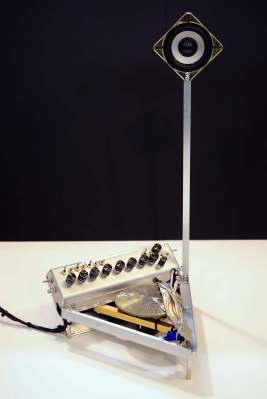
A Recording Lathe was once used for cutting records, and previously, wax cylinders – if you want to get really old school. [Beau], being an analog lover, decided he had to try making his own. He designed the whole thing in FreeCAD and got 3D printing. A single stepper motor drives the lead screw which moves the writing head back and forth as the record spins in place. As to not waste materials, he’s reusing old CD’s for his newly created vinyls. Two 25W speakers cause vibrations in the needle to cut into the disc, via a clever little mechanism.

The system works pretty well, but he wants to replace the turntable with another stepper motor for finer control of the recording — sometimes the turntable slows down during recording under load which messes up the sound. There’s a video of it in action on his site that we can’t embed here, so you should definitely go check it out!

Of course you could skip the middleman and go straight to 3D printing your records…

Poor Audio Quality Made Great: Listen To Vintage Music Using An Antique Radio Without Removing The Insides

Sometimes it is not how good but how bad your equipment reproduces sound. In a previous hackaday post the circuitry of a vintage transistor radio was removed so that a blue tooth audio source could be installed and wired to the speaker. By contrast, this post will show how to use the existing circuitry of a vintage radio for playing your own audio sources while at the same time preserving the radio’s functionality. You will be able to play your music through the radio’s own audio signal chain then toggle back to AM mode and listen to the ball game. Make a statement – adapt and use vintage electronics.

Pre-1950’s recordings sound noisy when played on a high-fidelity system, but not when played through a Pre-War console radio. An old Bing Crosby tune sounds like he is broadcasting directly into your living room with a booming AM voice. You do not hear the higher frequency ‘pops’ and ‘hiss’ that would be reproduced by high-fidelity equipment when playing a vintage recording. This is likely due to the fact that the audio frequency signal chain and speaker of an antique radio are not capable of reproducing higher frequencies. Similarly, Sam Cooke sounds great playing out of an earlier transistor radio. These recordings were meant to be played on radios from the era in which they were recorded.

Choosing an Antique Radio

Vintage radios can be found at garage sales, estate sales, hamfests, antique shops, antique radio swap meets, and Ebay. Millions of radios have been manufactured. People often give them away. For this reason, antique radios are relatively inexpensive and the vast majority are not rare or valuable.

Generally speaking, tube radios must be serviced and may not even work. Transistor radios often work to some level. Try to find a radio that is clean and uses a power supply transformer or batteries.

Click past the break to learn how to restore these radios to working condition

Continue reading “Poor Audio Quality Made Great: Listen To Vintage Music Using An Antique Radio Without Removing The Insides”

Controlling Music With The Wave Of A Hand

2301141406514425783

[Thomas] created a magical music player that gives the listener the ability to change songs and alter the volume levels without having to touch anything but air. Called the LighTouch, this device puts the control in the hands of the user by interpreting input from an ultrasonic sensor and plays back tracks based on waving gestures.

It is the 2nd iteration of a prototype that he completed about a year ago and functions as a streaming radio/alarm clock. The sensor is hooked up to a Raspberry Pi with a fading LED. Everything is highly customizable including the distances used for playback features. The criteria [Thomas] put in place has the pause method trigger when an object is detected between 0-10cm from the sensor. The volume control on the next level up brightens and dims the LED light just for some added flair.

Continue reading “Controlling Music With The Wave Of A Hand”

PS/2 Synth Will Knock You Off Your Broom

Here’s a hack centered around something a lot of people have sitting around: a PS/2 keyboard. [serdef] turned a Harry Potter-edition PS/2 into a combination synth keyboard and drum machine and has a nice write-up about it on Hackaday.io.

For communication, he tore up a PS/2 to USB cable to get a female mini DIN connector and wired it to the Nano. He’s using a Dreamblaster S1 synth module to generate sounds, and that sits on a synth shield along with the Nano. The synth can be powered from either the USB or a 9-volt.

Keymapping is done with the Teensy PS/2 keyboard library. [serdef] reused a bunch of code from his bicycle drummer project which also employed the Dreamblaster S1. [serdef] is continually adding features to this project, like a pot for resonance control which lets him shape the waveform like an analog synth. He has posted some handy PS/2 integration code, his synth code, and a KiCad schematic. Demo videos are waiting for you across the link.  Continue reading “PS/2 Synth Will Knock You Off Your Broom”

Commodore 64 And Nintendo Make Beautiful Music Together With SYNCART

Cyncart

[Dan] has been hard at work developing CYNCART to get his Commodore 64 and original NES to play together. We’ve seen [Dan’s] handiwork before, and it’s pretty clear that he is serious about his chip tunes.

This project starts with something called a Cynthcart. The Cynthcart is a Commodore 64 cartridge that allows you to control the computer’s SID chip directly. In effect, it turns your Commodore 64 into a synthesizer. [Dan] realized that the Commodore’s user port sends out simple eight bit values, which happens to match perfectly with the NES’ controller ports. In theory, he should be able to get these two systems communicating with each other.

[Dan] first modified the Cynthcart to send data out of the user port on the Commodore. This data gets sent directly to the NES’ 4021 shift register chip in the second player controller port. The NES runs a program to turn this data into sound on the NES’ audio chip. The first player controller can then be used to modify some other sound settings on the NES. Musical notes are played on the Commodore’s keyboard. This setup can also be used to play music on both systems at the same time. Be sure to watch the video of the system in action below.

Continue reading “Commodore 64 And Nintendo Make Beautiful Music Together With SYNCART”

Thumbnail that say The Hacklet

The Hacklet #7 – MIDI

7

This week’s Hacklet is all about Hackaday.io projects which use MIDI, or Musical Instrument Digital Interface for the uninitiated. MIDI was designed from the ground up as an open communications standard for musical instruments. Nearly every major instrument company participated in the design of the standard. MIDI was first demonstrated in January of 1983, with the communications standard document following in August. Hackers, makers, and musicians immediately ran with it, using MIDI to do things the designers never dreamed of.

SAMSUNG[Robert’s] 9×9 Pixel Muon Detector/Hodoscope  is a great example of this. [Robert] is using 18 Geiger Muller Tubes to detect cosmic particles, specifically muons. The tubes are stacked in two rows which allows him to use coincidence detection. Rather than just plot some graphs or calculate impact probabilities, [Robert] hacked a Korg Nanokey 2 MIDI controller to output MIDI over USB messages corresponding to the detected muons. Check out his video to see a sample of the music of the universe!


diyMPCNext up is [Michele’s] DIY MPC style MIDI controller. [Michele] needed a simple low-cost drum controller that wouldn’t wake his neighbors. He loved Akai MPC controllers, so he rolled his own. [Michele] investigated force sensitive resistors but found they were very expensive. At a cost of $8 USD each, his resistors alone would be nearly the cost of a low-end MPC!  [Michele] created his own sensitive pads using a sandwich of copper tape and 3M Velostat conductive sheets. An HCF4067 routes all the analog lines to a single pin of Teensy 3.0, which then converts the analog resistor outputs to MIDI messages.

pic-midi-1vo[Johan] loves his analog synths, and wanted them to be able to talk MIDI too. He built MIDI2VC, a circuit which converts MIDI to 1V/Octave (similar to  CV/Gate). 1V/Octave is an analog control system used in some early synthesizers, as well as many modern analog creations. Pitches are assigned voltages, and as the name implies, each octave is 1 volt. A4 on the keyboard is represented by 4 volts, while A5 is 5 volts. [Johan] used a Microchip PIC16LF1823 to receive and convert the MIDI signals. The PIC outputs I2C data to an MCP4725 DAC which drives the analog side of the house.

eldanceLong before DMX512 came on the scene, hackers were controlling lights via MIDI. [Artis] continues this with El Dance, a wireless system for controlling electroluminescent wire worn by dancers. Similar in function to  [Akiba’s] EL wire system, [Artis] took a lower cost route and used the venerable NRF24L01 radio module. He added an antenna which gives the modules a range of about 30 meters. The computer running the dance routine’s music sees the transmitter side of the link as a MIDI instrument. Standard note on and off commands activate the EL wire strings.

midi-vibeOur final hack comes from [Jen] who built a MIDI Vibrator Inductor Synth. [Jen] performs in an experimental music band called My Wife, with instruments as varied as violins and sewing machines. [Jen] must be a fan of Van Halen’s Poundcake as she’s using a similar technique, with a MIDI twist. An Arduino converts MIDI notes to analog values, which are sent to a motor controller board. The motor controller uses PWM to drive a vibrator motor at the frequency of the note being played. Like all DC motors, the vibrator puts out a ton of electromagnetic noise, which is easily picked up by [Jen’s] electric bass.

That’s it for this week’s Hacklet! Tune in next week for more projects from Hackday.io!


ServoBender, The Electronic Pedal Steel

You’ve most certainly heard a pedal steel guitar before, most likely in any ‘old’ country song, or more specifically, any country song that doesn’t include the word ‘truck’ in its lyrics. Pedal steels are strange devices, looking somewhat like a 10-string guitar with levers that change the pitch of individual strings. Historically, there have been some attempts to put a detuning mechanism for individual strings in normal electric guitars, but these are somewhat rare and weird. [Gr4yhound] just nailed it. He’s come up with the perfect device to emulate a pedal steel in a real guitar, and it sounds really, really good.

The imgur album for this project goes over the construction of the ServoBender in a bit more detail than the video. Basically, four servos are mounted to a metal plate below the bridge. Each servo has a spring and cam system constructed out of 3D printed parts. The detuning is controlled by an Arduino and a few sustain pedals retrofitted with hall effect sensors. Simple, really, but the effect is astonishing.

[Gra4hound]’s contraption is actually very similar to a B-Bender where a guitarist pushes on the neck to raise the pitch of the B string. This setup, though, is completely electronic, infinitely adjustable, and can be expanded to all six strings. Very, very cool, and it makes us wonder what could be done with one of those freaky robot guitars, a soldering iron, and a bit of code.

Video below, because you should watch it again.

Continue reading “ServoBender, The Electronic Pedal Steel”