Barcode Guitar Plays More Than Beep-Bop

One of our favorite things about the rise of hobbyist development ecosystems such as the Arduino is that it’s now possible to make a MIDI controller out of almost anything, as long as you have the the shields and the dedication. We’re glad that [James Bruton] takes the occasional break from making robots to detour into instrument making, because his latest creation turns it up to 11.

This awesome guitar uses a barcode scanner to play notes, and various arcade controls to manipulate those notes. The barcodes themselves scan as ASCII values, and their equivalent integers are sent to an external MIDI device. This futuristic axe is built on an Arduino Mega, with a USB shield for the barcode scanner, and a MIDI shield on top that [James] connects to various synths in the video after the break.

In between shooting barcodes, the right hand also controls octave shifting and changing MIDI channels with the joystick, and doing pitch-bends with the rotary encoder. The array of arcade buttons on the bottom neck let him switch between single player for monophonic synths, and multiplayer for polys. The other three buttons are press-and-scan programmable single-note sounders that assist in chord-making and noodling.

We particularly dig the construction, which is a combination of 20/20 and 3D printed boxes. [James] found some angled PVC to serve as fretboards for the four necks, and a nice backgrounds for bar codes.The only thing we would change is the native beep of the barcode scanner — either silence it forever or make it mutable, because it doesn’t jive with every note. It might be nice to get the gun to scan continuously so [James] doesn’t get trigger finger. Or better yet, build the scanner into a glove.

Want to do something more useful with that barcode scanner in your parts bin? Use it to manage your household inventory. But first, reacquaint yourself with the history of the humble barcode as presented by [Adam Fabio].

Continue reading “Barcode Guitar Plays More Than Beep-Bop”

Hypnotic Visuals Synthesizer

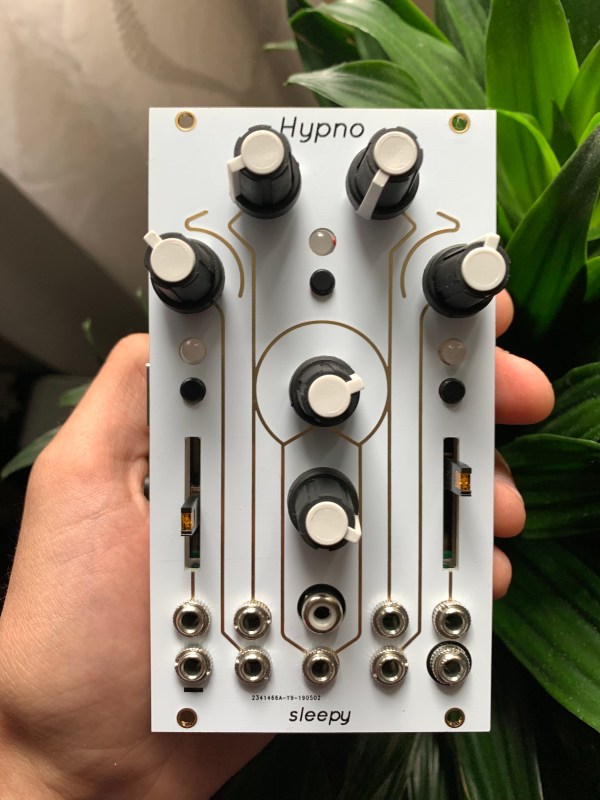
Ever wanted to make some seriously trippy retro graphics to go along with your lo-fi hip hop beats? Now you can, with [teafella]’s aptly named Hypno Video Synthesizer, a Raspberry Pi-based video synthesizer that digitally emulates and extends analog video workflows through colorization, shape generation, and feedback, patching the modifications into a compact interface. The device allows music creators to perform with live visuals, or alternatively to create a unique visual source for a video setup. Once the CV input is plugged in, all it requires is a composite display and power to start working.

Hypno takes input through a control voltage (CV) jack using a MCP3008 ADC via SPI, with voltages scaled from -5-5V to 0-5V. The device attaches on top of a Raspberry Pi, using Raspbian for the operating system and the Pi Zero GPIO to interface with an OpenGL Engine. The input parameters are taken from knobs through a multiplexer into a single channel of the ADC, with values offset in software based on the CV inputs.

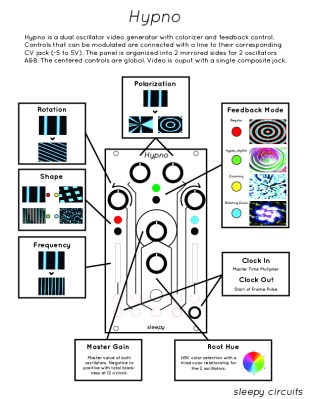
Using the Hypno ends up being fairly straight forward, as the controls are organized onto two mirrored sides for the two oscillators A & B, with global controls in the center. There are knobs that control polarization, rotation, shape, feedback modes (regular, hyper digital, zooming, rotating zoom), clock in/clock out, frequency, root hue, and master gain, as well as RGB LEDs that provide visual feedback.

A single jack outputs the composite result, although a micro-HDMI plug can also be used on the back. For advanced functionality, Hypno allows for patching, which mixes effects on top of one another and allows for shapes such as oscillator cross modulation. There are also alt-controls that open up self modulation and other shapes. Examples include bipolar drift (smoothly scrolls the oscillator) and mirroring (mirrors the oscillator’s shape in different patterns for a kaleidoscope-eque tiled madness).

The software is written in C++ and GLSL, with the main engine running with one plane in OpenGL, drawing the output of a GLSL shader. The CV and knob inputs are fed into shader uniforms that are used to change the visuals in the engine.

[teafella], a self-professed Arduino user, uses WiringPi for the GPIO interactions. The Shader system is inspired by analog video synthesis, with every shape having a simulated “scan” over the screen and function mapped to it that can be transformed into polar coordinates.

The setup for Hypno is fully compatible with analog CV equipment such as Eurorack synthesizers, which makes it easy for music creators to plug and play. Here’s a couple of sample outputs from some soundtracks inputted into Hypno:

Too many combinations to even imagine? Check out a demo of Hypno in action!

Continue reading “Hypnotic Visuals Synthesizer”

Hacked Tape Player Makes For A Unique Instrument

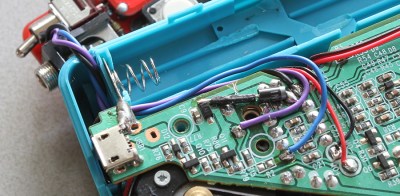
[Gijs Gieskes] is certainly no stranger to hacked cassette players, but his latest triumph may well be the most approachable project for anyone looking to explore the world of unorthodox tape unspooling. By attaching a fairly simple add-on PCB to a modern portable cassette player, the user is able to modify the playback speed of the tape at will. The skillful application of such temporal distortions leads to wonderfully abstract results.

The board that [Gijs] has come up with uses four potentiometers and matching push buttons to allow the user to set different playback speeds that they can engage with the push of the button. There’s also a fifth potentiometer to augment the “global” speed as well as an override switch. During playback, these controls can be used to arbitrarily tweak and augment the sound of samples contained on a the looping cassette.

If that’s a little hard to conceptualize, don’t worry. [Gijs] has provided some examples of how the the rapid adjustment of playback speed offered by this “Zachtkind” can add a fascinating level of complexity to sounds and melodies. The assembled player is available for purchase ready to go, but he also provides kits and a detailed installation guide for those who’d rather build it themselves.

Going all the way back to 2005, [Gijs] and his incredible creations have been a staple of Hackaday. From the Arduino video sampler to the array of oddly musical analog clocks, we never cease to be in awe of this exceptionally prolific hacker.

A Hard Rocking Arduino Visualization Shield

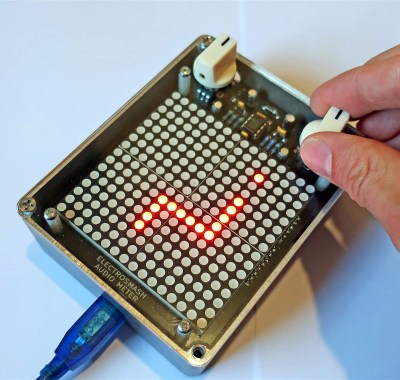
Over the summer [ElectroSmash] put the finishing touches on the Arduino Audio Meter, a shield for the Arduino Uno that visualizes various aspects of an incoming audio signal on a set of four 8×8 LED dot matrices. Obsentisibly it’s for use on a guitar pedalboard, but thanks to the incredible documentation and collection of example code provided by the team, the project promises to be an excellent platform for all sorts of audio experimentation.

Incoming audio is amplified with an MCP6002 and fed into the Uno’s Analog to Digital Converter, where it’s processed via whatever Sketch the user has uploaded. User input is provided by a digital encoder with push-button. A set of four MAX7219 chips control the entire 256-pixel matrix with just three pins on the Arduino. The resolution of the display allows the Arduino Audio Meter to show more than just a simple VU meter, it can even do text and basic graphics.

[ElectroSmash] provides various Sketches for use with the Arduino Audio Meter that provide the expected repertoire of audio visualizations, but they also provide a number of interesting Sketches to expand the capabilities of the device in unexpected ways. Some of them could be useful for a stage musician, such a tool to tune your guitar, whereas others are fun uses of the hardware such as a game of “Snake”.

With the entire project released as open source, users are free to run wild with the Arduino Audio Meter. Writing your own custom software is an obvious first step to making the project your own, but adding additional hardware features and functions certainly aren’t out of the question either.

Our very own [Lewin Day] once walked us through the effort involved in building boutique guitar pedals, and while the Audio Audio Meter’s capabilities are somewhat limited as it doesn’t have the ability to change the audio going through it, we’re still interested in seeing what the community will come up with once they have an easy way to bring their ideas to life.

Continue reading “A Hard Rocking Arduino Visualization Shield”

Teaching A Vintage Line Printer To Make Music, All Over Again

Sit next to any piece of machinery long enough and you get to know it by the sounds it makes. Think about the sounds coming from any 3D-printer or CNC machine; it’s easy to know without looking when the G code is working through the sines and cosines needed to trace out a circle, for instance.

It was the same back in the day, when bored and bright software engineers heard note-like sounds coming from their gear and wrote programs to turn them into crude music machines. And now, [Ken Shirriff] details his efforts to revive a vintage IBM 1403 line printer’s musical abilities. The massive 1960s-era beast is an irreplaceable museum piece now, but when [Ken] and his friends at the Computer History Museum unearthed stacks of punch cards labeled with song titles like “Blowin’ In the Wind” and “The Blue Danube Waltz,” they decided to give it a go.

The 1403 line printer has a unique chain-drive print head, the inner workings of which [Ken] details aptly in his post. Notes are played by figuring out which character sequences are needed to get a particular frequency given the fixed and precisely controlled speed of the rotating chain. The technique is quite similar to that used by musical instruments such as the Floppotron, or when coercing music from everyday items including electric toothbrushes.

Lacking the source code for the music program, [Ken] had to reverse engineer the compiled program to understand how it works and to see if playing music would damage the chain drive. The video below shows the printer safely going through a little [Debussy]; audio clips of songs originally recorded back in 1970 are available too.

Continue reading “Teaching A Vintage Line Printer To Make Music, All Over Again”

Using Machinery To Make Factory-Fresh Industrial Music

Many machines make music as a side effect, as anyone who owns a 3D printer can confirm. [工場音楽レーベルINDUSTRIAL JP] is working on a project to meld music and machinery in new ways. They are building a record label and a playlist based on the sights and sounds of small factories in Japan. Their videos combine the hypnotizing, rhythmic beauty of precision manufacturing process with music from local artists, and the result is like r/SoundsLikeMusic met up with How It’s Made and created a series of un-narrated industrial fever dreams.

While the focus is on high-tech factories, the content of these moodily-lit videos is pretty diverse. Never before have we been so mesmerized by the folds of an air filter or the pressing of vinyl records. Our favorite might be GOKO BANE, which takes a bumpin’ look around the Goko Spring factory. It makes us want to throw on some rags and dance like they do down in Zion.

Once in a while they will play around with the video speed of the factory process for effect, and it works nicely. If there’s any downside, it’s that no one process is shown from start to finish. But that’s not the point, anyway.

Don’t have access to a factory? Us either. But if you can get stepper motors, it’s pretty easy to make music by driving them forward, or even backward.

Thanks for the tip, [KILLERGEEK].

Because Conventional Laser Harps Aren’t Dangerous Enough

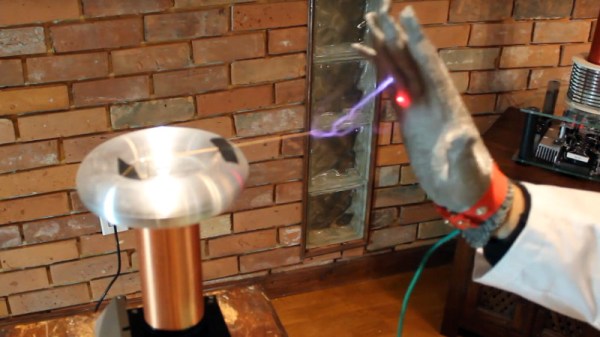
In the late 1980s, the French musician [Jean-Michel Jarre] famously toured with a laser harp. The word among teenage fans was that he had to wear special gloves to stop his hands getting burned, because 1980s teens were both impressionable and didn’t know much about lasers. In fact we’re told by a member of our community who was part of his road crew that the glove was a matter of reflectivity, so laser harps remain relatively harmless and French harpists retain their fingers. To add a bit of spice to the laser harp experience, [James Cochrane] hooked up a laser rangefinder to a Tesla coil to make an instrument with a bit more crackling energy in its performance than the [Jarre] model.

It starts with a laser tape measure modified to serve as an Arduino rangefinder, coupled to custom MIDI code to make a laser harp MIDI controller. The Tesla coil in question happens also to be a MIDI instrument, so the one can control the other with ease. The addition of an earthed chain mail glove allows it to be played in close proximity to the coil, and he rewards us with a rendition of the Star Trek theme. Tesla fun and games behind us, he then gives us a demonstration with a more conventional MIDI instrument.

We’ve had innumerable Tesla coil projects here over the years, if you’re hungry for more we suggest starting with this unusual planar PCB coil design. Meanwhile you can see the laser harp coil in the video below the break.

Continue reading “Because Conventional Laser Harps Aren’t Dangerous Enough”