Game Boy Camera Gets Ridiculously Good Lens

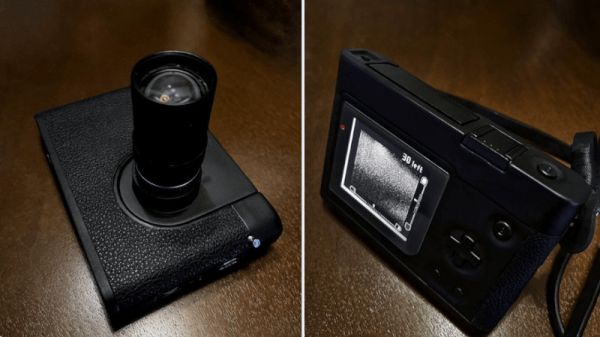
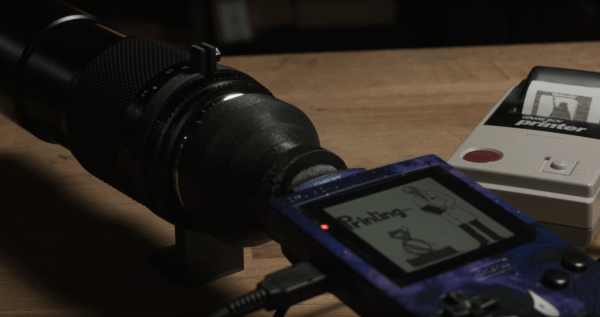
How do you get better pictures from a 20+ year old Game Boy Camera? How about marrying a DSLR lens to it? That’s what [ConorSev] did and, honestly, the results are better than you might expect as [John Aldred] mentioned in his post about the topic. You can check the camera out in the video below.

A 3D printed adapter lets you mount a Canon EF lens to the Game Boy Camera, a trick that we’ve seen in the past. [ConorSev] looked at the existing adapters floating around, and came up with the revised version you see here. There was still the problem of actually getting the images off the Camera cartridge, but luckily, this isn’t exactly unexplored territory either.

While there might not be anything new with this project, using a high-quality lens on the toy makes for some interesting photographs, and you wonder how far you can push this whole idea. Of course, no matter how much of a lens you put on the front, you still have to contend with the original image sensor which has hardly well. Still, we were impressed at how much better things looked with a high-quality zoom lens.

We bet the original designer of the Game Boy Camera never imagined it would have the kind of zoom capability you can see in the video. We love seeing these little handhelds pushed beyond their limits. Cryptomining? No problem. Morse code? Piece of cake.

Continue reading “Game Boy Camera Gets Ridiculously Good Lens”

Six GameBoy Pokemon games

Bridging Game Worlds With The ‘Impossible’ Pokémon Trade

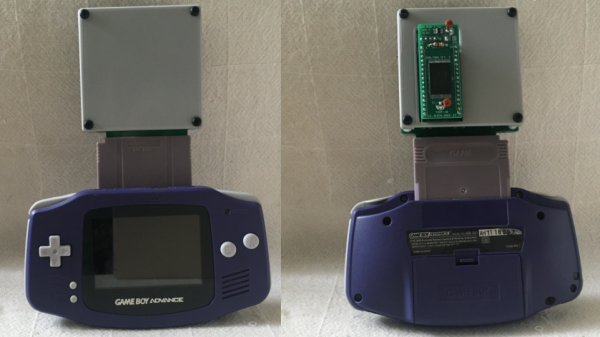
Transferring hard-earned Pokémon out of the second generation GameBoy game worlds into the ‘Advance Era’ cartridges (and vice versa) has never been officially supported by Nintendo, however [Goppier] has made these illicit trades slightly easier for budding Pokémon trainers by way of a custom PCB and a healthy dose of reverse engineering.

Changes to the data structure between Generation II on the original GameBoy (Pokémon Gold, Silver and Crystal) and Generation III on the GameBoy Advance (Pokémon Ruby, Sapphire, FireRed, LeafGreen and Emerald) meant that trades between these cartridges was never a possibility – at least not through any legitimate means. In contrast, Pokémon trades are possible between the first and second generation games, as well as from Generation III and beyond, leaving the leap from Gen II to Gen III as an obvious missing link.

Modern players have already overcome this limitation by dumping the cartridge save files onto a PC, at which point any Pokémon could be added or subtracted from the save. Thus, this method relies on self-control as well as the right hardware. [Goppier]’s solution is arguably far more elegant, and requires very little extra hardware. A simple PCB with ports for older and newer GameBoy Game Link Cables is the physical bridge between the generations. An ARM Cortex microcontroller sits between these connections and translates the game data between the old and the new.

The microcontroller is required to translate the data structure between the generations, and seems fit for purpose. Not only does the Pokémon data require conversion, but a few other hacks are needed before the two generations will talk nicely to each other. Pokémon on the GameBoy Advance brought in new features such as representing player movement in the trading rooms (i.e. you can see the other player moving on your screen), which also had to be addressed.

The concern over the legitimacy of trades within the Pokémon community is a curious, yet understandable, byproduct of the multiplayer experience. As an example, modern players have to be wary of ‘hacked’ Pokémon, which can often introduce glitches into their game world following a trade. Apart from these issues, some Pokémon players simply desire genuine Pokémon as part of fostering a fair and enjoyable gaming experience.

This literal bridge between Gen II and Gen III game worlds brings the community tantalizingly close to a ‘legitimate’ means of transferring their Pokémon out of ancient cartridges and into modern games. Could Nintendo one day officially sanction Gen II to Gen III trades with a similar device? Crazier things have happened.

We love our GameBoy hacks here on Hackaday, so why not check out this project that replaces the battery-backed SRAM in your GameBoy games with FRAM?

Continue reading “Bridging Game Worlds With The ‘Impossible’ Pokémon Trade”

GBA Remote Play Upgrade Lets You Play PlayStation On The Bus

The Nintendo Game Boy Advance was basically the handheld gaming situation of its era, by virtue of the fact that it had no serious competitors in the market. The system was largely known for 2D games due to hardware limitations.

However, [Rodrigo Alfonso] has recently upgraded his GBA Remote Play system that lets him play PlayStation games and others on his classic Game Boy Advance. We first featured this project back in July, which uses a Raspberry Pi 3 to emulate games and pipe video data to the handheld for display, receiving button presses in return.

Since then, [Rodrigo] has given the project some upgrades, in the form of a 3D-printed case that mounts a battery-powered Pi directly to the back of the console for portable play. Additionally, overclocking the GBA allows for faster transfer rates over the handheld’s Link Port, which means more pixels of video data can be clocked in. This allows for more playable frame rates when running at 240×160, the maximum resolution of the GBA screen.

The result is a Game Boy Advance which you can use to play Crash Bandicoot on the bus just to confuse the normies. Of course, one could simply build a Raspberry Pi handheld from scratch to play emulated games. However, this route takes advantage of the GBA form factor and is pretty amusing to boot. Video after the break.

Continue reading “GBA Remote Play Upgrade Lets You Play PlayStation On The Bus”

Cramming A DS Inside A Gameboy

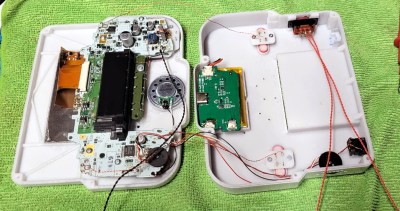
Many holiday recipes and console hacks share a common theme: cramming a thing inside another thing. Whether it’s turducken or a Nintendo DS inside a Gameboy, the result is always unexpected. The chassis for this mod is a humble Gameboy color with a Gameboy SP screen tackled on the top to serve as the secondary display. Unfortunately, this mod lost touch screen functionality, limiting some of the games you can play.

[TheRetroFuture] received the custom handheld from [GameboyCustom], which was somewhat damaged in shipping. The original screw mounts had to be removed and the case glued back together to fit the DS motherboard. So for [TheRetroFuture] to get inside to start troubleshooting involved a razor blade and patience. Testing various points and swapping components got [TheRetroFuture] closer to the root problems. The fix ended up being a few wires that came loose during shipping. Finally, after reseating a display connection and some careful soldering, it booted and started playing games.

Overall, it’s pretty impressive to see Mario Kart DS running on both screens on the tiny handheld. But you might be asking, why? Why shove one handheld inside another handheld? Sometimes it’s to gain new functionality like this Raspberry Pi inside a PSP body. Sometimes, it’s just because we can. Video after the break.

Continue reading “Cramming A DS Inside A Gameboy”

the conversion from hynix SRAM to FRAM on a Pokemon Yellow PCB

Pokemon Time Capsule

The precious Pokemon we spent hours capturing in the early nineties remain trapped, not just by pokeballs, but within a cartridge ravaged by time. Generally, Pokemon games before the GameBoy Advance era had SRAM and a small coin cell to save state as NVRAM (Non-volatile random access memory) was more expensive. These coin cells last 10-15 years, and many of the Pokemon games came out 20 years ago. [9943246367] decided to ditch the battery and swap the SRAM for a proper NVRAM on a Pokemon Yellow cartridge, 23 years later.

The magic that makes it work is a FRAM (ferroelectric random access memory) made by Cypress that is pin-compatible with the 256K SRAM (made by SK Hynix) on the original game cartridge PCB. While FRAM data will only last 10 years, it is a write-after-read process so as long as you load your save file every 10 years, you can keep your Pokemon going for decades. For stability, [9943246367] added a 10k pull-up on the inverted CE (chip enable) pin to make sure the FRAM is disabled when not in use. A quick test shows it works beautifully. Overall, a clever and easy to have to preserve your Pokemon properly.

Since you’re replacing the chip, you will lose the data if you haven’t already. Perhaps you can use [Selim’s] Pokemon Transporter to transport your pokemon safely from the SRAM to the FRAM.

Modded GBA SP Does Its Best Switch Impression

The whole idea behind the Nintendo Switch is that the system isn’t just a handheld, but can be converted into a more traditional home game console when placed into its dock. The wireless controllers even pop off the sides so you can kick back on the couch and enjoy your big-screen gaming from a distance. Judging by how many units Nintendo has sold of their latest system, it’s clearly a winning combination.

Which is probably why [Tito] of Macho Nacho and his friend [Kyle Brinkerhoff] decided to recreate some of the Switch’s core features using one of Nintendo’s older handhelds, the Game Boy Advance SP. There was already a video-out mod kit on the market for the GBA SP that would let them play games on the TV, but the team still had to figure out how to make a dock for the 18 year old handheld, plus get it working with the official Switch Joy-Cons.

Wiring the custom PCB into the GBA SP

Lucky, this crew is no stranger to developing impressive GBA SP add-ons. Last month they took the wraps off of an expanded 3D printed rear panel for the system that housed a number of upgrades, such as an expanded battery pack and support for Bluetooth audio.

This mod uses a similarly expanded “trunk” for the GBA, but this time it’s to hold the rails the Joy-Cons mount to, as well as the electronics required to get the modern controllers talking to the Game Boy. Namely, a Raspberry Pi Zero and a custom PCB designed by [Kyle] that uses a dozen transistors to pull the system’s control inputs low when the Pi’s GPIO pins go high.

[Tito] doesn’t seem to mention it in the video below, but we’re assuming the dock component of this project is just a 3D printed box with a connector sticking up for the GBA SP’s link cable port, since that’s where the TV-out modification outputs its video. Incidentally that means you don’t really need the dock itself, but it certainly looks cool.

At the end of the video [Tito] goes over a few of the rough edges of the current build, including the rather lengthy pairing process to get the Joy-Cons talking to the Raspberry Pi. But ultimately, he says that not only does the system feel good in his hands, but playing those classic games on the big screen has been a nice change of pace.

Continue reading “Modded GBA SP Does Its Best Switch Impression”

An Open Source Game Boy Printer That Doesn’t Print

While we’ll admit seeing your Game Boy Camera shots come out on a little slip of thermal paper was pretty neat back in 1998, anyone who’s still using the Game Boy Printer these days is probably more interested in getting their images in digital form. Which is why the open source NeoGB Printer is so exciting.

A collaborative effort between [Rafael Zenaro], [Raphaël BOICHOT], and [Brian Khuu], the project combines an ESP32 development board and some common components with their GPLv3 firmware to fully emulate the Game Boy Printer hardware. Once plugged into your Game Boy, any of the 110 titles that support Nintendo’s paper-pushing peripheral will recognize the NeoGB Printer as the real deal and happily send along the image.

But rather than committing it to paper, the NeoGB Printer saves the image to an SD card. From there, you can put the card in your computer and do whatever you wish with the captured files. Incidentally, it turns out there’s already a commercial gadget on the market that does something very similar, but this DIY approach comes well under its $99 USD price tag. In fact, if you’ve got a Game Boy Link Cable you don’t mind cutting up, you’ve probably got everything you need to pull this off in the parts bin right now.

We particularly like how the team has went out of their way to support different hardware configurations for the NeoGB Printer. If you want to go all out and add status LEDs and an OLED display, go for it. But if you just plan on using the thing once to grab a copy of the Pokémon diploma you earned 20 years ago, then you can skip the bells and whistles.

If you’re only worried about getting your snaps out of the Game Boy Camera, we’ve covered projects that will extract them directly from the cartridge. But this approach certainly has its appeal, as works with a much wider variety of games. We’re glad this project exists, as it means a whole new generation can explore all the wacky ways developers came up with to utilize the Game Boy Printer back in the day.