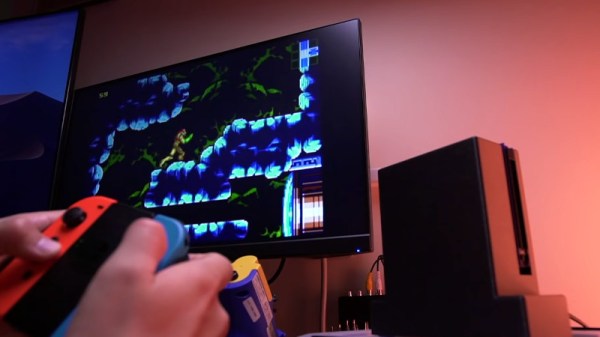
A Game Boy connected to a monitor while playing Super Mario Land 2

FPGA Boards Add VGA And HDMI Interfaces To The Original Game Boy

The classic Game Boy remains a firm favorite in the realm of retrocomputing. Revolutionary as it was at the time, by today’s standards its display is rather primitive, with no backlight and a usable area measuring only 47 mm x 44 mm. [Martoni] figured out a way to solve this, by developing GbVGA and GbHdmi, two projects that enable the Game Boy to connect to an external monitor. This way, you can play Super Mario Land without straining your eyes, and we can also image potential uses for those who stream their gameplay online.

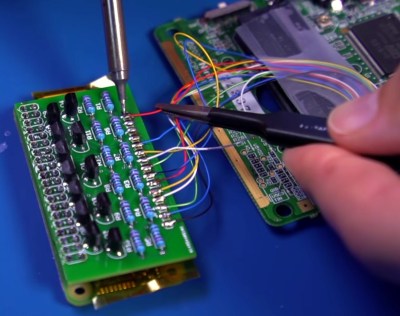
A Game Boy connected to a monitor while playing Super Mario Land 2 Getting the image data out of the Game Boy is surprisingly straightforward, and has been done a few times before. Basically, the connection between the CPU and the LCD screen is a serial interface with a 4 MHz clock, two data lines and two sync lines. [Martoni] uses pin headers sticking out of the Game Boy’s plastic case to connect these to a small FPGA board. The board in question is a Fireant for the VGA version and a Tang Nano 4K for the HMDI model. In either case the FPGA reads out each frame from the Game Boy’s LCD interface and draws the extracted image onto the monitor, using the same four shades of green as used on the original screen.

[Martoni] states that the ultimate goal of these projects is to make a Switch-like docking station for the original Game Boy, which is definitely something we’re looking forward to. Although adding external monitors to the Game Boy is not entirely new, we like the simplicity of this implementation and the fact that anyone can improve upon it thanks to the full source code being available. Similar hacks have been performed on the newer Game Boy Pocket and Game Boy Advance as well.

Spilled OJ Does A Number On Zelda Game Boy Cartridge

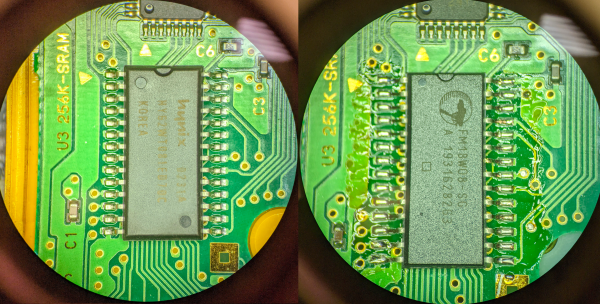
When [Taylor Burley] first opened up the cartridge for The Legend of Zelda: Oracle of Seasons, it certainly didn’t look like it had been dunked in corrosive orange juice. But looks can be deceiving, and while the game’s owner certainly did an admirable job of cleaning up the surface of the PCB, the cartridge was no longer functional. Clearly, this was a sticky situation.

After removing all of the components from the PCB, [Taylor] was quickly able to piece together what had happened. Despite the vigorous cleaning the game received after the spill, juice had found its way under each IC on the board. Left to sit in these nooks and crannies for who knows how long, the juice started to eat away at the traces on the PCB. Getting the game back up and running would naturally require considerable board repairs, but they don’t call him Solderking for nothing.

Corrosion lurking under each chip.

In the video below, you can see [Taylor] methodically scraping away the corrosion on the board before he starts recreating damaged connections with solid 30 gauge wire. Using tweezers and viewing the action through a digital microscope, he deftly bends the wire around to fit the shapes of the original traces and tacks the new conductors down with solder. He even goes ahead and repairs the traces that go to various test points on the cartridge; it’s a completely unnecessary extravagance, but we’re certainly not complaining. There’s a relaxing quality to watching him work, so we were in no rush to see his latest video end.

After fixing the board back up, he replaces all the components and takes it for a test drive on an original Game Boy Color. Confirming that Link’s 2001 outing is working as expected, he finishes the job with a few coats of spray-on conformal coating. With any luck, the next time this particular cartridge has to go face-to-face with some spilled juice, it will roll right off.

This isn’t the first time we’ve seen [Taylor] laboriously rebuild a Game Boy cartridge, and it certainly isn’t the first time we’ve seen him pull off some particularly impressive feats of soldering, either. His work always reminds us that patience and a steady hand can really do wonders.

Continue reading “Spilled OJ Does A Number On Zelda Game Boy Cartridge”

A conventiongoer plays Pokemon on a working Color Game Boy costume.

Convention Plays Pokemon On Giant Color Game Boy Costume

Standard cosplay is fun and all, but what is there for admirers to do but look you up and down and nitpick the details? Interactive cosplay, now that’s where it’s at. [Jaryd Giesen] knows this, and managed to pull together a working color Game Boy costume in a few days.

The original plan was to use a small projector on an arm, like one of those worm lights that helped you see the screen, but [Jaryd] ended up getting a secondhand monitor and strapping it to his chest. Then he took the rest of the build from there. Things are pretty simple underneath all that cardboard: there’s a Raspberry Pi running the RetroPie emulator, a Pico to handle the inputs, and two batteries — one beefy 12,000 mAH battery for the monitor, and a regular power pack for the Pi and the Pico.

As you’ll see in the build and demo video after the break, nearly 100 people stopped to push [Jaryd]’s buttons. They didn’t get very far in the game, but it sure looks like they had fun trying.

Since we’re still in a pandemic, you may want to consider incorporating a mask into your Halloween costume this year. Just a thought.

Continue reading “Convention Plays Pokemon On Giant Color Game Boy Costume”

Interactive Clips For Game Boy: Sit Back And Watch Or Take Control

How often does this happen to you? You find yourself describing something that happened in a game to someone, and they’re not sure they know what part of the map you’re talking about, or they’ve never gotten that far. Wouldn’t it be cool to make a bookmark in a video game so you can jump right to the beginning of the action and show your friend what you mean using the actual game?

That’s the idea behind [Joël Franusic] and [Adam Smith]’s fantastic Playable Quotes for Game Boy — clip-making that creates a 4-D nugget of gameplay that can either be viewed as a video, or played live within the bounds of the clip. The system is built on a modified version of the PyBoy emulator.

Game Boy game ROM -- complete and partial
Left: the full game ROM. Right: a bookmarked slice of the game ROM with the rest set to zero.

Basically, a Playable Quote is made up of a save state and all that entails, plus a slice of the game’s ROM that includes just enough game data to recreate an interactive clip. Everything is zipped up and steganographically encoded into a PNG file. Here’s a Tetris quote you can play (or watch) right now — you might recognize it from the post thumbnail. You’ll find the others on the games site, which allows people to create and share and build on each other’s work.

There’s so much more that can be done with this type of immersive and interactive tool outside the realm of games, and we’re excited to see where this leads and what people do with it.

Haven’t heard of PyBoy before? Let us introduce you.

Bringing A Ruined Game Boy Cart Back To Life With Tons Of Soldering

Retro consoles and handhelds are full of nostalgia and happy memories for many. However, keeping these machines and their media going can be a difficult job at times. [Taylor] was challenged to rescue a copy of Kirby’s Dream Land for the original Game Boy, and set about the task.

The cartridge was badly corroded, with many of the traces eaten through, rendering the game inoperable. First, all the components were removed, and the board was cleaned. This allowed easy access to the traces across the whole board. Then, the job was to delicately remove some solder mask from the parts of the traces still remaining, and bridge the gaps with fine copper wire. Even worse, several vias were damaged, which [Taylor] tackled by feeding jumper wires through the board and executing a repair on each side.

It’s a simple enough repair for the experienced hand, but virtually magic to a retro gaming fan that doesn’t know how to solder. [Taylor] has given us a great example of how to deal with corroded carts properly, with enough detail to be quite educational to the beginner.

We’ve seen other great work in this vein too, like an Amiga 2000 brought back from a horrible creeping green death. If you’ve done your own retro rescue, be sure to drop us a line!

Continue reading “Bringing A Ruined Game Boy Cart Back To Life With Tons Of Soldering”

THICC GBA SP Mod Gets Easy Install Ahead Of Release

Back in August we covered a unique modification for the Nintendo Game Boy Advance SP which replaced the handheld’s rear panel with an expanded version that had enough internal volume for an upgraded battery, a Bluetooth audio transmitter, and support for both Qi wireless and USB-C charging. The downside was that getting the 10 mm 3D printed “backpack” installed wasn’t exactly the most user-friendly operation.

But today we’re happy to report that the dream team behind the so-called THICC BOI SP have not only made some huge improvements to the mod, but that they intend to release it as a commercial kit in the next few months. The trick to making this considerable upgrade a bit more forgiving is the use of a bespoke flat flex cable that easily allows the user to solder up all the necessary test points and connections, as well as a custom PCB that pulls together all the hardware required.

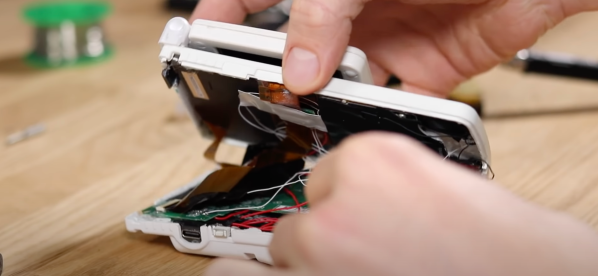
In the video below, [Tito] of Macho Nacho Productions goes over the latest version of the mod he’s been working on with [Kyle] and [Helder], and provides a complete step-by-step installation tutorial to give viewers an idea of what they’ll be in for once the kit goes on sale. While it’s still a fairly involved modification, the new design is surprisingly approachable. As we’ve seen with previous console modifications, the use of flat flex technology means the installation shouldn’t pose much of a challenge for anyone with soldering experience.

The flat flex cable allows for an exceptionally clean install.

Some may be put off by the fact that the replacement rear panel is even thicker this time around, but hopefully the unprecedented runtime made possible by the monstrous 4,500 mAh LiPo battery pack hiding inside the retrofit unit will help ease any discomfort (physical or otherwise) you may have from carrying around the chunkier case. Even with power-hungry accouterments like an aftermarket IPS display and a flash cart, the new battery can keep your SP running for nearly 20 hours. If you still haven’t beaten Metroid: Zero Mission by then, it’s time to take a break and reflect on your life anyway.

According to [Tito], the logistical challenges and considerable upfront costs involved in getting the new rear panels injection molded in ABS is the major roadblock holding the release of the kit back right now. The current prototypes, which appear to have been 3D printed in resin, simply don’t match the look and feel of the GBA SP’s original case well enough to be a viable option. A crowd funding campaign should get them over that initial hump, and we’ll be keeping an eye out for more updates as things move along towards production.

The previous version of this mod was impressive enough as a one-off project, but we’re excited to see the team taking the next steps towards making this compelling evolution of the GBA more widely available. It’s a fantastic example of what’s possible for small teams, or even individuals, when you leverage all the tools in the modern hardware hacking arsenal.

Continue reading “THICC GBA SP Mod Gets Easy Install Ahead Of Release”

GateBoy Is A Game Boy Emulated At Gate Level

Old game systems are typically the most popular targets for emulation. With huge communities of fans wanting to recreate the good times of yesteryear, most old systems have all been brought back to life in this manner. However, some simply dive into emulation for the technical challenge, and [Austin Appleby] has done just that with GateBoy.

GateBoy is a project to emulate the Game Boy logic gate by logic gate. It’s a lower level approach that builds upon earlier work [Austin] did on a project called MetroBoy, which we featured previously.

The emulator was created by painstakingly reverse-engineering the logic of the Game Boy. This was done by poring over die shots of the actual DMG-01 CPU silicon. GateBoy emulates most of the chip, though avoids the audio hardware at this stage.

Presently, GateBoy runs at roughly 6-8 frames per second on a modern 4GHz CPU. As it turns out, emulating all those gates and the various clock phases at play in the DMG-01 takes plenty of processing power. However, compilation optimizations do a lot of heavy lifting, so in some regards, GateBoy runs impressively quickly for what it is.

[Austin] still has plenty of work to do before GateBoy is completely operational, and there are some strange quirks of the Game Boy hardware that still need to be figured out. Regardless, it’s a fantastic academic exercise and a noble effort indeed. Meanwhile, you might like to check out the Game Boy emulator that runs just one single game.