If you have about 10 hours to kill, you can use [Edje Electronics’s] instructions to install TensorFlow on a Raspberry Pi 3. In all fairness, the amount of time you’ll have to babysit is about an hour. The rest of the time is spent building things and you don’t need to watch it going. You can see a video on the steps required below.
You need the Pi with at least a 16 GB SD card and a USB drive with at least 1 GB of free space. This not only holds the software, but allows you to create a swap file so the Pi will have enough virtual memory to build everything required.
Like many of us, [Michael Portera] was an avid trading card collector as a kid. Also like many of us, life got in the way, and the collections sat ignored in boxes until our mothers threatened to get rid of them (or skipped the threat altogether and sold them at a garage sale for next to nothing).
[Michael] was recently reunited with his collection of Magic cards, which vary in value as much as baseball or any other kind of collectible card. Now that his Friday nights are otherwise occupied, he decided to sell them off. But first, he had to know how much they’re worth.
Manually sorting and pricing hundreds of cards would take longer than he’d like, so he built a sorter to automate the process. It takes a stack of MtG cards and uses servos and little tires to move them, one by one, into position. A short Python script runs the servos, tells a Raspi 3 camera take a picture of each one, and uploads it to Amazon AWS. Once the pictures are there, [Michael] uses a second script to grab the card title text from the picture and fetch the value through TCGPlayer’s pricing API.
This machine probably isn’t for purists or people with a bunch of originals and re-issues of the same card. We probably should have mentioned that he took out all the Black Lotuses and other obviously valuable cards first. Someone still has to assess the condition of each card, but at two seconds per card, it’s quite the time twister saver. Time Walk past the break to see it in action.
Fun fact, the Osborne 1 debuted with a price tag equivalent to about $5,000 in today’s value. With a gigantic 9″ screen and twin floppy drives (for making mix tapes, right?) the real miracle of the machine was its portability, something unheard of at the time. The retrocomputing trend is to lovingly and carefully restore these old machines to their former glory, regardless of how clunky or underpowered they are by modern standards. But sometimes they can’t be saved yet it’s still possible to gut and rebuild the machine with modern hardware, like with this Raspberry Pi used to revive an Osborne 1.
Purists will turn their nose up at this one, and we admit that this one feels a little like “restoring” radios from the 30s by chucking out the original chassis and throwing in a streaming player. But [koff1979] went to a lot of effort to keep the original Osborne look and feel in the final product. We imagine that with the original guts replaced by a Pi and a small LCD display taking the place of the 80 character by 24 line CRT, the machine is less strain on the shoulder when carrying it around. (We hear the original Osborne 1 was portable in the same way that an anvil is technically portable.) The Pi runs an emulator to get the original CP/M experience; it even runs Wordstar. The tricky part about this build was making the original keyboard talk to the Pi, which was accomplished with an Arduino that translates key presses to USB.
It was only a matter of time. Everything else is getting its data logged and reported to the Internet for detailed analysis, so why should our rodents be any different? The cover story is that [Nicole Horward] hooked her pet hamster Harold up to the web because she wanted to see if he was getting as much exercise as he should. The real reason is, of course, that Harold wanted to show off to his “friends” on Hamsterbook.
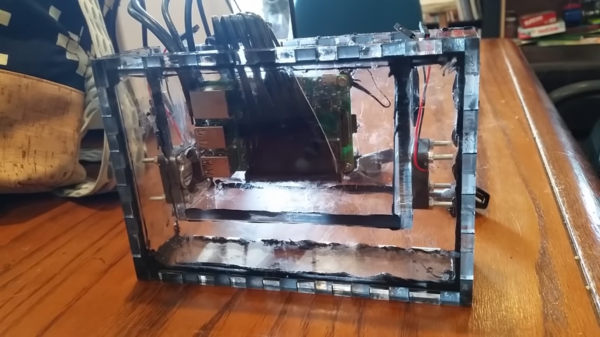
The hardware side of this hack is very simple, a magnetic door sensor (like the kind used in alarm systems) is used to detect each time the wheel makes a complete rotation. The sensor is hooked up to the GPIO pins of a Raspberry Pi, where it’s read by a Python script. A small LCD screen was added to give some visual feedback on Harold’s daily activity, and the whole thing was boxed up in a laser cut enclosure.
That gave [Nicole] a cute little display next to Harold’s cage, but it didn’t do much for analyzing his activity. For that, a script is used to upload the data every minute to a ThingSpeak channel via MQTT. This automatically generates attractive graphs from the raw data, making it much easier to visualize what’s happening over the long term.
We love to hack IKEA products, marvel at Raspberry Pi creations, and bask in the glow of video projection. [Nord Projects] combined these favorite things of ours into Lantern, a name as minimalist as the IKEA lamp it uses. But the result is nearly magic.
The key component in this build is a compact laser-illuminated video projector whose image is always in focus. Lantern’s primary user interface is moving the lamp around to switch between different channels of information projected on different surfaces. It would be a hassle if the user had to refocus after every move, but the focus-free laser projector eliminates that friction.
A user physically changing the lamp’s orientation is detected by Lantern’s software via an accelerometer. Certain channels project an information overlay on top of a real world object. Rather than expecting its human user to perform precise alignment, Lantern gets feedback from a Raspberry Pi camera to position the overlay.
Speaking of software, Lantern as presented by [Nord Projects] is a showcase project under Google’s Android Things umbrella that we’ve mentioned before. But there is nothing tying the hardware directly to Google. Since the project is open source with information on Hackster.io and GitHub, the choice is yours. Build one with Google as they did, or write your own software to tie into a different infrastructure (MQTT?), or a standalone unit with no connectivity at all.
If you’re building a CNC router, laser cutter, or even 3D printer, you’ll usually be looking at a dedicated controller. This board takes commands from a computer, often in the form of G-Code, and interprets that into movement commands to the connected stepper motors. Historically this has been something of a necessary evil, as there was really no way to directly control stepper motors with a computer fast enough to be useful. That may not be the case anymore.
Thanks to the Raspberry Pi (and similar boards), we now have Linux computers with plenty of GPIO pins. The only thing missing is the software to interpret the G-Code and command the steppers over GPIO, which thanks to [pantadeusz], we now have. Called raspigcd, this software interprets a subset of G-Code to provide real-time control over connected steppers fast enough to drive a small CNC router.
Of course, you can’t directly control a beefy stepper motor to the GPIO pins of a Pi. You’ll let out all the magic smoke. But you can wire it up directly to a stepper driver board. These little modules connect up to a dedicated power supply and handle the considerable current draw of the steppers, all you need to do is provide them the number of steps and direction of travel.
This method of direct control offers some very interesting possibilities for small, low-cost, CNC projects. Not only can you skip the control board, you could conceivably handle the machine’s user interface (either directly via a touch screen or over the network) on the same Pi.
We’ve seen attempts at creating all-in-one Linux stepper controllers in the past, but the fact that anyone with a Raspberry Pi 2 or 3 (the boards this software has currently been tested on) can get in on the action should really help spur along development. Has anyone used this?
It’s a story as old as time: hacker sees cool tool, hacker recoils in horror at the price of said tool, hacker builds their own version for a fraction of the price. It’s the kind of story that we love here at Hackaday, and has been the impetus for countless projects we’ve covered. One could probably argue that, if hackers had more disposable income, we’d have a much harder time finding content to deliver to our beloved readers.
[ Alex Jensen] writes in to tell us of his own tale of sticker shock induced hacking, where he builds his own version of the Hak5 Bash Bunny. His version might be lacking a bit in the visual flair department, but despite coming in at a fraction of the cost, it does manage to pack in an impressive array of features.
This pentesting multitool can act as a USB keyboard, a mass storage device, and even an RNDIS Ethernet adapter. All in an effort to fool the computer you plug it into to let you do something you shouldn’t. Like its commercial inspiration, it features an easy to use scripting system to allow new attacks to be crafted on the fly with nothing more than a text editor. A rudimentary user interface is provided by four DIP switches and light up tactile buttons. These allow you to select which attacks run without needing to hook the device up to a computer first, and the LED lights can give you status information on what the device is doing.
[Alex] utilized some code from existing projects, namely PiBunny and rspiducky, but much of the functionality is of his own design. Detailed instructions are provided on how you can build your own version of this handy hacker gadget without breaking the bank.