ZeroPhone Gives Smartphones The Raspberry (Pi)

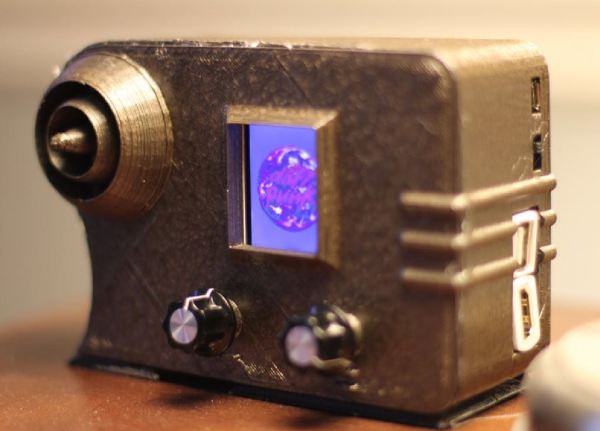
There are several open source phones out there these days, but all of them have a downside. Hard to obtain parts, hard to solder, or difficult programming systems abound. [Arsenijs] is looking to change all that with ZeroPhone. ZeroPhone is based upon the popular Raspberry Pi Zero. The $5 price tag of the CPU module means that you can build this entire phone for around $50 USD.

The radio module in the ZeroPhone is the well known SIM800L 2G module. 2G is going away or gone in many places, so [Arsenijs] is already researching more modern devices. An ESP8266 serves as the WiFi module with an OLED screen and code in python round out this phone. Sure, it’s not a fancy graphical touchscreen, but a full desktop is just a matter of connecting a display, mouse, and keyboard.

For the security conscious, the ZeroPhone provides a unique level of control. Since this is a Raspberry Pi running Linux, you choose which modules are included in the kernel, and which software is loaded in the filesystem. And with news that we may soon have a blobless Pi, the firmware hiding in the radio modules are the only black boxes still remaining.

If a Raspberry Pi is a bit too much for you to bite off, check out this Arduino based phone. Don’t want to do any soldering? Check out what you can do with a cheap Android phone and a bit of hacking.

Review: Hammer-Installed Solderless Raspberry Pi Pin Headers

A few days ago we reported on a new product for owners of the Raspberry Pi Zero, a set of solderless header pins that had a novel installation method involving a hammer. We were skeptical that they would provide a good contact, and preferred to stick with the tried-and-trusted soldered pins. It seems a lot of you agreed, and the comments section of the post became a little boisterous. Pimoroni, the originator of the product, came in for a lot of flak, with which to give them their due they engaged with good humor.

It’s obvious this was a controversial product, and maybe the Hackaday verdict had been a little summary based on the hammer aspect of the story. So to get further into what all the fuss had been about I ordered a Pi Zero and the solderless pin kit to try for ourselves.

Continue reading “Review: Hammer-Installed Solderless Raspberry Pi Pin Headers”

Raspberry Pi Launches Compute Module 3

The forgotten child of the Raspberry Pi family finally has an update. The Raspberry Pi Compute Module 3 has been launched.

The Pi 3 Compute Module was teased all the way back in July, and what we knew then is just about what we know now. The new Compute Module is based on the BCM2837 processor – the same as found in the Raspberry Pi 3 – running at 1.2 GHz with 1 gigabyte of RAM. The basic form factor SODIMM form factor remains the same between the old and new Compute Modules, although the new version is 1 mm taller.

The Compute Module 3 comes with four gigabytes of eMMC Flash and sells for $30 on element14 and RS Components. There’s also a cost-reduced version called the Compute Module 3 Light that forgoes the eMMC Flash and instead breaks out those pins to the connector, allowing platform integrators to put an SD card or Flash chip on a daughter (mother?) board. The CM3 Lite version sells for $25. Continue reading “Raspberry Pi Launches Compute Module 3”

A Simple Route To A Plug Top Pi

There are a host of tiny plug-top computers available for the experimenter who requires an all-in-one mains-powered computing platform without the annoyance of a full-sized PC or similar. But among the various models there has always been something missing, a plug-top Raspberry Pi. To address that gap in the market, [N-O-D-E] has created a fusion of Pi and plug using the official Raspberry Pi PSU accessory and a Raspberry Pi Zero, with a UUGear Zero4U USB hub sandwiched between the two.

It’s a pretty straightforward and simple build, the back of the PSU is formed into a flat surface with a bit of Sugru, then the power cable is stripped back to its wires which are then connected to the power pins on the USB hub. The hub is then attached to the Sugru — he doesn’t say how, but we suspect double-sided tape — and the Pi is mounted on top of the hub. Pogo pins make the required connections to the pads on the underside of the computer, so it can be removed and replaced at will.

The result is a useful addition to your Pi arsenal, one that could be used for a host of little stand-alone devices. It could use a cover, however we suspect a 3D printer owner could create themselves one with relative ease. The full description is shown in the video below the break.

Continue reading “A Simple Route To A Plug Top Pi”

Innocent TV Imprisoned Behind Mirror

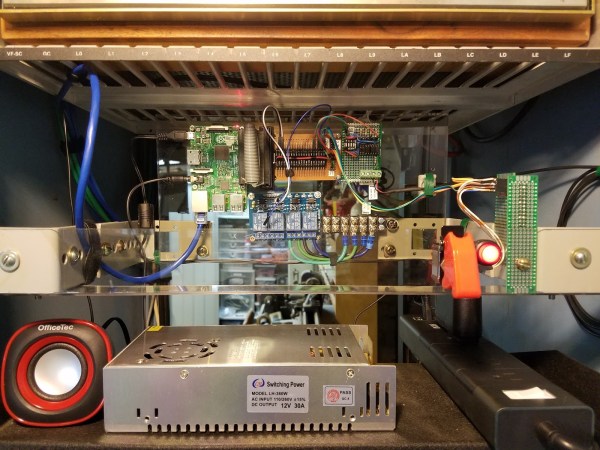
After following along with all the Magic Mirror builds, [Troy Denton] finally caved in and started building one for his girlfriend for Christmas. These popular builds are all pretty much bespoke, and this one is no different.

mirror2His victim TV didn’t have the ability to be switched on and off by the Raspberry Pi using HDMI/CEC, so he came up with an alternative. He got a couple of opto-isolators and soldered one to the on/off button on the TV’s control board. The Pi didn’t know whether it was switching the TV on or off, it just knew it was switching it. To solve this, [Troy Denton] connected another opto-isolator to the TV’s LED, this one the other way around. When the TV is turned on, the Pi now detects it.

The enclosure is fabbed from 2×4 lumber, the mirror is one-way acrylic which runs somewhere in the $75-100 range for this 27-9/16″x15-1/2″ application. The top and bottom rails include lines of holes to encourage airflow to keep things cool. the face plate is picture framing which makes it easy to mount the mirror. An ultrasonic range finder finishes off the build and when someone stands in front of this magic mirror, the Pi senses it and turns the monitor on.

Included in [Troy]’s post are the Python code and shell scripts he wrote as well as a bunch of pictures of the build process. We’ve seen Magic Mirrors builds before, including some small ones. They’re a cool addition to the house and a fairly simple build.

Blob-less Raspberry Pi Linux Is A Step Closer

The Raspberry Pi single board computer has been an astounding success since its launch nearly five years ago, to the extent that as of last autumn it had sold ten million units with no sign of sales abating. It has delivered an extremely affordable and pretty powerful computer into the hands of hobbyists, youngsters, hackers, engineers and thousands of other groups, and its open-source Raspbian operating system has brought a useful Linux environment to places we might once have thought impossible.

The previous paragraph, we have to admit, is almost true. The Pi has sold a lot, it’s really useful and lots of people use it, but is Raspbian open-source? Not strictly. Because the Broadcom silicon that powers the Pi has a significant amount of proprietary tech that the chipmaker has been unwilling to let us peer too closely at, each and every Raspberry Pi operating system has shipped with a precompiled binary blob containing the proprietary Broadcom code, and of course that’s the bit that isn’t open source. It hasn’t been a problem for most Pi users as it’s understood to be part of the trade-off that enabled the board’s creators to bring it to us at an affordable price back in 2012, but for open-source purists it’s been something of a thorn in the side of the little board from Cambridge.

This is not to say that all is lost on the blob-free Pi front. Aided by a partial pulling back of the curtain of secrecy by Broadcom in 2014, work has quietly been progressing, and we now have the announcement from [Kristina Brooks] that a minimal Linux kernel can boot from her latest open firmware efforts. You won’t be booting a blob-free Raspbian any time soon as there are bugs to fix and USB, DMA, and video hardware has still to receive full support, but it’s a significant step. We won’t pretend to be Broadcom firmware gurus as we’re simply reporting the work, but if it’s your specialty you can find the code in its GitHub repository. Meanwhile, we look forward to future progress on this very interesting project.

We reported on the partial Broadcom release back in 2014. At the time, the Raspberry Pi people offered a prize to the first person running a native Quake III game on their hardware, sadly though they note the competition is closed they haven’t linked to the winning entry.

Raspberry Pi Home Automation For The Holidays

When you want to play around with a new technology, do you jump straight to production machinery? Nope. Nothing beats a simplified model as proof of concept. And the only thing better than a good proof of concept is an amusing proof of concept. In that spirit [Eric Tsai], alias [electronichamsters], built the world’s most complicated electronic gingerbread house this Christmas, because a home-automated gingerbread house is still simpler than a home-automated home.

fya59blixaq00y3-largeYeah, there are blinky lights and it’s all controlled by his smartphone. That’s just the basics. The crux of the demo, however, is the Bluetooth-to-MQTT gateway that he built along the way. A Raspberry Pi with a BTLE radio receives local data from BTLE sensors and pushes them off to an MQTT server, where they can in principle be read from anywhere in the world. If you’ve tried to network battery-powered ESP8266 nodes, you know that battery life is the Achilles heel. Swapping over to BTLE for the radio layer makes a lot of sense.

Continue reading “Raspberry Pi Home Automation For The Holidays”