Debian Bookworm Comes To The Raspberry Pi, And Wayland Is Now Default

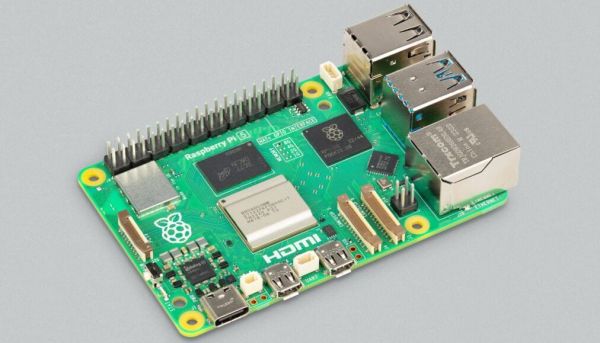
It must have been a busy week for the PR department at Raspberry Pi, with the launch of their latest single-board computer, the Pi 5. Alongside the new board comes something else, an updated Raspberry Pi OS version.

This is built from Debian 12 “Bookworm”, and supplants the previous “Bullseye” version. As well as the new OS base it comes with a pile of Pi-specific upgrades including an optimsied version of Mozilla Firefox. Probably most important is that henceforth (at least on 64-bit boards) its desktop will use the Wayland compositor rather than X11 to draw and manipulate windows. This is a development that has been in the works for a very long time — it must be almost a decade since the first Raspberry Pi blog entry about Wayland — so it’s welcome at last to see it.

The new tweaks as well as Wayland are supposed to deliver a much faster Pi experience, so we thought we’d break out the stopwatch and do some rough real-world tests. The bench 8GB Pi 4 here has a vanilla 64-bit Bullseye installed, so off we went to measure boot time, Chromium browser opening time, and Hackaday load time. It was time to download the new 64-bit Bookworm image and do the same. Have we just downloaded a power-up?

Both tests were done with an everyday boot, after the first-time OS set-up, and with all browser caches emptied. First up was a significant boost, with Bookworm booting in 37.14 seconds to Bullseye’s 53.5, but the Chromium opening was a little more disappointing. On Bullseye it took 7.15s, while Bookworm’s Chromium managed a more pedestrian 9.13s. The new Firefox takes only 7.95s to open. Both Chromium browsers load Hackaday in about 1.8s, while the new Firefox did the same job in a shade over 3s.

So allowing for our stopwatch reaction time and the ad-hoc nature of the test, this is a faster-booting OS, but the underlying hardware is still the limiting factor. We’re disappointed to see that there’s no update for the x86 version of the Raspberry Pi Desktop, and we hope they’ll be able to rectify this in the future.

Dial Up A Tune On The Jukephone

What do you do when you find a nice corded phone with giant buttons out in the wild? You could pay $80/month for a landline, use a VOIP or Bluetooth solution instead, or do something a million times cooler and turn it into a jukebox.

Now when the receiver is lifted, [Turi] hears music instead of a dial tone or a voice on the other end. But playback isn’t limited to the handset — there’s a headphone jack around back.

To listen to a track, he can either dial one in directly, or call up a random track using one of the smaller buttons below. A handy directory organizes the tunes by the hundreds, putting children’s tracks between 1-99 and the intriguing category “hits” between 900-999.

The phone’s new guts are commanded by a Raspberry Pi Pico, which is a great choice for handling the key matrix plus the rest of the buttons. As you may have guessed, there’s an DF Player Mini mp3 player that reads the tracks from an SD card. Everything is powered by a rechargeable 18650 battery.

Jukephone is open source, and you’ll find more pictures on [Turi]’s blog post. Be sure to check out the very brief build and demo video after the break.

Continue reading “Dial Up A Tune On The Jukephone”

Raspberry Pi Reveals A Little About Their RP1 Peripheral

The Raspberry Pi 5 is the new hotness from the Cambridge-based single board computer vendor, thanks in part to its new wonder-chip peripheral that speeds up much of its interfacing with the world. The RP1 hangs of the CPU’s PCIe bus and takes on many functions previously in the SoC, and those curious about it now have a little bit of information. Eben Upton has posted an article about the chip, and there’s a partial datasheet and a video in which the engineers talk about the chip as well.

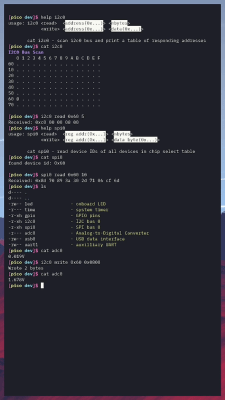
The datasheet is intended to help anyone wishing to write a hardware driver for a Pi 5, and they admit that it doesn’t reveal everything on the silicon. We don’t expect them to put this chip up for sale on its own because doing so would enable their competitors to produce something much closer to a Pi 5 clone. It does reveal a few nuggets, though; there are a couple of Cortex M3 cores for housekeeping, and alongside all the interfaces we know from earlier boards it has, perhaps most interestingly for Hackaday readers, a 12-bit analogue-to-digital converter. This has always been on our Pi wishlist and is a welcome addition.

So, if you read the datasheet and watch the video below, you’ll learn a lot about the interfaces and how to talk to them, but not quite so much about the full workings of the chip itself. They hint that there’s more to be released, but since the Pi people have a history of not letting go of the family silver, we won’t expect the keys to the kingdom.

Have a read of our Pi 5 launch coverage.

Continue reading “Raspberry Pi Reveals A Little About Their RP1 Peripheral”

Peggyboard Will Have You Climbing The Walls Repeatedly

When you can’t climb actual rocks all the time, what do you do to train and keep sharp? You go to a rock-climbing gym, naturally. But what do you do when it’s 2020 and your rock-climbing gym has shuttered for the foreseeable? You build the best darn rock-climbing wall possible, and you outfit it with an LED for every hold and write an app that lets you plan your route and repeat it later.

This is essentially a DIY version of something called a Moonboard, which, aside from being expensive, was quickly going out of stock back in 2020. [Pegor] started the Peggyboard by building a climbing woody, which is a legendary home climbing wall built by a legendary climber about 20 years ago.

The Peggyboard is Raspberry Pi-powered and has a rather nice app going for it, which [Pegor] has kindly decided to open source.

On the initial screen, the user can select a route and assign the holds as either starting holds, foot holds, hand holds, or finishing holds, each with a different color LED. Another screen lets the user choose a previously-saved route, then apply it to the Peggyboard’s LEDs with the light bulb icon.

Don’t know where to get started building your own climbing wall? You can 3D print climbing holds, you know.

2023 Halloween Hackfest: Ouija Robot Is Even Creepier Than The Real Thing

When you’re a kid, nothing says spooky like turning off the lights and bringing out the Ouija board. For decades, this mystifying oracle has purported to channel the dead by spelling out messages using a board with numbers, letters, yes/no, and a heart-shaped windowed bit of plastic called a planchette.

While the action of a standard Ouija board owes itself to something called the ideomotor phenomenon, this motorized Ouija robot by [Ronald McCollum] is powered by tweets.

That’s right, the mannequin hand uses the planchette to spell out the tweets with a rather crisp snap of the wrist. [Ronald] impressively coded all the positions by hand, with each letter being comprised of both a hand position and planchette position.

This project utilizes both an Adafruit Crickit board and a Raspberry Pi, mostly because [Ronald] wanted to use the Crickit for something, and added the Pi to spell out the tweets on the display in real time. Check it out in action after the break, and stick around for a bonus video of the numbers being laser-cut.

Speaking of creepy motion, here’s a refrigerator clock that uses those colorful alphanumeric magnets.

Continue reading “2023 Halloween Hackfest: Ouija Robot Is Even Creepier Than The Real Thing”

RP2040 picture on left by Phiarc, CC BY-SA 4.0, via Wikimedia

Kaluma Puts JavaScript On The RP2040

With a simple firmware update, Kaluma puts a lightweight JavaScript runtime on the Raspberry Pi Pico (which uses the RP2040 microcontroller), providing handy modules for file systems, graphics, networking, and more. Code for a simple LED blink can then look like:

// index.js
const led = 25;
pinMode(led, OUTPUT);
setInterval(() => {
digitalToggle(led);
}, 1000);

Development can then be done using tools that are very familiar to JavaScript developers, such as npm and flashing new code to a USB-connected Pico with the (Node.js-based) Kaluma command-line interface. Take a look at the GitHub repository for the project, or browse some of the projects made with Kaluma.

Much like with MicroPython, there’s value to be had in putting implementations of high-level languages on microcontrollers. Each new language opens embedded programming to a whole new group of coders. But it’s not just languages making their way to the RP2040. Wonderful projects such as emulating the ZX Spectrum on an RP2040 also happen.

Thanks to [Shri Hari Ram] for the tip!

Overclocking Raspberry Pi 5’s SoC To 3 GHz And 1 GHz GPU

Overclocking computer systems is a fun way to extract some free performance, or at least see how far you can push the hardware before you run into practical limitations. The newly released Raspberry Pi 5 with BCM2712 SoC is no exception here, with Tom’s Hardware having a go at seeing how far both the CPU and GPU in the SoC can be pushed. The BCM2712’s quad Cortex-A76 CPU is normally clocked at 2.4 GHz and the VideoCore VII GPU at 800 MHz. By modifying some settings in the /boot/config.txt configuration file these values can be adjusted.

In order to verify that an overclock was stable, the Stressberry application was used, which fully loads the CPU cores. Here something like a combination of stress-ng and glxgears could also be used, to stress both the CPU and GPU. With the official actively cooled heatsink the CPU reached a temperature of 74°C with a whole board power usage of about 10 Watts. At idle this dropped to 3 Watts at 46°C. At these speeds, the multiple Raspberry Pi 5 units OCed by Tom’s Hardware were mostly stable, though one of the team’s boards experienced a few crashes. This suggests that this level of OCing could still be subject to luck of the draw, and long-term stability would have to be investigated as well.

As for the practical use cases of OCing your Raspberry Pi 5, benchmarks showed a marked uplift in compression and Sysbench benchmark scores, but OCing the GPU had no real positive impact on YouTube or 3D performance, leading even to a massive increase in dropped frames with video playback. This probably means that increasing the CPU clock may be beneficial, but OCing the GPU could be futile without also OCing the RAM frequency, if at all possible.

Realistically, the Raspberry Pi SoCs never were speed monsters, with even the Raspberry Pi 4B’s SoC being beaten handily in 2020 by a budget dual-core Intel CPU.  The current Intel Alder-Lake-N-based N100 SoC has a 6 Watt TDP and boosts up to 3.4 GHz while its Xe-LP-based iGPU (with AV1 decoding support) makes for a decent gaming experience within a ~16 Watt power envelope. Clearly, any OCing of the Raspberry Pi boards is more for the challenge of it, but then so is running the latest Intel CPU at 10 GHz with liquid nitrogen cooling.