A button that stopped working has probably led to more than a few smashed remotes over the years. Fortunately [pescado99] has shared a beautifully simple cure for dead or dying remote buttons: graphite dry lubricant.
Most remotes operate by pushing a conductive carbon coating on the back of the button onto a pair of contacts on the PCB. Unfortunately, that conductive coating can wear off, leaving you with a dead or dying button. The video after the break [pescado99] demonstrates how to use a cotton swab to apply powdered graphite to the rear of the buttons to make them conductive again. A soft pencil can also be used, but the graphite works better.
In a world of digital monotony, the Avo DA14 digital multimeter, with its vintage nixie tube charm, is a refreshing gem. Recently refurbished by [Thomas Scherrer], this multimeter video review is a blend of nostalgia and tech savvy. The DA14 not only has style, but substance — delivering resistance, current, and voltage measurements that make you wonder why more multimeters didn’t stick with this stylish glow.
As [Thomas] starts by powering up the DA14, we were instantly captivated as the Nixie tubes illuminate in their retro orange. With each twist of the dial, he demonstrates just how intuitive the multimeter is to operate, walking us viewers through each function while giving some extra love to its calibration process—a neat front-panel potentiometer that requires just a touch of finesse to get perfect readings.
But, as with all good tinkering tales, things go downhill when issues with analog inputs and the display pop up. A teardown reveals a beautifully complex inner assembly of transformers, rectifiers, and circuit boards, giving the DA14 its impressive yet fragile structure. When the critical defective display chip is found, hopes for a full repair dim. His story ends without a revival, but if you want to see a similar attempt that did get resurrected – albeit without those nixie digits – take a look at this LCD transplant we covered previously.
The video begins with the removal of the round CRT tube. Once it’s extracted from the set, it’s placed in a round garbage can which serves as a handy work stand for the unique device. It’s all delicate work as it’s very easy to damage a picture tube, particularly an old one. Removing the discoloration is quite a job—the problem is caused by adhesive holding the front layer safety glass on, which has going bad over the years. It requires lots of heat to remove. In doing this repair, [bandersentv] notes he’s also giving up the safety of the original extra glass layer on the front of the tube. Worth noting if you’re worried about a given tube’s integrity.
Of course, cleaning the tube is just part of the job. [bandersentv] then gave us a second video in which he returns the tube to its original home and gets the TV back up and running. The quality is surprisingly good given what poor shape the tube was in to begin with.
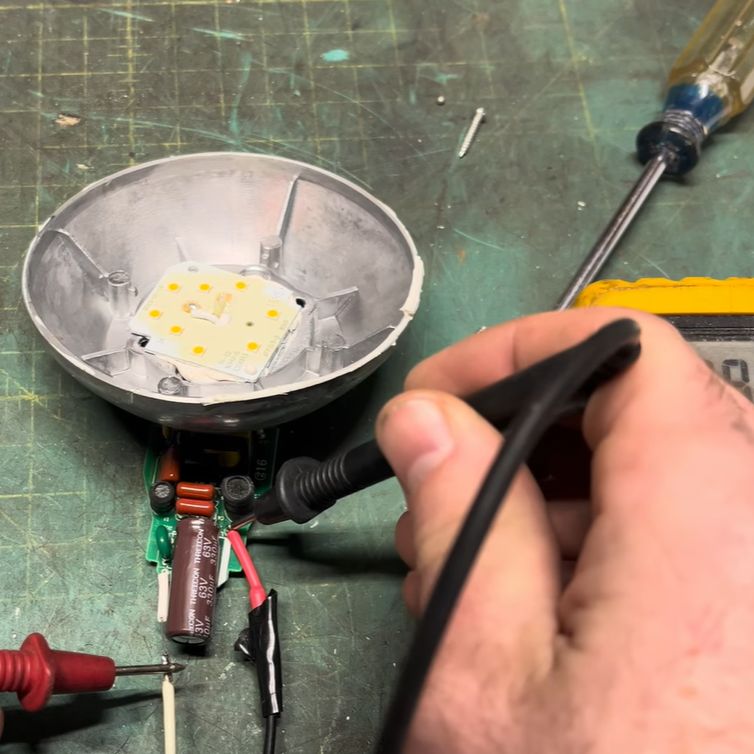
Checking the voltages on a dead LED lightbulb. Best done by a professional, obviously. (Credit: The Doubtful Technician, YouTube)
We have probably all seen the marketing blurbs on packaging and elsewhere promoting the amazing lifespan of LED lighting solutions. Theoretically you should be able to install a LED bulb in a fixture that used to hold that incandescent lightbulb which had to be replaced annually and have it last a decade or longer. Yet we seem to replace these LED bulbs much more often than that, with them suffering a range of issues. To get to the root cause of this, [The Doubtful Technician] decided to perform an autopsy on a couple of dead lightbulbs which he got from a variety of sources and brands.
One lamp is an Amazon-bought one from a seller who seems to have vanished, but was promised over 3 years of constant use. Other than the fun of blinding of oneself while testing, this one was easy to diagnose, with a dodgy solder joint on a resistor in a MELF package. The next one from Lowes was very dim, and required popping open with some gentle force, which revealed as likely culprit a shorted SMD resistor. Finally a more substantial (i.e. heavier) bulb was tested which had survived about 7 years in the basement until it and its siblings began to suddenly die. Some might consider this the normal lifespan, but what really failed in them?
The electronics in this last bulb were the most impressive, with a full switch mode power supply (SMPS) that appears to have suffered a failure. Ultimately the pattern with these three bulbs was that while the LEDs themselves were still fine, it were things like the soldering joints and singular components on the LED driver PCB that had failed. Without an easy way to repair these issues, and with merely opening the average LED lightbulb being rather destructive, this seems like another area where what should be easy repairs are in fact not, and more e-waste is created.
Back in the summer our eye was caught by [Jazzy Jane]’s new signal generator, or perhaps we should say her new-to-her signal generator. It’s an Advance E1 from around 1950, and it was particularly interesting from here because it matches the model on the shelf above this bench. She’s back with a new video on the E1, allowing us a further look inside it as she replaces a dead capacitor, gets its audio oscillator working, and upgrades its sockets.
Treating us to a further peek inside the unit, first up is a leaky capacitor. Then a knotty question for old tech enthusiasts, to upgrade or not? The ancient co-ax connectors are out of place on a modern bench, so does originality matter enough to give it a set of BNC sockets? We’d tend to agree; just because we have some adapters for the unit here doesn’t mean it’s convenient. Following on from that is a period variable frequency audio mod which has failed, so out that comes and a little fault-finding is required to get the wiring of the audio transformer.
These instruments are not by any means compact, but they do have the advantage of being exceptionally well-built and above all cheap. We hope readers appreciate videos like the one below the break, and that you’re encouraged not to be scared of diving in to older items like this one to fix them. Meanwhile the first installment is here.
Over the years, Apple has gone all-in on parts pairing. Virtually every component in an iPhone and iPad has a unique ID that’s kept in a big database over at Apple, which limits replacement parts to only those which have their pairing with the host system officially sanctified by Apple. With iOS 18 there seems to be somewhat of a change in how difficult getting a pairing approved, in the form of Apple’s new Repair Assistant. According to early responses by [iFixit] and in a video by [Hugh Jeffreys] the experience is ‘promising but flawed’.
As noted in the official Apple support page, the Repair Assistant is limited to the iPhone 15+, iPad Pro (M4) and iPad Air (M2), which still leaves many devices unable to make use of this feature. For the lucky few, however, this theoretically means that you can forego having to contact Apple directly to approve new parts. Instead the assistant will boot into its own environment, perform the pairing and calibration and allow you to go on your merry way with (theoretically) all functionality fully accessible.
An unlikely theatre for an act in the right-to-repair saga came last year in the form of McDonalds restaurants, whose McFlurry ice cream machines are prone to breakdown. The manufacturer had locked them down, and a franchisee with a broken machine had no option but to call them for an expensive repair job. iFixit and Public Knowledge challenged this with a request for a DMCA exemption from the Copyright Office, and now news emerges that this has been granted.
The exemption in question isn’t specific to McDonalds, instead it applies to retail food preparation equipment in general, which includes ice-cream machines. We’re guessing that franchisees won’t be breaking out the screwdrivers either, instead it’s likely to lower significantly the cost of a service contract for them and any other food industry operators hit with the same problem. Meanwhile any hackers who’ve picked up an old machine can now fix it themselves without breaking the law, and maybe the chances of your local Mickey D’s having no McFlurries have gone down.
This story has featured more than once on these pages, so catch up here, and here.


![A stack of Activation Locked MacBooks destined for the shredder in refurbisher [John Bumstead]’s workshop.](https://hackaday.com/wp-content/uploads/2024/10/locked_macbooks_3x2_john_bumstead.jpg?w=600&h=450)


