The Repair And Refurbishment Of Silicone Keyboards

There are a lot of retrocomputers out there sitting in garages and attics, and most of them need work. After thirty or forty years, you’re looking at a lot of corrosion, leaking caps, and general wear and tear. When it comes to extreme refurbishment, we haven’t seen anyone better than [Drygol], and this time he’s back with an exceptional example of how far repair and refurbishment can go. He’s repairing the silicone keyboard of a Commodore 116 using some very interesting techniques, and something that opens up the door to anyone building their own silicone keypad.

This project comes from from a member of a demoscene group that found an old C116 that needed a lot of work. The C116 shipped with a silicone membrane keyboard instead of the mechanical keyswitches of the C64 and other, higher-end computers. Unfortunately, this silicone keypad had a few keys ripped out of it. No one, as far as we can tell, has ever figured out how to make these silicone keypads from scratch, but [Drygol] did come up with a way to replace the ripped and missing keys. The process starts with making a silicone mold of the existing keyboard, then casting silicone into the negative of that mold. After a few attempts , [Drygol] had a custom silicone button that matched the shape and color of the original C116 keyboard. The only thing left to do was to attach tiny conductive carbon pads to the bottom of the newly cast buttons and fit them into the existing keyboard.

This is an interesting refurbishment, because there are a lot of vintage computers that used silicone keyboards in the place of mechanical keyswitches. The Speccy, The Commodore TED machines, and a lot of vintage calculators all used silicone keyboards. Until now, no one has figured out how to make DIY silicone keypads, and repairing silicone was out of the question. [Drygol]’s attempt isn’t perfect — it needs key labels, but screen or pad printing will take care of that — but it’s the best we’ve seen yet and opens the doors to a lot of interesting projects in the world of vintage computer repair.

Repairing A Vintage Sharp MemoWriter

As you may know, we’re rather big fans of building things here at Hackaday. But we’re also quite partial to repairing things which might otherwise end up in a landfill. Especially when those things happen to be interesting pieces of vintage hardware. So the work [ekriirke] put in to get this early 1980’s era Sharp MemoWriter EL-7000 back up and running is definitely right up our alley.

There were a number of issues with the MemoWriter that needed addressing before all was said and done, but none more serious than the NiCd batteries popping inside the case. Battery leakage is a failure mode that most of us have probably seen more than a few times, but it never makes it any less painful to see that green corrosion spreading over the internals like a virus. When [ekriirke] cracked open this gadget he was greeted with a particularly bad case, with a large chunk of the PCB traces eaten away.

The corrosion was removed with oxalic acid, which dropped the nastiness factor considerably, but didn’t do much to get the calculator back in working order. For that, [ekriirke] reconnected each damaged trace using a piece of wire; he even followed the original traces as closely as possible so the final result looked a little neater. Once everything was electrically solid again, he covered the whole repair with a layer of nail polish to adhere the wires and add a protective coating. Nail polish might not have been our first choice for a sealer, and likely not that particular shade even if it was, but sometimes you’ve got to use what you have on hand.

After years of disuse the ribbon cartridge was predictably dry, so [ekriirke] rejuvenated it with the fluid from a permanent marker applied to the internal sponge. He also made some modifications to the battery compartment so he could insert rechargeable Ni-MH AA batteries rather than building a dedicated pack. There’s no battery door in the enclosure, so removing the batteries will require opening the calculator up, but at least he has the ability to remove the batteries before putting the device in storage. Should help avoid a repeat of what happened the first time.

If you’re a fan of a good restoration, we’ve got plenty to keep you entertained. From bringing a destroyed Atari back from the dead to giving some cherished children’s toys a new lease on life, fixing old stuff can be just as engrossing as building it from scratch.

Continue reading “Repairing A Vintage Sharp MemoWriter”

A Steady Hand Makes This Chip Work Again

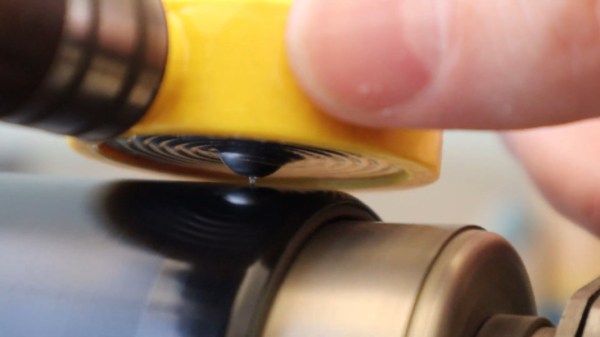
What do you do when you’re working with some vintage ICs and one of the tiny legs pops off? That’s what happened to [Kotomi] when working with an old Super Nintendo. A single lead for the sound chip just snapped off, leaving [Kotomi] one pin short of a working system (the Google Translatrix). This is something that can be fixed, provided you have a steady hand and a rotary tool that’s spinning at thousands of RPM.

Fixing this problem relies on a little bit of knowledge of how integrated circuits are built. There’s a small square of silicon in there, but this tiny die is bonded to a metal leadframe, which looks like the ribcage of a robotic centipede. This leadframe is covered in epoxy, the pins are bent down, and you have an IC. Removing just a tiny bit of epoxy grants access to the leadframe which you can then solder to. Don’t breathe the repair, it’s not pretty, but it does work.

While this technique makes use of a Dremel to break into the chewy nougat center of a vintage chip, and in some ways this could be called decapsulation, it really isn’t. We’ve seen people drop acid to get to the center of a chip and a really hot torch will get to the middle of a ceramic chip, but this technique is just accessing the lead frame of the IC. All ICs have a stamped (or photoetched) metal frame to which the silicone die is bonded. Running a Dremel against some epoxy doesn’t access the silicon, but it does grant access to the signals coming off the chip.

Our Right To Repair Depends On A Minimally Viable Laptop

It’s never been harder to repair your electronics. When the keyboard in your shiny new MacBook dies, you’ll have to send it to a Genius. When the battery in your iPhone dies, you’ll have to break out the pentalobe screwdrivers. Your technology does not respect your freedom, and this is true all the way down to the source code: the Library of Congress is thankfully chipping away at the DMCA in an effort that serves the Right to Repair movement, but still problems remain.

The ability — or rather, right — to repair will inevitably mean using electronics longer, and keeping them out of the garbage. That’s less e-waste, but it’s also older, potentially slower and less powerful portable workstations. This is the question: how long should you keep your electronics running? When do you start getting into the false economy of repairing something just because you can? What is the minimally viable laptop?

Continue reading “Our Right To Repair Depends On A Minimally Viable Laptop”

The Vedolyzer Was High Tech Repair Gear For 1939

There’s an old joke that all you need to fix TVs is a cheater, a heater, and a meter. If you don’t remember, a cheater was a cord to override the interlock on TVs so you could turn them on with the back removed. Of course, in real life, pro repair techs always had better equipment. In 1939 that might have meant the Supreme Vedolyzer which combined a meter, a ‘scope, and a wavemeter all in one device. [Mr Carlson] acquired one that was in fair shape and made a few videos (see below) of the teardown and restoration.

[Mr Carlson] wasn’t restoring this as an art project, by the way. He plans on using it, so he was less concerned with authenticity and more worried about usability. That led him to do things like remove the input jacks and replace them with BNCs. The video series is a bit of a time investment. Part one is about 82 minutes long! But if you are interested in old gear, this is a chance to peer inside an unusual specimen.

Continue reading “The Vedolyzer Was High Tech Repair Gear For 1939”

There Are 200 Electronic Kits In That Box

If you grew up in the latter part of the 20th century, you didn’t have the Internet we have today — or maybe not at all. What you did have, though, was Radio Shack within an hour’s drive. They sold consumer electronics, of course, but they also sold parts and kits. In addition to specific kits, they always had some versions of a universal kit where lots of components were mounted on a board and you could easily connect and disconnect them to build different things. [RetoSpector78] found a 200-in-1 kit at a thrift store that was exactly like the one he had as a kid and he shares it with us in the video below.

This was a particularly fancy model since it has a nice looking front panel with a few knobs and displays. The book shows you how to make the 200 different projects ranging from metronomes to rain detectors. The projects really fell into several categories. There were practical circuits like radio receivers, test equipment, and transmitters. Then there were games or circuits even the manual called “silly.” In addition, there were circuits to build simply to understand how they work, like flip flops or counters.

Continue reading “There Are 200 Electronic Kits In That Box”

Fail Of The Week: Electromigration Nearly Killed This Xerox Alto

The Living Computers museum in Seattle has a Xerox Alto, the machine famous for being the first to sport a mouse-based windowing graphical user interface. They received it in working condition and put it in their exhibit, but were dismayed when a year later it ceased to operate. Some detective work revealed that the power supply was failing to reach parts of the machine, and further investigation revealed an unlikely culprit. Electromigration had degraded the contacts between the supply pins and the backplane traces.

If electromigration is new to you, don’t feel ashamed, it was a new one to us too. It’s “the transport of material caused by the gradual movement of the ions in a conductor due to the momentum transfer between conducting electrons and diffusing metal atoms“, got it? Okay, that’s just a long way to say that passing a sufficiently high current through a conductor for a long time can physically move the metal of that conductor.

This one just doesn’t pop up very often. But in the case of the Alto, an under-specified power distribution system caused a lot of current to flow through too few solder joints. Those joints were left without enough metal to make a decent connection, so they failed.

The fix came with a set of sturdy busbars freshly soldered to the pins, but the interest in this piece comes more from the unusual phenomenon that caused it. That soldered joints can seemingly flow away defies belief. It’s still something most of us will never encounter, but like tales of ball lightning it’s one for the “Fancy that!” collection.

We’ve covered the Alto before, most notably [Ken Shirriff]’s work in restoring the Computer History Museum’s example.