LittleFS: The Emphasis Is On Little

It used to be that developing for microcontrollers was relatively relaxing. These days, even a cheap micro like the Raspberry Pi Pico has multiple cores, networking (for the W, at least), and file systems. Just like desktop computers. Sort of. I found out about the “sort of” part a few weeks ago when I decided to embark on a little historical project. I wanted a file system with a large file that emulates a disk drive. The Pico supports LittleFS, and I figured that would be the easy thing to do. Turns out the Little in LittleFS might be more literal than you think. On the plus side, I did manage to get things working, but it took a… well — dare I say hack? — to make it all work.

History

I’m an unabashed fan of the RCA 1802 CPU, which is, of course, distinctly retro. The problem is, I keep losing my old computers to moves, natural disasters, and whatnot. I’ve had several machines over the years, but they seem to be a favorite target of Murphy’s law for me. I do currently have a small piece of hardware called an Elf Membership Card (by [Lee Hart]), but it lacks fancy features like disk drives, and while it could be expanded, there’s something charming about its current small size. So that led me to repurpose a 6502 emulator for the KIM-1 to act like an 1802 instead. This is even less capable than the membership card, so it was sort of a toy. But I always thought I should upgrade the Arduino inside the emulator to a processor with more memory, and that’s what I did.

I started out with a Blackpill STM32F board and called the project 1802Black. The code is a little messy since it started out as [Oscar’s] KimUNO code, and then my updates layered with new updates. Also, for now, I shut off the hardware parts so it won’t use the KimUNO hardware — you only need a Blackpill (or a Pico, see below) and nothing else, although I may reenable the hardware integration later.

It wasn’t that hard to get it running with just more memory. Still, I wanted to run [Mike Riley’s] Elf/OS operating system and I also had a pair of Raspberry Pi Picos mocking me for not using them in a project yet. The chip has excellent Arduino board support. But what sealed the deal was noticing that you can partition the Pico’s flash drive to use some of it for your program and the rest for a file system. You can get other RP2040 dev boards with 16 MB of flash, which would let me have a nearly 15 MB “hard drive,” which would have been huge in the 1802’s day. Sounds simple. If it were, though, we wouldn’t be talking.
Continue reading “LittleFS: The Emphasis Is On Little” →

Life-Sized Rock’em Sock’em Robot Will Definitely Knock Your Block Off

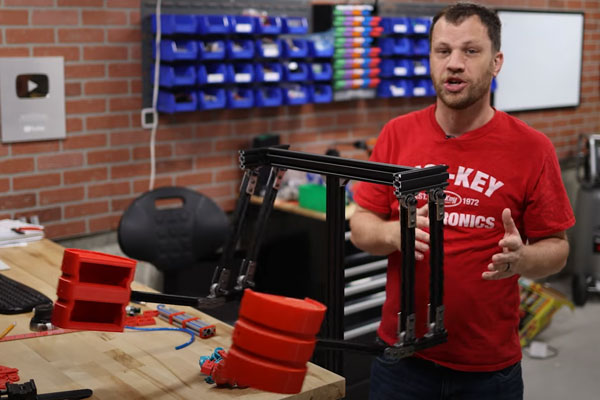
He knocked his block off! That’s what [Zach] of Byte Sized Engineering is planning on saying when he completes this Rock’em Sock’em Robots replica. The twist? His replica is going to be life-sized. The original game involved two players, each controlling a robot that could punch and block with two lever-driven arms. [Zach] is looking to scale that up to human sized, but with a few interesting technical additions.

This build might be a bit large to be driven by a small child, so for the punching action [Zach] is using a four-bar linkage moved by a pneumatic cylinder. After some modelling, he decided on a 16mm bore and 100mm stroke cylinder that should provide a good, quick pneumatic action, but without putting so much force in that it destroys the whole thing. The aim is to knock his block off, not to permanently remove his block and take someone else’s  block with it. This first video details his first prototype of the arm and the first set of tests, with later videos hopefully getting more into the mechanism and technical details of the build. We’d also like to see  (hint, hint [Zach]) some of the files and code to follow up with.

Bonus fact: as older Brits may tell you, the game was marketed for some time there under the name “Raving Bonkers“, with the robots renamed as Basher Bonker and Biffer Bonker.  The name didn’t catch on, and they changed back to the Rock’em Sock’em robots name.  Ask someone in the UK these days if they want to play raving bonkers with your basher, and you will probably get your own block knocked off. Video below the break. Continue reading “Life-Sized Rock’em Sock’em Robot Will Definitely Knock Your Block Off” →

Bus Sniffing The Model 5150 For Better Emulation

At the risk of stating the obvious, a PC is more than just its processor. And if you want to accurately emulate what’s going on inside the CPU, you’d do well to pay attention to the rest of the machine, as [GloriousCow] shows us by bus-sniffing the original IBM Model 5150.

A little background is perhaps in order. Earlier this year, [GloriousCow] revealed MartyPC, the cycle-accurate 8088 emulator written entirely in Rust. A cycle-accurate emulation of the original IBM PC is perhaps a bit overkill, unless of course you need to run something like Area 5150, a demo that stretches what’s possible with the original PC architecture but is notoriously finicky about what hardware it runs on.

Getting Area 5150 running on an emulator wasn’t enough for [GloriousCow], though, so a deep dive into exactly what’s happening on the bus of an original IBM Model 5150 was in order. After toying with and wisely dismissing several homebrew logic analyzer solutions, a DSLogic U3Pro32 logic analyzer was drafted into the project.

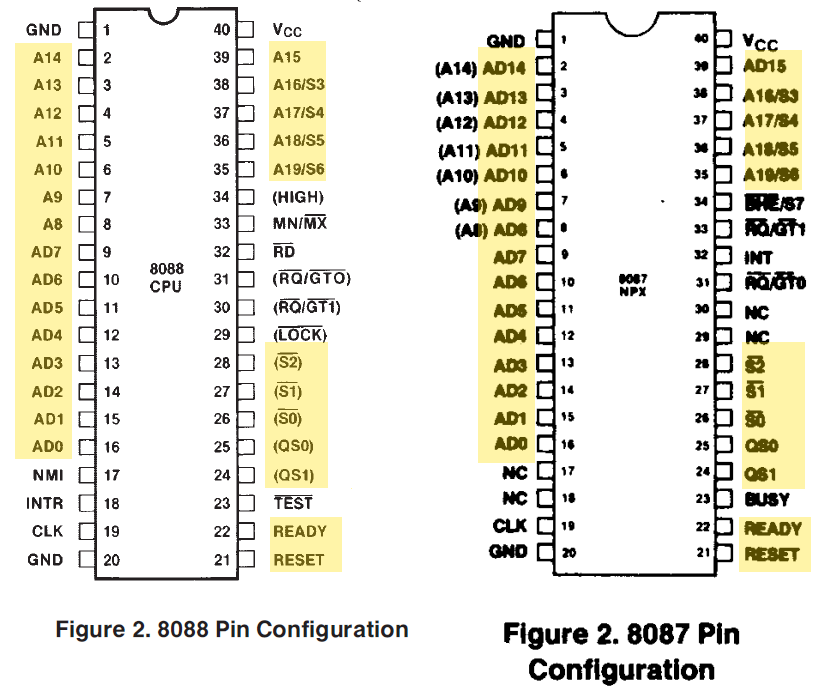
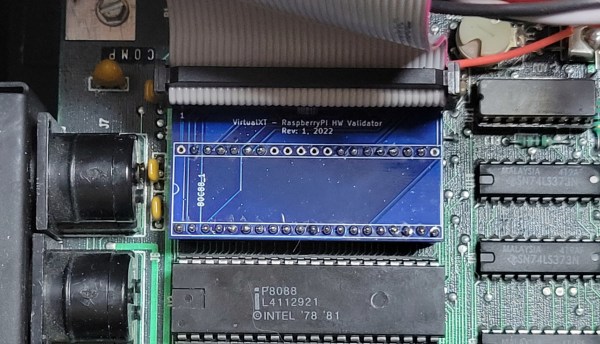
Fitting the probes for the 32-channel instrument could have been a problem except for the rarely populated socket for the 8087 floating-point coprocessor on the motherboard. A custom adapter gave access to most of the interesting lines, including address and data buses, while a few more signals, like the CGA sync lines, were tapped directly off the video card.

Capturing one second of operation yielded a whopping 1.48 GB CSV file, but a little massaging with Python trimmed the file considerably. That’s when the real fun began, strangely enough in Excel, which [GloriousCow] used as an ad hoc but quite effective visualization tool, thanks to the clever use of custom formatting. We especially like the column that shows low-to-high transitions as a square wave — going down the column, sure, but still really useful.

The whole thing is a powerful toolkit for exploring the action on the bus during the execution of Area 5150, only part of which [GloriousCow] has undertaken as yet. We’ll be eagerly awaiting the next steps on this one — maybe it’ll even help get the demo running as well as 8088MPH on a modded Book8088.

Computer Space Replica Is Up And Running

You never forget your first time — watching someone pour several quid’s worth of 10p pieces into a Space Invader machine in 1978, upsetting for a youngster who wanted to have a turn. We’re still waiting, but [Alston] has found an interesting way to get around those arcade video game hoggers by building a replica of Computer Space, the first commercial arcade video game.

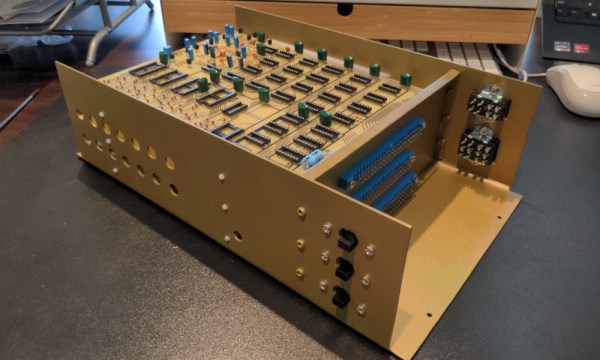
Released in 1971, the groundbreaking game was designed by gaming legends [Nolan Bushnell] and [Ted Dabney], and came in a striking curvy fiberglass case that was molded by a manufacturer of swimming pools. [Alston] hasn’t built the case yet, but he does have the electronics up and running.

The electronics of Computer Space are interesting, because there is no microprocessor in there. Instead, it is built from discrete components. [Nolan] had originally planned to use a mini computer called the Data General Nova 800. However, he realized that he could make it cheaper by building it out of discrete components. As [Nolan] described it in an oral history at the Smithsonian [PDF link], the idea came to him after a post-Thanksgiving dinner nap:

“Screw the minicomputer. Get rid of it. Do it all in hardware. Make the game out of this collection, just make it a simple state machine. And the minute that happened, it was like knife through butter. Not only did I get the cost down, but what was budgeted for $1,500 worth of minicomputer, the whole damn computer cost me less than $300 in glue parts. So, I knew that I had something.”

That decision makes it an interesting project to build a replica. Although you can emulate it on a modern computer easily (there is even a version that runs in CSS in the browser). [Alston] is going the hard route, building replica PCBs and using the same components where possible, helped by people who have documented it. So far, the boards are and running and displaying a grainy, pixelated image on a portable TV.

The next step is to take the replica electronics box he has built and make a cabinet to put it into. That’s a big project, and [Alston] is looking for someone with an original cabinet that he can examine and document.

Fixing A C64 With A Cheap $20 Oscilloscope

Modern computers are so fast and complex that we would seldom try and fix them on a component level with simple DIY tools. Working on an early 1980s computer is much easier by comparison, with the fastest signals often in the single-MHz range. [Sayaka] demonstrates this by using a cheap $20 oscilloscope to troubleshoot and repair a Commodore 64.

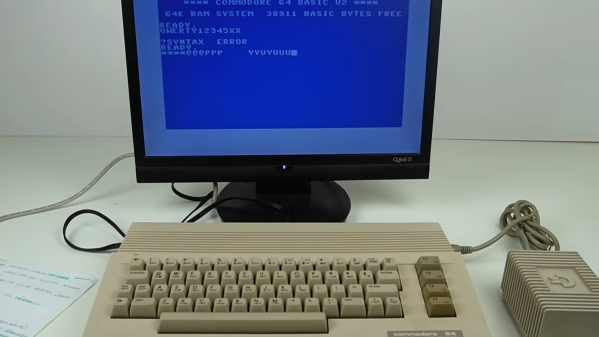
After powering it up for the first time, the C64 displays a BASIC prompt, but none of the keys seem to work. [Sayaka] did what good hackers do, and immediately disassembled it to try and figure out the problem, suspecting the CIA chip as a likely culprit.

[Sayaka] elected to purchase a cheap DS0138 oscilloscope kit to help troubleshoot the C64. It’s not the most capable thing, with a bandwidth of just 200 KHz, but it’s enough to do some work on an old retro machine. After probing around to check a number of signals, she noted that the CIA’s pins seemed to be very oxidized and suffering poor conductivity. All it took from there was a resolder job, and the computer was repaired.

We’ve seen other cheap scopes with altogether more impressive specs, too. Video after the break. Continue reading “Fixing A C64 With A Cheap $20 Oscilloscope” →

How To Chase The Beam With A Z80

The more accomplished 8-bit microcomputers of the late 1970s and early 1980s had a dedicated display chip, a CRT controller. This took care of all the jobs associated with driving a CRT display, generating the required timing and sequencing all the dots to make a raster. With a CRT controller on hand the CPU had plenty of time to do other work, but on some cheaper machines there was no CRT controller and the processor had to do all the work of assembling the display itself.

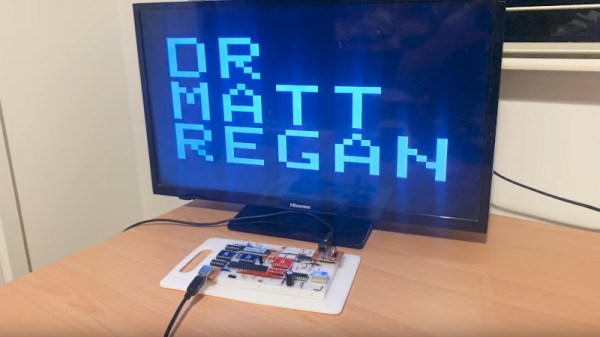
[Dr. Matt Regan] had a Sinclair ZX81 which relied on this technique, and he’s put up the first of what will become a series of videos offering a deep dive into this method of creating video. The key to its operation lies in very careful use of timing, with operations executed to keep a consistent number of clock cycles per dot on the display. He’s making a very low resolution version of the display in the first video, which he manages to do with only an EPROM and a couple of 74 logic chips alongside the Z80. We’re particularly impressed with the means of creating the sync pulses, using opcodes carefully chosen to do nothing of substance except setting a particular bit.

This method of assembling a display on such a relatively slow microprocessor has the drawback of no means of creating a grayscale, and of course it’s only available in glorious black and white. But it’s the system which gave a first experience of computing to millions, and for that we find the video fascinating. Take a look, below the break.

If this has caused you to yearn for all things Sinclair, read our tribute to the man himself.

Continue reading “How To Chase The Beam With A Z80” →

16 Kbit DRAM Gives Up Its Secrets

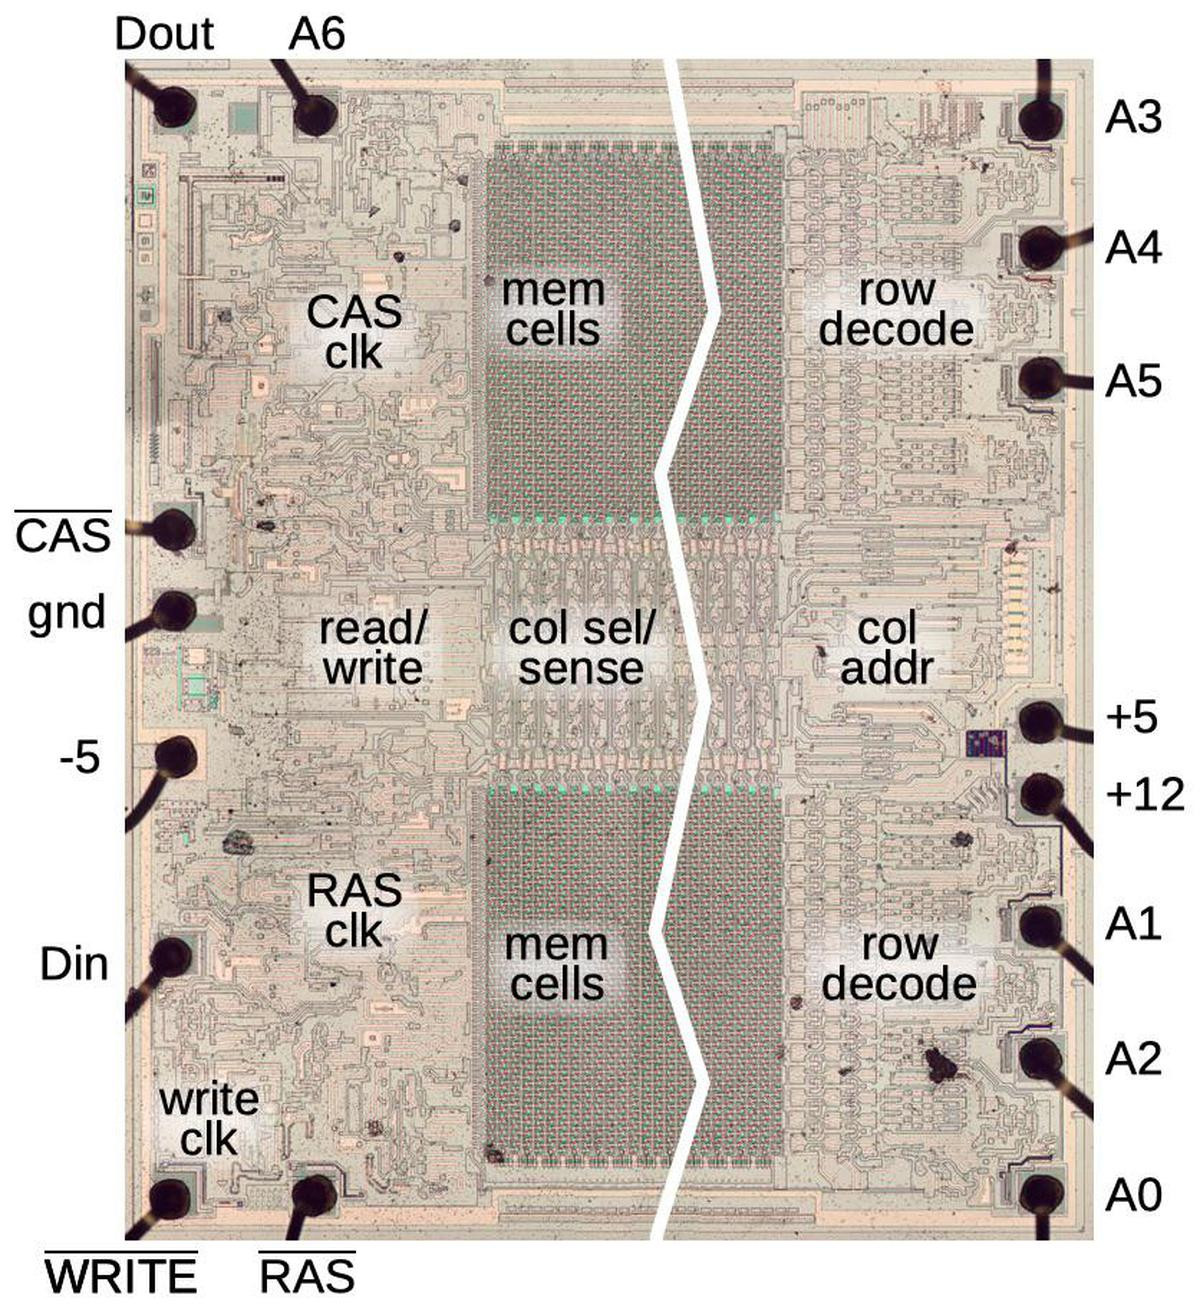
[Ken Shirriff] is looking inside chips again. This time, the subject is the MK4116 — a 16 Kbit DRAM chip. Even without a calculator, you know that’s a whopping 2 Kbytes, and while that doesn’t sound impressive, in the late 1970s, it was a modern miracle.

The chip showed up in computers ranging from the TRS-80 to the Xerox Alto and was even a mainstay of arcade video games. While [Ken] thought it would be a pretty predictable teardown, he found several surprises.

Static RAM chips use flip flops and retain their state as long as power is on. That’s convenient, but each flip flop takes multiple transistors, so there is a limit to how many bits you can put on a particular size chip. Dynamic RAM increases that limit because it is nothing more than a capacitor and a single transistor. This increases memory density, but the problem is that the capacitor doesn’t hold charge indefinitely. The computer or an associated circuit had to refresh the memory periodically to maintain the contents.

One of the key innovations for this chip was the use of multiplexed address lines so it could use a smaller package. Inside, two banks of capacitors store the bits, and, usually, a computer would use eight chips to store a byte. Of course, each memory bit is made to be as compact as possible. This chip is also made to be very low power when idle. The secret is that it doesn’t use load transistors but instead uses an active pull-up tied to the system clock. Another interesting feature is the sense amplifier, which has to measure the tiny noisy voltage from the capacitors.

You’ll see all this and more in [Ken’s] write-up. Chips from that era were relatively easy to take apart compared to today’s devices. Want to know how it’s done? [Ken] can tell you. He is well-known for doing a lot of cool stuff, with ICs and even old mainframe and space hardware.