diy-laser-scanner

Cheap DIY Laser Scanner Is Quite Impressive

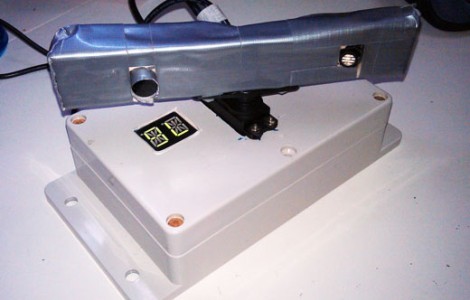
With the introduction of the Kinect, obtaining a 3D representation of a room or object became a much easier task than it had been in the past. If you lack the necessary cash for one however, you have to get creative. Both the techniques and technologies behind 3D scanning are somewhat complicated, though certainly still within reach as maker [Shikai Chen] shows us. (Google Translation)

He wanted to create 3D scanned images, but he didn’t have the resources to purchase a Kinect. Instead, he built his own scanner for about 1/6th the cost. Interestingly enough, the scanner resembles what you might imagine a very early Kinect prototype looked like, though it functions just a little bit differently than Microsoft’s creation. The scanner lacks any sort of IR emitter/camera combo, opting to use a laser and a USB VGA camera instead. While scanning, the laser shines across the target surface, and the reflected light is then picked up by the camera.

So how does this $25 DIY laser scanner measure up? Great, to be honest. Check out the video below to see how well his scanner works, and be sure to take a look through his second writeup (Google Translation) as well for more details on the project.

[via Seeedstudio]

[youtube=http://www.youtube.com/watch?v=jLZ-s9KRzG8&feature=player_embedded&w=470]

OpenPnP Working To Create An Affordable And Completely Open Pick And Place Machine

open-pick-and-place

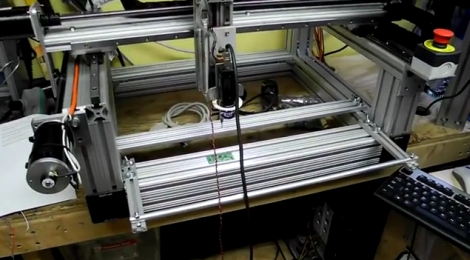
If you happen to do a lot of SMD work, a pick and place machine is an incredible time saver. The problem is that most automated pick and place solutions are well outside of the “small outfit” price range, let alone the budget of a hobbyist.

We have seen some great DIY pick and place implementations around here, though most are lacking professional features or the sort of documentation that would make it easy for others to replicate. The OpenPnP project is looking change things, with a completely open source hardware and software solution with a price target of under $1,000.

Things are already well under way, with plenty of details available in the project’s wiki. According to the development page, a prototype should go into construction in the near future, and development of the pick and place’s control software is coming along nicely.

While things are looking great for the OpenPnP project, they can always use some help to keep things moving. Be sure to check out the project page if you are interested in lending a hand.

To see some of the progress being made, stick around to see a short demo video of the control software and camera in action.

[via Make]

Continue reading “OpenPnP Working To Create An Affordable And Completely Open Pick And Place Machine”

Pros And Cons Of Replacing Tool Batteries With Lithium Polymer

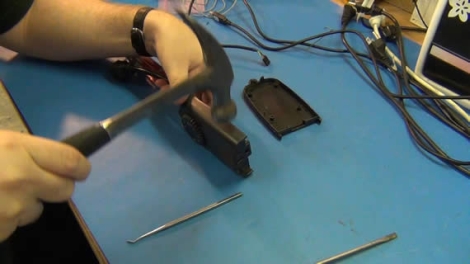
[HammyDude] was tired of buying replacement batteries for his power tools. He had some Lithium Polymer batteries on hand and decided to take one of his dead drills and swap out the dead power pack.

The orange battery pack you see above has a deans connector on it for use with RC vehicles. By opening up the drill housing, [HammyDude] was able to add the mating deans connector. Now the replacement easily plugs into the drill, and it even fits inside the handle body.

This battery is made up of several cells, and an inexpensive charger is capable of topping off each individually for a balanced charge. In the video after the break [HammyDude] points out that the Makita charger applies voltage to all of the cells in series. It’s incapable of balance charging so when one cell dies the battery is toast. We’ve encountered this problem with Makita tools before.

One drawback to take note of in the end of the video: this replacement doesn’t have any low voltage cut-off. Running this battery pack down too low will permanently damage it. There must be a simple circuit that could be added as a safety measure. If you know of one, drop us a tip.

Continue reading “Pros And Cons Of Replacing Tool Batteries With Lithium Polymer”

Etching Your Own PCBs

When [Adr1an] wrote in to share a link to his PCB etching tutorial he mentioned that he knew we had already covered a ton of these guides. He’s absolutely right, not only have we featured a great number of them, but we also wrote our own quite a while ago. But that doesn’t mean we ignore them when they come in on the tips line. In fact, we read all of them that have something to offer and are pleased to feature the ones that are well presented… like this one!

[Adr1an] went all out with his writeup. He not only covers all of the elements that go into this, but discusses where to purchase them and his thoughts on how he arrived at the choice. He’s using the toner transfer method and prefers Brother branded toner for its coverage and resistance to over-etching. He prints on HP Everday Photopaper, then uses a laminator to transfer to the copper clad board. For this guide he used 2oz copper but prefers 1oz copper as it etches faster. His etchant of choice is Ferric Chloride, which can be ordered as a dry powder. He uses the direct etch method of loading etchant into a sponge an applying that to the board.

The board he makes in the guide looks great, and it only took him 28 minutes!

Toaster Oven Reflow Control Without Modifying The Oven

[Eberhard] wanted his own reflow oven but didn’t really want to mess around with the internals that control the heating element. He put his microcontroller programming experience to work and came up with an add-on module that controls the oven by switching the mains power.

The image above shows a board in the midst of the reflow process. If you’re not familiar, solder paste usually comes with a recommended heat curve for properly melting the slurry. [Eberhard] managed to fit three of these temperature profiles into his firmware.

The ATtiny45 which makes up the controller samples oven temperature via the thermistor seen next to the board. A PID algorithm is used to calculate when to switch mains power on and off via a relay. One button and one LED make up the controller’s user interface for scrolling through the three preprogrammed temperature profiles.

It looks like it works great, see for yourself in the clip after the break.

Continue reading “Toaster Oven Reflow Control Without Modifying The Oven”

Gridrunner: A Custom Part For Measuring In Eagle CAD

[Koogar] came up with a useful tool for checking the measurements of your layouts in Eagle CAD. He calls it the Gridrunner; a custom part that adds a 200mm ruler to your design. Tick marks are in 1/10th of a millimeter increments for great accuracy when used with the zoom feature of Eagle. Once you’ve got the layout just right, delete the ruler from your design and export it for fabrication. [Koogar] does mention that the beta version of Eagle 6 has a new measuring tool, but he still thinks the Gridrunner offers some things that the built-in tool doesn’t. See just how handy it is in the video after the break. The measuring starts about 1:40 into it.

We found it interesting that [Koogar] is using Eagle for quite a bit more than PCB design. We’ve used it for laying out a drilling template for face plates before, but he’s going far beyond that. He uses the library editor to recreate the parts of his CNC machine which he says are then really easy to align. From there, he exports the CAM files for mounting brackets. Do you use Eagle for something other than PCB design? Let us know about it by leaving a comment. Continue reading “Gridrunner: A Custom Part For Measuring In Eagle CAD”

Building A Heat Sealer For Anti-static Bags

[Raphaël Assénat] needed anti-static bags for some boards he is selling. He had a lot of leftovers on hand (presumably from the components he ordered to assemble these boards) and wanted to reuse them. Instead of buying a heat sealer he built his own to cut them down to size.

His build starts with a transformer to drop mains voltage down to 9 Volts. From there, you can see the two power resistors used in series to limit the current. Without these, the wire would get way too hot. Just in front of those resistors is a momentary push switch which cuts the power by default. Here we can see that [Raphaël] is using a wood block to press the bag against the wire as it heats up.

The wire itself is a piece of straightened tension spring. Apparently this spring material is a poor conductor, which is why it gets hot enough to melt the plastic bag when you run current through it.