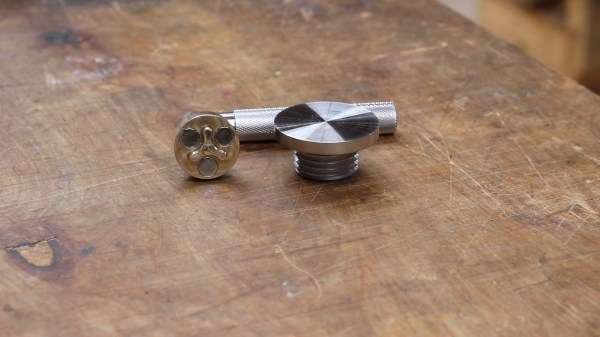
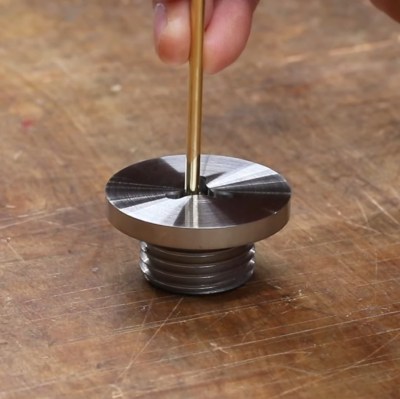
[Ruvin Kub] likes magnets, a lot. Most of his projects feature some sort of magnet and his PC board agitation bath is no exception. You can see a video about the device, below. We’ll admit our Russian is pretty rusty, but if you ask YouTube nicely it will translate the Russian subtitles into whatever language you like.
One of the things we liked about the video was that he uses hydrogen peroxide, citric acid, and salt as an etchant. We’ve seen the same mix with vinegar or muriatic acid instead of citric acid. We aren’t sure what the actual translation is about why he doesn’t like ferric chloride, but YouTube says, “she’s too gloomy for my light souls.”
One aspect of working for Hackaday comes in our regular need to take good quality photographs for publication. I have a semi-decent camera that turns my inept pointing and shooting into passably good images, but sometimes the easiest and quickest way to capture something is to pull out my mobile phone.
It’s a risky step because phone camera modules and lenses are tiny compared to their higher quality cousins, and sometimes the picture that looks good on the phone screen can look awful in a web browser. You quickly learn never to zoom on a mobile phone camera because it’s inevitably a digital zoom that simply delivers grainy interpolated pictures.
That’s not to say that the zoom can’t be useful. Recently I had some unexpected inspiration when using a smartphone camera as a magnifier to read the writing on a chip. I don’t need an archival copy of the image… I just needed a quick magnifying tool. Have I been carrying a capable magnifier for soldering in my pocket or handbag for years without realising it? I decided to give it a try and it worked okay with a few caveats. While I have seen optics turn these cameras into pretty good microscopes, my setup added nothing more than a phone tripod, and will get you by in a pinch.
Creating your own PC board is a rite of passage for many. These days, though, you can order super inexpensive boards and have them in very little time, so it doesn’t always make sense to build your own. Still, some people like the challenge, and others don’t want to wait even a few days. Probably everyone has dreamed of a 3D printer-like machine that would just crank out beautiful PCBs. The Voltera V-One isn’t quite at that level of sophistication, but it isn’t too far from it. [Great Scott] shows us how he built two different boards using the system in the video below. While the results were impressive, you can also see that there are several limitations, especially if you are not designing your board with the machine in mind.
One thing that is obvious is that the machine does need your help. In addition to aligning holes, you’ll need to install tiny rivets for vias and slightly less tiny rivets for through-hole components. The last time we looked at the machine, it didn’t do holes at all, but [Scott] shows the drill attachment which allows the machine to produce vias and support leaded components.
In 2018, when KiCad Version 5 modernized the venerable 4.X series, it helped push KiCad to become the stable and productive member of the open source EDA landscape that we know today. It has supported users through board designs both simple and complex, and like a tool whose handle is worn into a perfect grip, it has become familiar and comfortable. For those KiCad users that don’t live on the bleeding edge with nightly builds it may not be obvious that the time of version 6 is nearly upon us, but as we start 2021 it rapidly approaches. Earlier this month [Peter Dalmaris] published a preview of the changes coming version 6 and we have to admit, this is shaping up to be a very substantial release.
Don’t be mistaken, this blog post may be a preview of new KiCad features but the post itself is extensive in its coverage. We haven’t spent time playing with this release yet so we can’t vouch for completeness, but with a printed length of nearly 100 pages it’s hard to imagine [Peter] left anything out! We skimmed through the post to extract a few choice morsels for reproduction here, but obviously take a look at the source if you’re as excited as we are. Continue reading “Feeling The KiCad 6 Electricity”→
Surface mount devices were once upon a time considered a huge imposition for the electronics hobbyist. Tiny, difficult to solder by hand, and barely even labelled, many wondered whether the pastime was about to hit a brick wall entirely. Instead, enterprising hackers and makers set about learning new tricks and techniques to work with the technology, and we’ve never looked back since. [Seon] is one such enthusiast, and has built a useful turntable for making manually picking and placing boards easier. (Video, embedded below.)
The design is something [Seon] has refined gradually over time, having built two initial versions of the turntable before finally feeling ready to do a wider public release with version 3. It consists of a rotating caddy that has radial slots that hold all the tiny SMD parts, that can be labelled for easy parts identification. There’s also an acrylic window that ensures only one segment of the caddy is open at a time, to avoid accidentally dropping similar, tiny looking parts into adjacent slots – a big improvement over the first design. There’s then a smaller rotating central pad upon which a PCB can be placed, ready to receive parts.
Older industrial equipment is often a great option if you’re on a budget, and you might even be able to add some premium features yourself. [Brett] from [Theoretically Practical] has done with his old MIG welder, adding premium control features with the help of an Arduino.
The main features [Brett] were after is pre-flow, post-flow, and a spot welding timer. Pre-flow starts the flow of shielding gas a moment before energizing the filler wire, while post-flow keeps the gas going after the weld is complete. This reduces the chances of oxygen contaminating the welds. A spot welding timer automatically limits welding time, enabling consistent and repeatable spot welds.
The Miller S-22A wire feeder can have these features, but it requires an expensive and difficult to find control unit. All it does is time the activation of the relays that control the gas flow, power, and wire feeder, so [Brett] decided to use an Arduino instead. The welders control circuit runs at 24V, so an optoisolator receives the trigger signal, and relays are used for outputs. Potentiometers were added to the original control panel, and all the wiring was neatly fitted behind it. The upgrade worked perfectly and allowed [Brett] to increase the quality of his welds. See the video after the break for the full details.
Inverter welders can be picked up for ridiculously cheap prices, if you’re willing to live with the trade-offs. We’ve also seen some other DIY welder upgrades, on small and large machines.
Draining a battery is easy. Just put a load across the terminals, maybe an incandescent bulb or a beefy power resistor, and wait. What’s quite a bit trickier is doing so safely. Put too large a load on, or leave it connected for longer than necessary, and you can end up doing damage to the cell. Not convinced he’d always remember to pull the battery out of his jury-rigged discharger at the opportune moment, [Jasper Sikken] decided to come up with a simple tool that could automatically handle the process with the cold and calculating precision of silicon.
V4 used the protection module from a pouch battery.
At a glance we can see the major components you’d expect in a discharger: a fairly simple PCB, four ceramic power resistors, a holder for a single 18650 cell, and a rocker switch to connect it all together. But wait, what’s that a TP4056 charging module doing in there?
While its presence technically makes this device a battery charger, [Jasper] is actually using it for the onboard protection IC. With the charging module between the cell and the power resistors, it will cut the connection when the voltage drops to 2.4 V. Oh yeah, and it can charge the battery back up if you connect up a USB cable.
[Jasper] says his little tool works great, with the resistor array putting just enough load on the battery to pull it down quickly without getting so hot that they’re dangerous to have exposed. He estimates the BOM for this gadget runs around $2 USD, and is considering offering it as a kit on Tindie in the near future.
If you’re looking for something a bit more advanced, [Jasper] built a programmable load a few years back that can discharge batteries and test power supplies all while logging the data to your computer for later analysis.