Digital Oscilloscope Does Its Best Analog Impression

Do you ever find yourself yearning for the days before digital storage oscilloscopes (DSOs)? Where even the basic scopes commanded four figures, and came in a bench-dominating form factor? No, of course you don’t. The DSO is a wonder of modern technology: for a couple hundred bucks you can have capabilities that previously would have been outside the reach of hobbyists, all in a package that’s small enough to fit on even the most cramped workbenches.

Which is why the good folks of the EEVblog forums are so confused about the OWON AS101, a modern digital oscilloscope that’s designed to look and operate like the analog CRT monsters of old. Despite the 3.7 inch LCD, users are treated to the classic analog scope look, and the switches and knobs on the front should trigger a wave of nostalgia for hackers of a certain age.

But this isn’t just some “retro” look-alike, OWON is committed to delivering on that analog experience by taking away all those modern digital features we’ve become so dependant on. This single-channel scope can’t save data to USB, doesn’t have any sort of protocol decoding capabilities, and forget about automatic…well, anything. It’s even limited to 20 MHz, just like the old-school CRT scopes that you pick up for a song at any swap meet. All for the low, low, price of $150 USD from the usual importers.

In the EEVblog thread, the best idea anyone can come up with is that the OWON AS101 is designed for educational markets in developing countries, where outdated equipment is so common that there may actually be a need for faux-analog oscilloscopes to match what’s already in use. These new-manufactured “analog” trainers can be used to get students ready for a professional life of using antiquated technology. It’s hard to believe, but sometimes we can forget how fortunate many of us are to have easy access to cheap tools and equipment.

Even still, when you can get a pocket-sized 10 MHz DSO for around $50, it’s difficult to imagine how this analog-digital hybrid could possibly attract any takers at 3x times the price. If any of our readers would care to shed some light on this unusual piece of gear, we’d love to hear it.

Continue reading “Digital Oscilloscope Does Its Best Analog Impression”

Cheap Stereo Microscope Helps With SMD

Soldering is best done under magnification. Parts become ever smaller and eyes get weaker, so even if you don’t need magnification now, you will. [Makzumi] didn’t want to shell out $400 or more for a good microscope so he hacked one from some cheap binoculars from the toy section on Amazon.

A lot of magnifiers aren’t really good for soldering because the distance between the work and the lens isn’t very large. The hacked ‘scope has about 4 inches of working distance, which is plenty of room to stick some solder and a hot iron under there. The resulting magnification is about 12 or 15X and he claims that the cell phone pictures he’s included aren’t as good as really looking through the eyepieces yourself.

Continue reading “Cheap Stereo Microscope Helps With SMD”

You Didn’t See Graphite Around This Geiger Counter

Even if you don’t work in a nuclear power plant, you might still want to use a Geiger counter simply out of curiosity. It turns out that there are a lot of things around which emit ionizing radiation naturally, for example granite, the sun, or bananas. If you’ve ever wondered about any of these objects, or just the space you live in, it turns out that putting together a simple Geiger counter is pretty straightforward as [Alex] shows us.

The core of the Geiger counter is the tube that detects the radiation. That’s not something you’ll be able to make on your own (probably) but once you have it the rest of the build comes together quickly. A few circuit boards to provide the tube with the high voltage it needs, a power source, and a 3D printed case make this Geiger counter look like it was ordered from a Fluke catalog.

The project isn’t quite finished ([Alex] is still waiting on a BNC connector to arrive) but seems to work great and isn’t too complicated to put together, as far as Geiger counters go. He did use a lathe for some parts which not everyone will have on hand, but a quick trip to a makerspace or machinist will get you that part too. We’ve seen some other parts bin Geiger counters too, so there’s always a way around things like this.

Print A Drill Press For Your Printed Circuit Boards

If you make printed circuit boards the old fashioned way by etching them yourself, you may need to drill a lot of holes; even surface-mount converts still need header pins on occasion. But, drilling these holes by hand often leads to broken drill bits, which always seems to happen with one un-drilled hole and no spare bits left. [Daumemo] came up with a solution: a 3D printed drill press for a Dremel or similar rotary tool.

While you can buy commercial presses designed to fit these tools, there’s a certain satisfaction to building your own, and if you have a well-stocked parts bin you might even finish it before a mail-ordered version could arrive. Certainly you could do it at lower cost. The design is straightforward, and uses printed parts augmented with “reprap vitamins” (i.e. the non-printable, typically metal, components). If you’ve ever built — or repaired — a 3D printer, you may have these pieces already: a couple of LM8UU bearings, some 8 mm steel rod, and a pair of springs seem like the most esoteric parts required, although even these could probably be substituted without much trouble.

Only a few pieces need to be printed: a base is outfitted with a removable table for holding the workpiece, while a lever actuates the frame holding the tool. [Daumemo] chose to print the design in ABS, but found that it flexes a little too much, occasionally requiring some care during use — a stiffer filament such as PLA might yield better results. Overall, though, this seems like a great project for that 3D printer you haven’t used in a while.

Be sure to check out the video of the press in action, after the break.

Continue reading “Print A Drill Press For Your Printed Circuit Boards”

Scrapyard Milling Machine Gets Work Done On A Budget

Which to buy first, a lathe or a mill? It’s a tough question for the aspiring home machinist with limited funds to spend on machine tools, but of course the correct answer is a lathe. With a lathe, we are told, all other machine tools can be built, including a milling machine. Granted that might be a slight  exaggeration, but [Maximum DIY] was still able to use his budget-blowing lathe to make a decent milling machine mostly from scrap.

Details are a bit sparse in the forum post, but there’s enough there and in the video after the break to be mightily impressed with the build. Unlike many DIY mills that are basically modified drill presses, [Maximum DIY] started with things like a scrapped bench grinder pedestal and surplus steel tubing. The spindle motor is from a paint sprayer and the Z-axis power feed is a treadmill incline motor. The compound table was a little too hard to make, so the purchased table was fitted with windshield wiper motor power feeds.

Therein lies perhaps the most clever hack in this build: the use of a plain old deep 19mm socket as a clutch for the power feeds. The 12-point socket slides on the square shaft of the wiper motor to engage the drive screw for the compound table – simple and bulletproof.

To be sure, the finished mill is far from perfect. It looks like it needs more mass to quell vibration, and those open drive pulleys are a little nerve wracking. But it seems to work well, and really, any mill is better than no mill. Of course, if you’re flush with cash and want to buy a mill instead of making one, this buyer’s guide should help.

Continue reading “Scrapyard Milling Machine Gets Work Done On A Budget”

3D Printed Pen Plotter Is As Big As You Need It To Be

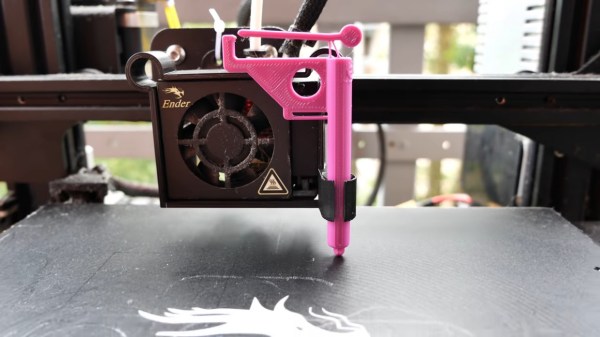
There’s nothing quite like building something to your own personal specifications. It’s why desktop 3D printers are such a powerful tool, and why this scalable plotter from the [Lost Projects Office] is so appealing. You just print out the end pieces and then pair it with rods of your desired length. If you’ve got some unusually large computer-controlled scribbling in mind, this is the project for you.

The design, which the team calls the Deep Ink Diver (d.i.d) is inspired by another plotter that [JuanGg] created. While the fundamentals are the same, d.i.d admittedly looks quite a bit more polished. In fact, if your 3D printed parts look good enough, this could probably pass for a commercial product.

For the electronics, the plotter uses an Arduino Uno and a matching CNC Shield. Two NEMA 17 stepper motors are used for motion: one to spin the rod that advances the paper, and the other connected to a standard GT2 belt and pulley to move the pen back and forth.

We particularly like the way [Lost Projects Office] handled lifting the pen off the paper. In the original design a solenoid was used, which took a bit of extra circuitry to drive from the CNC Shield. But for the d.i.d, a standard SG90 servo is used to lift up the arm that the pen is attached to. A small piece of elastic puts tension on the assembly so it will drop back down when the servo releases.

If this plotter isn’t quite what you’re after, don’t worry. There’s more where that came from. We’ve seen a number of very interesting 3D printed plotters that are just begging for a spot in your OctoPrint queue.

Glia Is Making Open Medical Devices, And You Can Help

The Glia project aims to create a suite of free and open-source medical equipment that can be assembled cheaply and easily when and where it’s needed. Even essential tools like stethoscopes and tourniquets can be difficult to acquire in certain parts of the world, especially during times of war or civil unrest. But armed with a 3D printer and the team’s open-source designs, an ad-hoc factory can start producing these lifesaving tools anywhere on the planet.

Glia member [Tarek Loubani] has recently written a blog post discussing the team’s latest release: an otoscope that can be built for as little as $5. Even if you don’t recognize the name, you’ve almost certainly seen one of them in use. The otoscope is used to look inside the ear and can be invaluable in diagnosing illnesses, especially in children. Unfortunately, while this iconic piece of equipment is quite simple on a technical level, professional-quality versions can cost hundreds of dollars.

Now to be fair, you’ll need quite a bit more than just the 3D printed parts to assemble the device. The final product requires some electrical components such as a battery holder, rocker switch, and LED. It also requires a custom lens, though the Glia team has thought ahead here and provided the files for printable jigs that will allow you to cut a larger lens down to the size required by their otoscope. In a situation where you might have to improvise with what you have, that’s a very clever design element.

So far the team is very happy with how the otoscope performs, but they’ve run into a bit of a logistical snag. It turns out that early work on the project was done in the web-based TinkerCAD, which isn’t quite in line with the team’s goals of keeping everything free and open. They’d like some assistance in recreating the STLs in FreeCAD or OpenSCAD so they’re easier to modify down the road. So if you’re a FOSS CAD master and want to earn some positive karma, head over to the GitHub page for the project and put those skills to use.

We’ve previously covered Glia’s work with 3D printed tourniquets to treat gunshot wounds, a project that led to [Tarek] himself being shot by a sniper while attempting to field test the design in Gaza. If that’s not commitment to the principles of open-source hardware, we don’t know what is.

Continue reading “Glia Is Making Open Medical Devices, And You Can Help”