Modular Feeders For SMD Component Tape

Making one of something is pretty easy, and making ten ain’t too bad. But what if you find yourself trying to make a couple of hundred of something on your home workbench? Suddenly, small timesavers start to pay dividends. For just such a situation, you may find these modular SMD tape feeders remarkably useful.

The tape feeders come in a variety of widths, to suit different size tapes. You’ve probably seen if you’ve ever ordered SMD components in quantity from Mouser, Digikey, et al. SMD components typically ship on large tape reels, which are machine fed into automated pick and place machines. However, if you’re doing it yourself in smaller quantities, having these manual tape feeders on your desk can be a huge help. Rather than having scraps of tapes scattered across the working surface, you can instead have them neatly managed at the edge of your bench, providing components as required.

The feeders are modular, so you can stack up as many as you need for a given job. Rails are provided to affix them to the relevant work surface. We’ve seen similar work before – like this 3D-printed bowl feeder for SMD parts.


Return Of The Logic Probe

We live in a day when it is very inexpensive to buy an oscilloscope, especially one with modest performance that hooks to a laptop. However, there was a time when even a surplus scope was out of reach for many people who liked to build things. A common alternative was the logic probe. At the low end, this could be an inverter and an LED, although it was more common to have a little extra circuitry to actually do a comparison to a reference voltage and present some indication of fast pulses — you might not be able to tell the frequency of a clock, but you could tell it wasn’t stuck. Of course, today with a microcontroller you can make a very sophisticated probe with less circuitry than a classic probe. We’ve seen a few takes on this and the latest is the DigiLogicProbe from [TheRadMan].

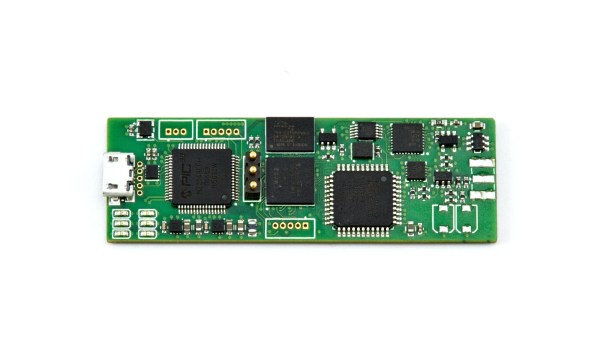
The probe is just a ATtiny85 board with a handful of components. A resistor and diode help protect the probe and the circuit under test. There are also a few LEDs and a buzzer. The rest of the project is software.

Continue reading “Return Of The Logic Probe”

The Solderdoodle Open Source Iron Rides Again

Over the last year or so, cordless portable soldering irons have become all the rage. In fact, at this point a good number of Hackaday readers out there have likely traded in their full-size AC irons for a DC iron that’s only slightly larger than a pen. But before the big boom in portable irons, in the ye olden days of 2014, we brought you word of the open source Solderdoodle created by [Isaac Porras]. Based upon the Weller BP645 and featuring a 3D printed case, the DIY iron was designed to be charged from a standard USB port.

Now, [Isaac] is back with an updated version he calls the Solderdoodle Plus. It’s still based on the heating element from the Weller BP645, but now boasts twice the power, an improved 3D printed case, an intuitive touch-based user interface, and even some LED blinkenlights for good measure. As with the original Solderdoodle the hardware and software for the device are open source and you’re invited to build your own, though kits are also available through an already fully-funded Kickstarter campaign.

[Isaac] says that the temperature control functions on traditional corded soldering irons waste energy due to the large thermal mass they have to bring up to temperature. But with less thermal mass and a system of variable duty cycle pulsed power, he says the Solderdoodle Plus can do the same work as an old-school 60 watt iron while only consuming 10 watts. This allows the iron to maintain a constant 500°C for over an hour on the dual internal Panasonic NCR18500A lithium-ion batteries, and means you can charge it up with nothing more exotic than a micro USB cable.

Continue reading “The Solderdoodle Open Source Iron Rides Again”

Take A Mini Lathe For A Spin

[This Old Tony] is no stranger to quality tools, but he started on a mini lathe. Nostalgia does not stop him from broadcasting his usual brand of snark (actually, it is doubtful that anything short of YouTube going offline will stop that). He rates the lathe’s ability to machine different materials and lets you decide if this is an investment, or a money pit.

Lathe parts range from a chintzy start/stop button assembly that looks like it would be at home on a Power Wheels restoration project to a convenient cam locking mechanism on the tail stock which is an improvement on the lathe with which our narrator learned. We see the speed tested and promptly disproved as marketing hoopla unless you allow for a 40% margin of error. It uses a 500 watt DC motor, so don’t try correcting for mains power frequency differences. The verdict on the lead screw and thread dial is that you get what you pay for and this is demonstrated by painstakingly cutting threads into aluminum. Finally, we see torture tests on cold rolled steel.

Maybe someone from the mini lathe community will stop by with their two-cents. If you appreciate this introduction to lathes, consider [This Old Tony]’s guide to CNC machines or injection molding. But for us, [Quinn Dunki’s] series of machine tools has been a real treat this year.

Continue reading “Take A Mini Lathe For A Spin”

Printed It: Parametric Hex Key Holder

Desktop 3D printing is an incredible technology to be sure, but it’s not a cure-all. If you’re interested in making something in large numbers, or if production speed is a concern, 3D printing probably isn’t what you’re looking for. But on the flip side, if you want to make a few highly specialized or customized objects, desktop 3D printing represents an absolute revolution in capability for the individual hacker and maker.

In our ongoing mission to prove that desktop 3D printing isn’t just a novelty, we keep a close eye out for printable objects which play to the strengths of the technology. You won’t find any benchmarks or dust collectors here; everything featured in Printed It is a bona fide practical object. An ideal entry into this series is something that you wouldn’t need to print more than a few times, isn’t easily sourced or made via traditional means, and if possible, offers some form of customization which makes it more suitable to the individual’s needs than what’s commercially available.

Not every object we feature hits all of these marks, but this parametric hex key holder designed by [Daniel Leitner] absolutely does. This object was created to address a problem that we imagine most Hackaday readers share: taming an ever-growing collection of hex keys. What’s more, this design is something of an open source success story. It’s an idea that passed through the hands of multiple community members, becoming more refined and functional as it went. Even if you don’t personally need to wrangle some unruly hex keys, this object is a fascinating look at how 3D printing and the community that has sprouted up around it is truly evolving the process of going from concept to execution.

Continue reading “Printed It: Parametric Hex Key Holder”

Clever Wedges That Will Increase Your PCB Assembly Yield

If there’s one thing that will bring down the yield of your PCB assembly, it’s your solder paste. Put too much on, and you’ll get bridged leads. If you don’t put enough on, that pad might not make good contact. [ScalarElectric] has an amazing trick that’s sure to astonish and astound. Just use wedges and you’ll get better yield with fine-pitched components.

The trick here is to define the cream/solder paste layer of each package as a wedge on each pad instead of the usual rectangle. This gives a few benefits, the largest being the increased gap between paste shapes. You’re also getting a reduction in the total amount of paste applied, and a subsequent improvement in yield. (Reportedly, we’d love to see some data on this.)

PCB design tools usually have a way to alter the size of the cream/solder paste layer of a design, and indeed one option is to simply shrink the size of the paste layer elements. The trick to the wedges is increasing the total distance between solderpaste blobs while keeping the total amount of solderpaste high. This technique can be used down to 0.5mm pitch parts, and everything works like a charm.

While this is a little outside of our wheelhouse here at Hackaday — it is, after all, a novel use of existing tools that is mostly applicable to electronic design and production. [Ed Note: Sarcasm.] You can check out a few pics of this technique in the slideshow below. If you test this technique out, be sure to let us know how it went!

Manual 3D Digitizer Works A Bit Like 3-Dimensional Measuring Tape

Digitizing an object usually means firing up a CAD program and keeping the calipers handy, or using a 3D scanner to create a point cloud representing an object’s surfaces. [Dzl] took an entirely different approach with his DIY manual 3D digitizer, a laser-cut and 3D printed assembly that uses rotary encoders to create a turntable with an articulated “probe arm” attached.

Each joint of the arm is also an encoder, and by reading the encoder values and applying a bit of trigonometry, the relative position of the arm’s tip can be known at all times. Manually moving the tip of the arm from point to point on an object therefore creates measurements of that object. [Dzl] successfully created a prototype to test the idea, and the project files are available on GitHub.

We remember the earlier version of this project and it’s great to see how it’s been updated with improvements like the addition of a turntable with an encoder. DIY 3D digitizing takes all kinds of approaches, and one example was this unit that used four Raspberry Pi Zeros and four cameras to generate high quality 3D scans.