Build Your Own Import Variable Lab Bench Power Supply

Does it ever just kill you that someone in a factory somewhere got to have all the fun of assembling your bench tools? There are a lot of questionable circuit boards floating around the Internet, and they can replicate practically any section of a circuit. When it comes to putting a prototype these days you can pretty much just buy each block of your system’s overview flowchart and string them together. [GreattScott!] combines a few of these into a relatively useful variable power supply with current limiting.

Admittedly, this is more of academic exercise if your only metric for success is monetary savings. Comparable power supplies can be purchased for the same amount of local currency as the parts in this build. However, there is something to be said for making it yourself.

The core of this build is based around the LTC3780, a bit of silicon from LT that offers both buck and boost converting along with a current control mode. It’s useful for a lot of things. The here is rated for up to 130 watts of power, which makes is a decent amount of power for a bench supply.

With a few modifications, like replacing the world’s most untrustworthy potentiometers and adding a nice ABS box, the build is completed. Along the way, [GreatScott!] offers a few tricks for testing and some reminders of how not to make yourself dead when playing with electricity.

The end is a working lab bench supply project that can easily keep a hacker entertained on a lazy Sunday afternoon.

Continue reading “Build Your Own Import Variable Lab Bench Power Supply”

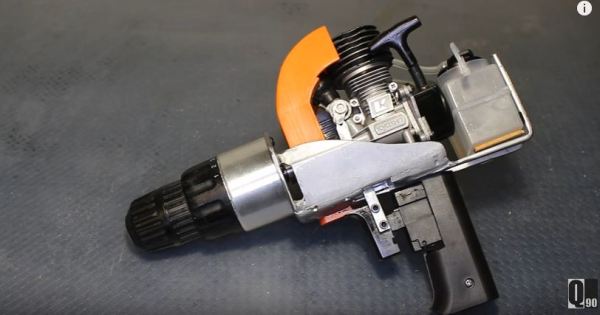
Safely Remove Drill Chuck; Receive Motor, Gearbox, And Clutch

There’s a treasure trove of usefulness inside of an electric drill. [Steven Dufresne], Hackaday writer and the mad scientist behind Rimstar.org, kindly documented how to safely and reliably remove the chuck from a drill motor. You may think this is easy, but once in a while you’ll come across a drill determined to hold onto all its bits. We certainly were entertained by the lengths [Steven] went to in the video below to get a Black and Decker to give up its chuck.

An understanding of how the chuck and gearbox are connected, combined with the right tools and a bit of force, gets you a motor, gears and gearbox, and a clutch. There’s not much left in the drill after that, and you can put some or all of those components to new use — like using them for the drive system of a BB-8 Droid.

Many projects (like this walking scooter) make use of cordless drills as motor sources. Being able to skip the chuck in order to interface directly to the shaft is useful for those projects where the drill is at least a semi-permanent part of the build. Ask your friends, neighbors, and at work. Cheap cordless drills and screw guns have been around for a long time. It’s usually the batteries that go and many people have the drills lying around and will be happy to part with them knowing you’re going to do something awesome with them.

Continue reading “Safely Remove Drill Chuck; Receive Motor, Gearbox, And Clutch”

Tour De Force Battery Hacking

Lithium-Ion batteries are finicky little beasts. They can’t be overcharged, overdischarged, overheated, or even looked at funny without bursting into flames. Inside any laptop battery pack, a battery charge controller keeps watch over all the little cells, and prevents them from getting damaged.

Of course, any “smart” device will sometimes make the wrong choices, and then it’s up to us to dig inside its brains and fix it. When [Viktor] got a perfectly good battery pack with a controller that refused to charge the batteries, he started off on what would become an epic journey into battery controllers, and the result is not just a fixed battery, but a controller-reprogramming tool, software, and three reversed controller chips so far.

devbBattery controller chips speak SMBus, and [Viktor] started out by building a USB-SMBus tool. It’s a clever use of a cheap eBay development board for a Cypress CY7C68013A USB microcontroller. Flashed with [Viktor]’s firmware and running his software on the host computer, a SMBus scan is child’s play.

The rest of the story is good old-fashioned hacking: looking for datasheets, reading industry powerpoints, taking wild guesses, googling for passwords, and toggling the no-connect pins while booting the controllers up. We’re not going to argue with results: the bq8030, R2J240, and M37512 controllers have all given up their secrets, and tools to program them have been integrated into [Viktor]’s SMBusb tool.

In short, this is one of the nicest hard-core hacks we’ve seen in a while. Kudos [Viktor]! And thanks for the SMBus tool.

Mini Plasma Cutter

What do you get when you combine an arc cigarette lighter and some scrap glass and metal? [NightHawkInLight] created a simple plasma cutter project along with some hot glue and a few simple tools.

If you aren’t a smoker, an arc lighter uses a high voltage spark to light the cigarette. He essentially cannibalizes it for use as a power supply. Any similar high-voltage power supply should work just as well. He also uses the same cigarette lighter power supply for an arc pen, that we covered earlier.

Continue reading “Mini Plasma Cutter”

Likely Everything You Need To Know Before Adopting A Drill Press

Oh sure, the thought of owning a happy whirring drill press of your very own is exciting, but have you really thought about it? It’s a big responsibility to welcome any tool into the home, even seemingly simple ones like a drill press. Lubricants, spindle runout, chuck mounts, tramming, and more [Quinn Dunki], of no small fame, helps us understand what it needs for happy intergration into its new workshop.

[Quin] covers her own drill press adventure from the first moments it was borne into her garage from the back of a truck to its final installation. She chose one of the affordable models from Grizzly, a Washington based company that does minimal cursory quality control on import machinery before passing on the cost to the consumer.

The first step after inspection and unpacking was to remove all the mysterious lubricants and protectants from the mill and replace them with quality alternatives. After the press is set-up she covers some problems that may be experience and their workarounds. For example, the Morse taper on the chuck had a few rough spots resulting in an incomplete fit. The chuck would work itself loose during heavier drilling operations. She works through the discovery and repair of this defect.

Full of useful tips like tramming the drill press and recommended maintenance, this is one of the best guides on this workshop staple that we’ve read.


How To Make Your Weller Wireless

On occasion I have encountered portable soldering irons and my impressions of them have ranged from nearly usable to total rubbish. While using a popular butane powered model and pondering if it was really any better than a copper wire and a candle a thought occurred to me. A regular old Weller station runs on 24 volts AC and performs all of its temperature regulation in a magnetically activated thermostatic fashion and all of that goodness occurs within the hand piece itself. It stood to reason that it could perform just as well with a DC source.

In this instance we are ignoring the negative effects of switching DC current over AC current on mechanical contacts. After all we are “In the Trenches” wherever we might have need for such a device. Using a couple of gel cell 12 volt 7 amp hour batteries freshly removed from a UPS I strung them up, and there you have it, a totally battery operated  iron with performance equal to that of the one at my bench.

Connecting SMPS to the Weller Iron
Connecting Power to the Weller Iron

Right at 24 volts the iron Thermocycles at the same rate as it would be while using the bench top supply for it. Just sitting under no load it cycles about every ten seconds and there was no perceptible difference in heat capacity or performance. A fully charged pair of batteries will last all day. The on state current draw from a full charge (13.5 volts on each of the batteries) yielded about a 2 amp draw. As the voltage began to decrease the current off cycle would get shorter as one would expect, but no drop in heat transfer was noticed until the batteries were well depleted and that took most of a work day.

For this instance I used the hand piece from the venerable Weller WTCPT station. For ongoing use I would not recommend this due to the use of a mechanical contact within the unit and switching of DC can reduced the life of most mechanical switches. Currently I am awaiting the arrival of some cheap eBay Hakko handpieces; I am sure they are knockoffs, but fine to experiment with a simple PWM with a feedback loop controller as the basic Hakko design also utilizes a 24 volt source. An automatic shut off timer would also be handy to avoid premature battery abuse due to a forgetful operator.

IMG_2505

Internet Of Things Woodworking

Woodworking is the fine art of building jigs. Even though we have Internet-connected toasters, thermostats, cars, and coffee makers, the Internet of Things hasn’t really appeared in the woodshop quite yet. That’s changing, though, and [Ben Brandt]’s Internet of Things box joint jig shows off exactly what cheap computers with a connection to the Internet can do. He’s fully automated the process of making box joints, all with the help of a stepper motor and a Raspberry Pi.

[Ben]’s electronic box joint jig is heavily inspired by [Matthias Wandel]’s fantastic screw advance box joint jig. [Matthias]’ build, which has become one of the ‘must build’ jigs in the modern woodshop, uses wooden gears to advance the carriage and stock across the kerf of a saw blade. It works fantastically, but to use this manual version correctly, you need to do a bit of math before hand, and in the worst-case scenario, cut another gear on the bandsaw.

[Ben]’s electronic box joint jig doesn’t use gears to move a piece of stock along a threaded rod. Stepper motors are cheap, after all, and with a Raspberry Pi, a stepper motor driver, a couple of limit switches, and a few LEDs, [Ben] built an Internet-enabled box joint jig that’s able to create perfect joints.

The build uses a Raspberry Pi 3 and Windows IoT Core to serve up a web page where different box joint profiles are stored. By lining the workpiece up with the blade and pressing start, this electronic box joint jig automatically advances the carriage to the next required cut. All [Ben] needs to do is watch the red and green LEDs and push the sled back and forth.

You can check out [Ben]’s video below. Thanks [Michael] for the tip.

Continue reading “Internet Of Things Woodworking”