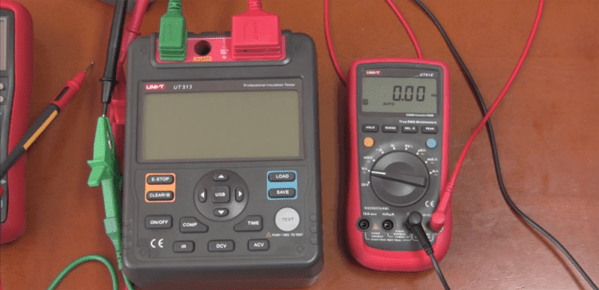
If you check out eBay, Amazon, or the other kinda-shady online retailers out there, you’ll quickly find you can buy a CAT III (600V) rated multimeter for under $50. If you think about it, this is incredible. There’s a lot of engineering that needs to go into a meter that is able to measure junction boxes, and factories in China are pushing these things out for an amazing price.
Over on the EEVBlog, these meters are being pushed to the limits. Last month, [joeqsmith] started a thread testing the theory that these cheap meters can handle extremely high voltages. A proper CAT III test requires a surge of electrons with a 6kV peak and a 2 ohm source. With a bunch of caps, bailing wire, JB Weld and zip ties, anyone can test if these meters are rated at what they say they are. Get a few people on the EEVBlog sending [joeqsmith] some cheapo meters, and you can have some real fun figuring out how these meters stack up.
The real experiments began with [joe smith]’s low energy surge generator, a beast of a machine that can be measured with an even beastlier high voltage scope probe. This is a machine that will send a voltage spike through anything to short out traces on poorly designed multimeters.
How did the cheapo meters fare? Not well, for the most part. There was, however, one exception: the Fluke 101. This is Fluke’s My First Multimeter, stuffed into a pocketable package. This meter is able to survive 12kV pulses when all but two of the other brands of meters would fail at 3kV.
What’s the secret to Fluke’s success? You only need to look at what the Fluke 101 can’t do. Fluke’s budget meter doesn’t measure current. If you ever look inside a meter, you’ll usually find two fuses, one for measuring Amps and the other for all the other functions on the scope. There’s quite a bit of engineering that goes into the current measurement of a meter, and when it goes wrong you have a bomb on your hands. Fluke engineers rather intelligently dropped current measurement from this budget meter, allowing them to save that much on their BOM.
There’s an impressive amount of data collected by [joeqsmith] and the other contributors in this thread, but don’t use this to decide on your next budget meter; This is more of an interesting discovery of how to make a product that meets specs: just cut out what can’t be done with the given budget.
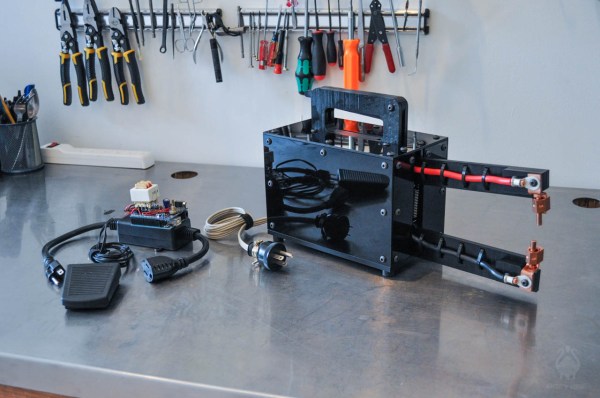

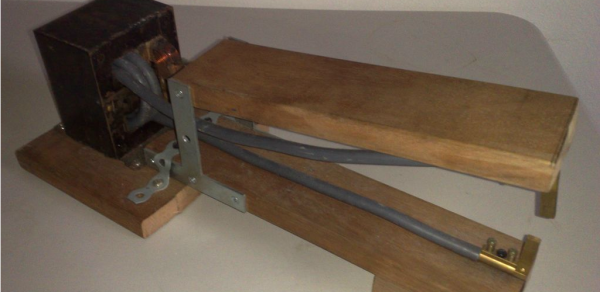
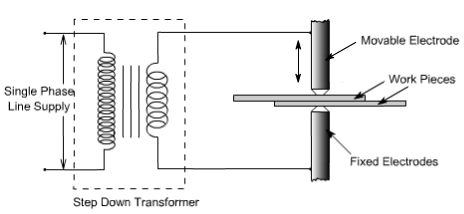 A spot welder works by passing an electric current through two thin pieces of metal. The resistance of the metal work pieces and the current passed though them creates enough heat to melt and join the two together at a single spot. To be able to get the high current needed for this project, [mrjohngoh] started with an old microwave transformer. He removed the standard secondary coil and re-wrapped it with 1cm thick wiring to get maximum current out of the transformer. The ends of the coil wire attach to electrodes, which are made from a high-current electrical plug. The electrodes are mounted at the ends of a pair of hinged arms. The weld is made when the two pieces of metal are sandwiched between the electrodes and power is applied.