There seem to be two camps when it comes to recipes: those based on volume-based measurements, and those based on the weight of ingredients. Gravimetric measurements have the advantage of better accuracy, but at the price of not being able to quickly scoop out a bit of this and a dash of that. It would be nice to get the convenience of volumetric measurements with the accuracy of weighing your ingredients, wouldn’t it?
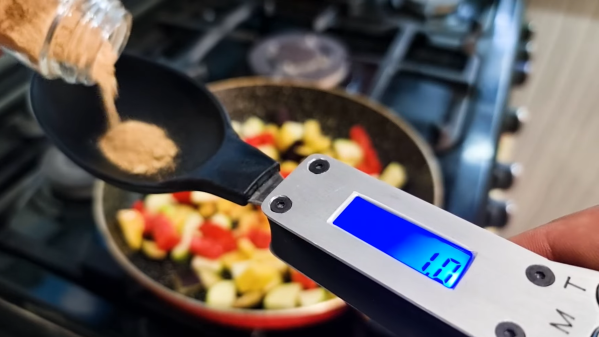
It would, and that’s just what [Penguin DIY] did with this digital kitchen spoon scale. The build started with, perhaps not surprisingly, a large mixing spoon and a very small kitchen scale. The bowl of the spoon got lopped off the handle and attached to the strain gauge, which was removed from the scale along with its LCD display and circuit board. To hold everything, a somewhat stocky handle was fabricated from epoxy resin sandwiched between aluminum bolsters. Compartments for the original electronics parts, as well as a LiPo battery and USB charger module, were carved out of the resin block, and the electronics were mounted so that the display and controls are easily accessible. The video below shows the build as well as the spoon-scale in action in the kitchen.
We think this is not only a great idea but a fantastic execution. The black epoxy and aluminum look amazing together on the handle, almost like a commercial product. And sure, it would have been easy enough to build a scale from scratch — heck, you might even be able to do away with the strain gauge — but tearing apart an existing scale seems like the right move here.
Continue reading “Digital Kitchen Spoon Makes Weighing Your Ingredients A Snap”