JTAG Hat Turns Raspberry Pi Into A Networked Debugger

Over the last year or so we’ve noticed a definite uptick in the number of folks using OpenOCD on the Raspberry Pi. It’s a cheap and convenient solution for poking around with various microcontrollers and embedded devices, but not always the most elegant. Looking to improve on the situation somewhat, [Matthew Mets] has been working on a purpose-built JTAG Hat to clean things up a bit.

Onboard level shifters allow you connect to JTAG and SWD interfaces from 1.8 to 5 V, and if you power the target device from the Pi itself, there’s even support for measuring the voltage and current. To connect up to your target, the open hardware board features a “legacy” pin header perfect for jumper wires, as well as a dedicated 10-pin Cortex Debug Connector. Whether you spin up your own or buy one assembled, it certainly looks like a tool worth having around if you often find yourself working with the appropriate chips.

In addition to the design files for the hardware, [Matthew] has also provided some nice documentation on how to get the software side of things up and running. Starting with a blank SD card, it walks you through the initial setup of the Raspberry Pi all the way through the installation and configuration of a patched version of OpenOCD designed to support the JTAG Hat.

If you spend more time working with 8-bit AVR chips, don’t worry. Last year we covered a similar project to turn everyone’s favorite Linux SBC into an all-in-one microcontroller development powerhouse.

Yet Another Rigol DS1054Z Viewer

Tired of squinting at the small numbers on the oscilloscope display, [Alfred] aka [Gaze@] decided to take matters into his own hands and wrote yet another tool to remotely view images from a Rigol DS1054Z. At least that was the initial idea. But, it grew unexpectedly — as [Alfred] says, “the more the project turned out to be fun, the more it got out of hand”. We know the feeling well.

In addition to being able to simply view and export the screen, the program implements waveform measurements (we’re not sure if it is using the measurement ability of the ‘scope, or actually performing measurements in the program). And as you can see in the animated GIF of the program in operation over on the GitHub repository, the numbers are certainly clear and legible. His problem of squinting at the small screen has indeed been solved.

This is coded in Pascal (FPC Lazarus), but we weren’t able to browse the program because [Alfred] hasn’t posted the source code yet. It is written only for Linux, and he has tested it on Ubuntu, Debian, Fedora, and Manjaro. The project relies on Python, PyVisa, and gtk2, and talks to your DS1054Z over USB or LAN. The installation instructions are well documented, but as [Alfred] himself warns, if you encounter trouble arising from subtle dependency version conflicts, you may need to be a nerd and/or a pensioner with unlimited time on your hands to solve them. There is no users guide nor extensive help according to [Alfred]. However, simple hints might be found in hover text or by pressing F1. Disclaimers aside, this looks like an interesting project to try out.

As [Alfred] notes, there are many other tools available to fetch data and images from your Rigol oscilloscope. [Jenny List] wrote a two-part series on using Python to control your test instruments, and here’s an example of a simple Python script that does a screen grab. Do you have a favorite way to remotely operate your oscilloscope? Let us know in the comments below.

Getting Started With Aluminum Extrusions

T-slot extrusions used to be somewhat mysterious, but today they are quite common thanks to their use in many 3D printers. However, it is one thing to assemble a kit with some extrusions and another thing to design your own creations with the material. If you ever had a Play-Doh Fun Factory as a kid, then you know about extrusions. You push some material out through a die to make a shape. Of course, aluminum extrusions aren’t made from modeling clay, but usually 6105-T5 aluminum. Oddly, there doesn’t seem to be an official standard, but it is so common that there’s usually not much variation between different vendors.

We use extrusions to create frames for 3D printers, laser cutters, and CNC machines. But you can use it anywhere you need a sturdy and versatile frame. There seems to be a lot of people using them, for example, to build custom fixtures inside vans. If you need a custom workbench, a light fixture, or even a picture frame, you can build anything you like using extrusions. Continue reading “Getting Started With Aluminum Extrusions”

Optical Sensor Keeps Eye On Wandering Saw Blade

Over the last year or so, we’ve been checking in on the progress [Andrew Consroe] has been making with his incredible CNC scroll saw project. While we were already impressed with his first prototype version, he somehow manages to keep pushing the envelope forward with each new upgrade, and we’re always excited when one of his progress reports hits the inbox.

Recently he’s been struggling with the fact that the considerable flexing of the scroll saw’s ultra-thin blade introduces positional errors while cutting. To combat this, he’s developed an ingenious sensor that can track the movement of the blade in two dimensions without actually touching it. Utilizing the Raspberry Pi HQ camera, a 3D printed framework, and some precisely placed mirrors, [Andrew] says his optical sensor is able to determine the blade’s position to within 10 microns.

In the video below [Andrew] goes over how his “Split Vision Periscope” works, complete with some ray traced simulations of what the Pi camera actually sees when it looks through the device. After experimenting with different lighting setups, the final optical configuration presents the camera with two different perspectives of the saw blade set on a black background. That makes it relatively easy to pick out the blade using computer vision, and turn that into positional information.

The periscope arrangement is particularly advantageous here as it allows the camera and lens to be placed under the work surface and well away from the actual cutting, though we’re interested in seeing how it fares against the dust and debris that will inevitably be produced as the saw cuts. While he hit all of his design goals, [Andrew] does note that his mirrors do leave some room for improvement; but considering he hand cut them out of old hard drive platters we think the results are more than acceptable.

An incredible amount of progress has been made since the first time we saw the CNC scroll saw, and we’re eager to see this new sensor fully integrated into the next version of [Andrew]’s impressive long-term project.

Continue reading “Optical Sensor Keeps Eye On Wandering Saw Blade”

Portable Drill Press

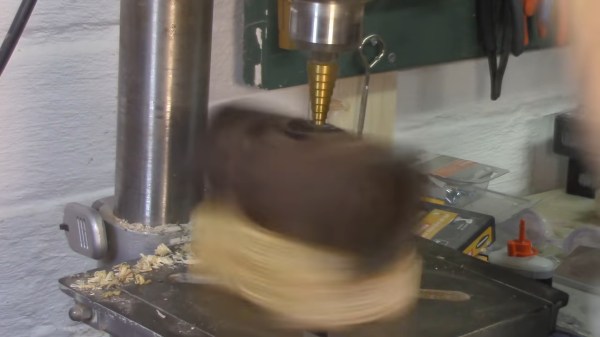
We aren’t sure that [John Heisz’s] build is really what we think of as a drill press, but it is a very portable way to convert a regular drill into something like a drill press. Your drill will probably be different, but you can follow along with his build in the video below.

On the face of it, it doesn’t seem like this would be very hard, but there are a few tricks. Finding the exact center of the drill axis on the back of the drill takes a bit of effort.

Continue reading “Portable Drill Press”

DIY Insulating Nuts And Bolts

[Rudi Schoenmackers] has devised a clever set of custom 3D-printed jigs that makes it easy to build your own wooden hex nuts and bolts. Well, easy if you have access to a woodworking shop with a router, bandsaw and belt sander.

You won’t be using these to mount your PCBs, however. They are pretty big — UNC 1½-6 threads (the closest metric thread would probably be M36-4). [Rudi] points out that these jigs can be readily adapted to generate different sizes and pitches of threads, even left-handed ones, but we suspect making a #4-40 or M3-0.5 is out of the question. There are commercial jigs for making threads, but as [Rudi] points out, those are quite expensive. The price of [Rudi]’s jigs is quite low, assuming you have a 3D printer.

We’re not sure how to best take advantage of these nuts and bolts in ordinary hacking projects, but [Rudi] enjoys giving them away as cool toys or making large clamps and vises out of them. Let us know if you have any applications where wooden threaded fasteners could come in handy. If wooden threads interest you, then check out this project we covered a few years ago on making simple taps.

Continue reading “DIY Insulating Nuts And Bolts”

Simple Probe Sniffs Out EMI

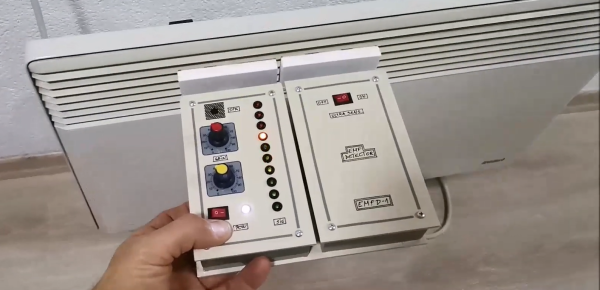
Unable to account for the strange glitches he was seeing on his DIY CNC router, [Daniël Van Den Berg]  wondered if his electronics might be suffering from some form of electromagnetic interference (EMI). So he did what any good hacker would do, and rummaged through the parts bin to build an impromptu EMI detector.

[Daniël] is quick to point out that he’s not an electrical engineer, and makes no guarantees about the accuracy of his tossed together gadget. But it does seem to work well enough in his testing that he’s able to identify particularly “noisy” electronic components, so it’s probably worth putting one together just to hear what your hardware is pumping into the environment.

The hardware here is very simple, [Daniël] just attached a coil of solid copper wire to one of the analog pins on an Arduino Nano with a resistor, and hung a speaker off of one of the digital pins. From there, it just took a few lines of code to read the voltage in the coil and convert that into a tone for the speaker. The basic idea is that a strong alternating magnetic field will set up voltage fluctuations in the coil large enough for the Arduino’s ADC to read.

If you’re looking for a bit more insight into what kind of interference your electronic creations might be putting out, [Alex Whittimore] gave a fantastic presentation during the 2020 Hackaday Remoticon about performing RF debugging using a cheap RTL-SDR dongle.