Many hackers learned about electronics over the years with home experimenter kits from Radio Shack and its ilk. Eschewing soldering for easier screw or spring based connections, they let the inexperienced build circuits with a minimum of fuss, teaching them the arcane ways of the electron along the way. [victorqedu] has put a modern spin on the form, with his Electric Puzzle Game.
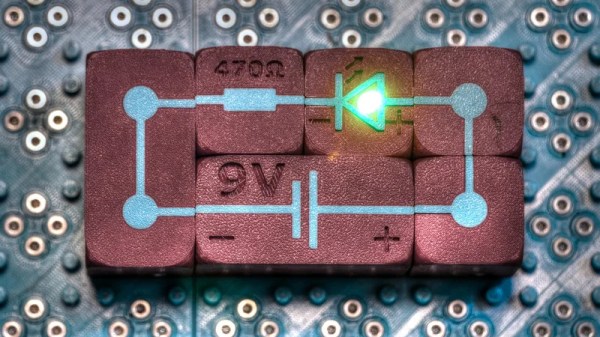
The build consists of a series of 3D printed blocks, each containing a particular electronic component or module. The blocks can be joined together to form circuits, with magnets in the blocks mating with screws in the motherboard to hold everything together and make electrical contact between the parts. It’s a project that requires a significant amount of 3D printing and upfront assembly to build, but it makes assembling circuits a cinch.
The variety of circuits that can be built is impressive. [victorqedu] shows off everything from simple LED and switch arrangements to touch sensors and even a low-powered “Tesla coil”. We imagine playing with the blocks and snapping circuits into place would be great fun. We’ve seen other unconventional approaches before, too – such as building squishy circuits for educational purposes. Video after the break.
Continue reading “Electric Puzzle Board Lets You Assemble Circuits With Ease”