Our more youthful readers are fairly likely to have owned some incarnation of a VTech educational computer. From the mid-1980s and right up to the present day, VTech has been producing vaguely laptop shaped gadgets aimed at teaching everything from basic reading skills all the way up to world history. Hallmarks of these devices include a miserable monochrome LCD, and unpleasant membrane keyboard, and as [HotKey] found, occasionally a proper Z80 processor.
It started, as such things often do, with eBay. [HotKey] found that the second hand market is flooded with these decades-old educational gadgets, often selling for just a few bucks. As it turns out, children of the smartphone and tablet era don’t seem terribly interested in a “laptop” from 1991. At any rate, he ordered about a dozen different models and started tearing into them to see what made them tick.
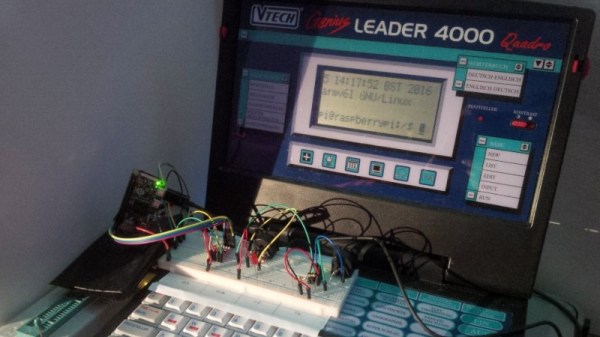
 He found that the VTech machines of around 20+ years old were using the Z80 processor, and what’s more, they shared a fairly standardized external cartridge interface for adding additional software or saving data. Upon attempting to dump some data from the cartridge port, [HotKey] discovered that it was actually connected to the computer’s main bus. He realized that with a custom designed cartridge, it should be able to take over the system and have it run his own code.
After more than a year of tinkering and talking to other hackers in the Z80 scene, [HotKey] has made some impressive headway. He’s not only created a custom cartridge that lets him load new code and connect to external devices, but he’s also added support for a few VTech machines to z88dk so that others can start writing their own C code for these machines. So far he’s created some very promising proof of concept programs such as a MIDI controller and serial terminal, but ultimately he hopes to create a DOS or CP/M like operating system that will elevate these vintage machines from simple toys to legitimate multi-purpose computers.
We’ve seen VTech hardware hacked in the past, but it’s generally been focused on the company’s more recent hardware such as the Linux-powered InnoTab. It will be interesting to see if these educational toys can fulfill some hacker’s dreams of having a cheap and portable box for Z80 tinkering.