You’ve probably heard of the brave pilots, the so-called ‘few’, that took to the air in their Supermarine Spitfires and saved the day during the Battle of Britain. It’s a story that contains a lot of truth, but as is so often the case, it masks a story with a bit more complexity. Those pilots did scramble across the airfields of Southern England back in the summer of 1940, but more of them went into battle behind the controls of a Hawker Hurricane than its more glamorous stablemate.
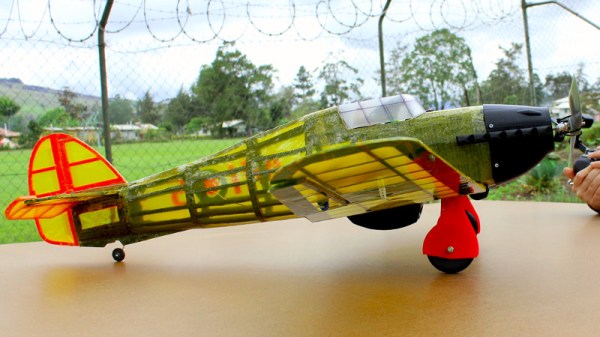
The Hurricane might have been eclipsed by the Spitfire in the public’s eye, but not for [Marius Taciuc], who’s made a fully-functional RC model of one. Normally that wouldn’t be worthy of our attention, but in this case he’s employed a rather fascinating construction technique. He’s recreated the doped-fabric skin of the original by 3D-printing the frame of the aircraft and covering it in heat-shrink film, making this a very rare bird indeed.
The video below takes us through the steps including the development of the frame in a CAD package based on a tracing of a 2D aircraft picture, fitting the film, and finally attempts at flight that are unfortunately foiled by inappropriate wheel choice. But the short flight and crash does demonstrate that this construction method is durable, which leads on to our interest in it. While it evidently makes a functional aircraft, there are other applications that could benefit from such a lightweight and strong combination of materials.
[Marius] actually created a model of the somewhat more photogenic Spitfire using a similar technique, though as far as we can tell, that one has remained grounded. Incidentally, these pages have been previously graced by Hurricanes of the non-PLA variety. Continue reading “This Hurricane Uses A Novel Technique”