Dirty Video Mixing With The Raspberry Pi Zero

Don’t get too excited now, we aren’t talking about that kind of dirty video. There’s plenty of other places on the Internet you can go to find that sort of thing. No, this video mixer is “dirty” because it combines two composite video streams into one garbled up mess that’s best viewed on an old CRT TV. Why, you may ask? Because rock and roll, that’s why.

Created by [Luke Blackford] as a visual for his band’s performances, the “Dirty Pi” is an exceptionally simple way to create some wild imagery with two Raspberry Pi Zeros. It might not be the most practical of devices, but if you want so throw some creepy looking video up on screens all over the house (say for an upcoming Halloween party), this is a fantastic way to do it on the cheap.

The idea is simple: connect the oft-forgotten composite video outputs of two Pi Zeros to a potentiometer, which then leads to the display. Play different videos on the Pis with the media player of your choice, and twiddle the potentiometer to create ghosting and interference. If you want to get that true 1980’s retro feel, put the whole thing into an old VHS cassette like [Luke] did, and you’re ready to rock.

Those who’ve been around the block a few times might recognize this trick as a variation of the [Karl Klomp] Dirty Video Mixer, and [Luke] tells us he likes this project because he was able to pull it off without writing any code or even doing any complex wiring, though he does imagine a future version where he adds some remote control functionality.

If you like your video mixers with more smarts and less dirt, we’ve covered a very slick build using the LM1881 in the past.

Continue reading “Dirty Video Mixing With The Raspberry Pi Zero”

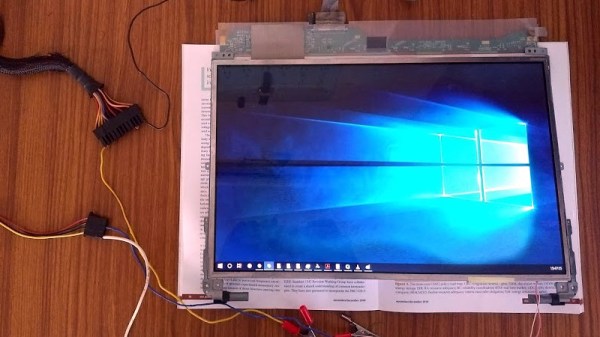
GE Record Player and TV 1600x900

VinylVideo Is Literally Video On Vinyl

It’s often said that the music etched into a vinyl record takes on a transcendent quality that you simply can’t find in a digital recording, but does that still apply when you add motion picture? The collaboration of [Sengmüller and Diamant] sure think so, because they are offering a new experience for the turntable with the introduction of their VinylVideo pre-amplifier. No tape reels here, this project shows the extend of what is possible through analog video.

Vinyl Video Amp

While all record players capable of playing back 7 in. 45 RPM are compatible with the system, the VinylVideo records themselves specially cut in order to generate the video signal. Each of the custom records has room for a 4-minute music video on the A-side, and the single on the B-side. Videos play back in black & white, sub-standard definition with mono audio, and run around 12 frames per second. The pre-amp takes in the analog signal from regular audio cables via RCA jacks or 3.5mm headphone jack, and then a Raspberry Pi model A+ handles the analog-to-digital conversion. Video out options include HDMI and composite video via a 3.5mm TRSS jack.

The current VinylVideo pre-amp is actually a refinement of the original project from the mid ’90s where it was a part of folk art exhibits. The legacy website (circa 1999) is still live, so you can give it a visit. However, for the most authentic experience you may want to fire-up a virtual machine with Netscape Navigator and Real Player installed.

For a more in-depth look at the VinylVideo in action there is a great video below from [Techmoan]:

Continue reading “VinylVideo Is Literally Video On Vinyl”

Feeding Dogs Over Twitch Is Latest E-Sport Craze

The modern social-networking fueled Internet loves two things more than anything: pets, and watching other people do stuff. There’s probably a scroll tucked behind a filing cabinet at Vint Cerf’s house that foretells anyone who can harness these two elements will gain control of the Internet Ready Player One style. If so, we’re thinking [Tyler Pearce] is well on his way to ascending the throne.

In an effort to make the Overwatch Twitch streams of his betrothed even more enticing, [Tyler] came up with a way for viewers to feed their dog Larry by dropping a command in the chat. There’s a surprisingly complex dance of software and hardware to make this reliable and visually appealing, but it’s worth it as showmanship is important in the brave new world of competitive e-sports. We’re assuming that’s what it says in the issue of ESPN Magazine with the Fortnite player on the cover, but nobody at Hackaday would qualify for a subscription to it so we don’t really know for sure.

A server running on the computer provides a slick administrative dashboard for the treat system, including a running log of who fed Larry and when. There’s also a number of checks in place to prevent too many treats being dispensed in a short time period, and to keep an individual from spamming the system.

On the hardware side, he’s using two NodeMCU ESP8266 microcontollers connected to a local MQTT broker: one to handle the lighting and one to run the 3D printed auger that actually pushes the food out. The printed auger is powered by a standard hobby servo, and even includes an IR sensor to automatically stop spinning when it detects a treat has been dispensed. [Tyler] reports the auger works quite well, though does have a tendency to jam up if overfilled.

We’ve seen all manner of automated pet feeders over the years, even ones with their own email accounts. So it was probably only a matter of time until they came to Twitch. If you can install Linux with it, why not use it to feed your dog? Or somebody else’s, as the case may be.

A Look At The Smallest Magnetic Deflection CRT Ever Made

A high-resolution LCD or OLED screen is a commodity component that we can buy on a little breakout board and plug into our microcontrollers without spending more than a dollar or two. We can buy them in sizes ranging from sub-postage-stamp to desktop TV if our budgets stretch that far, and they are easy to drive in every sense of the word. It is not so long ago though that a high-resolution LCD, even a small one, was a seriously expensive component. In consumer electronic devices such as camcorders engineers went to great lengths to avoid those costs, and [12voltvids] recently took a look at one of them.

Inside the viewfinder of a miniaturized Sony camcorder is a CRT. It’s fairly mundane in the scheme of CRTs, in that it’s a monochrome device with no unexpected features. Except that is, for one thing. It’s tiny, with only a 0.5″ inch screen size. Everything else is the same as your vintage full-sized TV, it has an electron gun and a deflection and focusing coil pack, but the entire device has been miniaturized to the point at which the coil pack is larger than the screen it is driving. On the accompanying PCB are all the support circuits, including a tiny flyback transformer and a single IC –  a Rohm BA7149 electronic viewfinder driver that is as near as possible an entire CRT TV on a chip. That’s it, the whole device runs from a single 5 volt supply.

He doesn’t give the date of the camcorder, but given that it looks as though it uses 8mm cassette tapes and has a curved miniaturized design rather than the angular black exteriors that were fashionable earlier we’d guess it to be from some time around the year 2000. To give it some context, at the time one of the hottest pieces of consumer electronics would have been a Diamond Rio MP3 player, and if your desktop PC had the first of the AMD Athlon processors you probably considered it to be about the fastest you could hope to own. The surprise then is that Sony still considered it more economical even at that point to use the CRT and associated circuitry than a tiny LCD. Either way we’d agree with him that it’s a keeper, a fascinating curio for any electronics enthusiast. If we see an old camcorder going for not a lot, we’ll certainly give it a second look after this.

Continue reading “A Look At The Smallest Magnetic Deflection CRT Ever Made”

Unphotogenic Lighting As A Feature

Have you ever taken a picture indoors and had unsightly black bars interrupt your otherwise gorgeous photo? They are caused by lighting which flickers in and out in its normal operation. Some people can sense it easier than others without a camera. The inconsistent light goes out so briefly that we usually cannot perceive it but run-of-the-mill camera phones scan rows of pixels in sequence, and if there are no photons to detect while some rows are scanned, those black bars are the result. Annoying, right?

What if someone dressed that bug of light up as a feature? Instead of ruining good photos, researchers at the University of California-San Diego and the University of Wisconsin-Madison have found out what different frequencies of flicker will do to a photograph. They have also experimented with cycling through red, green, and blue to give the effect of a poorly dubbed VHS.

There are ways an intelligent photographer could get around the photo-ruining effect with any smartphone. Meanwhile DSLR cameras are already immune and it won’t work in sunlight, so we are not talking about high security image protection. The neat thing is that this should be easy to replicate with some RGB strips and a controller. This exploits the row scanning of new cameras, so some older cameras are immune.

A Custom Built FPV Monitor To Keep The Fans Happy

If you’re going to be flying around a FPV-capable aircraft, be it a quadcopter or a fixed-wing plane, you shouldn’t be surprised if bystanders want to take a turn wearing your googles. Of course we hope that you’re good enough flying line of sight that you don’t need to be wearing the googles to stay airborne, but it does make it harder to pull off the sort of tricks and maneuvers that your audience wants to see. So if you want to put on a good show, the audience really needs their own display.

Unfortunately, as avid FPV flier [Michael Delaney] discovered, even the “cheap” ones will run you at least $100 USD. So he did what any self-respecting hacker would do, he set out to build his own. Using a collection of off the shelf components he was able to build a very impressive monitor that lets the viewer see through the eyes of his quadcopter at less than half the cost of commercially available offerings. Though even if he hadn’t manged to beat the cost of a turn-key monitor, we think it would have been more than worth it for this piece of highly customized gear.

At the heart of the monitor is a Boscam RX5808 5.8 GHz receiver, which is controlled by an Arduino Pro Mini. The video output from the receiver is sent to a 4.2″ TFT screen intended for the Raspberry Pi, and on the backside of the laser-cut wooden enclosure there’s a 128 x 64 I2C OLED to display the currently selected channel and diagnostic information.

An especially nice touch for this project is the custom PCB used to tie all the components together. [Michael] could have taken the easy route and sent the design out for fabrication, but instead went with the traditional method of etching his own board in acid. Though he did modernize the process a bit by using a laser and pre-sensitized copper clad board, a method that seems to be gaining in popularity as laser engravers become a more common component of the hacker’s arsenal.

We’ve previously covered using the RX5808 and Arduino combo to create a spectrum analyzer, in case you want to do more than just watch your friends do powerloops.

GPS Overlays Give Real Life Racing A Video Game Feel

Racing is certainly exciting for the person rocketing around the track fast enough to get the speedometer into the triple digits, and tends to be a decent thrill for the spectators if they’ve got good seats. But if you’re just watching raw race videos on YouTube from the comfort of your office chair it can be a bit difficult to appreciate. There’s a lack of context for the viewer, and it can be hard to get the same sense of speed and position that you’d have if you saw the event first hand.

In an effort to give his father’s racing videos a bit more punch, [DusteD] came up with a clever way of adding video game style overlays to the recordings. The system provides real-time speed, lap times, and even a miniature representation of the track complete with a marker to show where the action is taking place. The end result is that recordings of Dad’s exploits on the track could pass as gameplay footage from Gran Turismo (we know GT doesn’t have motorcycles, but you get the idea).

The first part of the system is the tracker itself, which consists of a GPS receiver, an Arduino Pro Micro, and an SD card module. [DusteD] powers the device with two 18650 cells in parallel, and a DC-DC boost converter to step it up to 5V. Everything is contained in a 3D printed enclosure that he designed in OpenSCAD, with the only external elements being a toggle switch, a momentary switch, and most critically, a set of LEDs.

These LEDs play into the second part of the system, the software. The blinking LEDs are positioned so they’ll get picked up by the camera, which is then used to help synchronize the data stored on the SD card with the video. [DusteD] came up with some software that will take the speed and position information from the card, and turn it into PNG files with transparent backgrounds. These are then placed on top of the video with the help of FFmpeg. It takes a little adjustment to get everything lined up properly, but as the video after the break shows the end result is very impressive.

This build reminds us of the Raspberry Pi powered GPS helmet camera we featured a few years back, and it’s interesting to see how the two projects achieved what’s essentially the same goal in different ways.

Continue reading “GPS Overlays Give Real Life Racing A Video Game Feel”