Never Twice The Same Color: Why NTSC Is So Weird

Ever wonder why analog TV in North America is so weird from a technical standpoint? [standupmaths] did, so he did a little poking into the history of the universally hated NTSC standard for color television and the result is not only an explanation for how American TV standards came to be, but also a lesson in how engineers sometimes have to make inelegant design compromises.

Before we get into a huge NTSC versus PAL fracas in the comments, as a resident of the US we’ll stipulate that our analog color television standards were lousy. But as [standupmaths] explores in some depth, there’s a method to the madness. His chief gripe centers around the National Television System Committee’s decision to use a frame rate of 29.97 fps rather than the more sensible (for the 60 Hz AC power grid) 30 fps. We’ll leave the details to the video below, but suffice it to say that like many design decisions, this one had to do with keeping multiple constituencies happy. Or at least equally miserable. In the end [standupmaths] makes it easy to see why the least worst decision was to derate the refresh speed slightly from 30 fps.

Given the constraints they were working with, that fact that NTSC works as well as it does is pretty impressive, and quite an epic hack. And apparently inspiring, too; we’ve seen quite a few analog TV posts here lately, like using an SDR to transit PAL signals or NTSC from a microcontroller.

Continue reading “Never Twice The Same Color: Why NTSC Is So Weird”

Hackaday Prize Entry: Bypassing TV Broadcasting Restrictions

It’s a common problem faced by TV viewers, the programming they want to watch is being broadcast, but not to their location. TV content has traditionally been licensed for transmission by geography, and this has sometimes put viewers at odds with broadcasters.

The viewing public have not always taken this restriction of their programming choice lying down, and have adopted a variety of inventive solutions with varying degrees of legality and success. Many years ago you might have seen extreme-length UHF antennas to catch faraway transmitters, more recently these efforts have been in the digital domain. It was said in the 1990s that Sky’s Videocrypt satellite TV smart cards were cracked because German Star Trek Next Generation fans were unable to buy subscriptions for non-UK addresses, for example. You can argue in the comments over whether [Patrick Stewart] et al being indirectly responsible for a decryption coup is an urban legend, but it is undeniable that serial smart card emulators and dodgy DOS software for Sky decryption were sold all over Europe at the time.

Modern-day efforts to break the geographic wall on TV broadcasting have turned to the Internet. Services such as the ill-fated Aereo and the Slingbox set-top streaming products have taken the TV broadcast in a particular area and transported it to other locations for viewing online. But they are not the only Internet self-streaming option, if the idea of paying a subscription or tying yourself to a commercial service does not appeal then you can build an off-air streamer for yourself.

[Solenoid]’s project is an off-air streamer using a Raspberry Pi 3 with a USB DVB-T tuner. It uses Tvheadend to power the streaming, and OpenVPN to provide security. His build logs detail his efforts to ensure that power consumption is not too high and that the Pi is not running too hot, and provides instructions on how to set up and use the software. It’s not an overly complex piece of hardware, but it could provide a useful service for any of you who wish to keep up-to-date with your home TV when you are off on your travels.

Interactive Dynamic Video

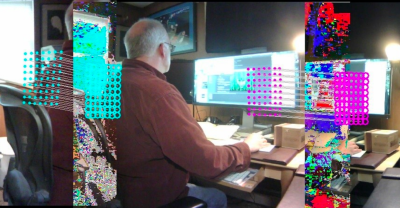
If a picture is worth a thousand words, a video must be worth millions. However, computers still aren’t very good at analyzing video. Machine vision software like OpenCV can do certain tasks like facial recognition quite well. But current software isn’t good at determining the physical nature of the objects being filmed. [Abe Davis, Justin G. Chen, and Fredo Durand] are members of the MIT Computer Science and Artificial Intelligence Laboratory. They’re working toward a method of determining the structure of an object based upon the object’s motion in a video.

The technique relies on vibrations which can be captured by a typical 30 or 60 Frames Per Second (fps) camera. Here’s how it works: A locked down camera is used to image an object. The object is moved due to wind, or someone banging on it, or  any other mechanical means. This movement is captured on video. The team’s software then analyzes the video to see exactly where the object moved, and how much it moved. Complex objects can have many vibration modes. The wire frame figure used in the video is a great example. The hands of the figure will vibrate more than the figure’s feet. The software uses this information to construct a rudimentary model of the object being filmed. It then allows the user to interact with the object by clicking and dragging with a mouse. Dragging the hands will produce more movement than dragging the feet.

The results aren’t perfect – they remind us of computer animated objects from just a few years ago. However, this is very promising. These aren’t textured wire frames created in 3D modeling software. The models and skeletons were created automatically using software analysis. The team’s research paper (PDF link) contains all the details of their research. Check it out, and check out the video after the break.

Continue reading “Interactive Dynamic Video”

Abusing A Cellphone Screen With Solenoids Posts High Score

This Raspberry Pi 2 with computer vision and two solenoid “fingers” was getting absurdly high scores on a mobile game as of late 2015, but only recently has [Kristian] finished fleshing the project out with detailed documentation.

Developed for a course in image analysis and computer vision, this project wasn’t really about cheating at a mobile game. It wasn’t even about a robotic interface to a smartphone screen; it was a platform for developing and demonstrating the image analysis theory he was learning, and the computer vision portion is no hack job. OpenCV was used as a foundation for accessing the camera, but none of the built-in filters are used. All of the image analysis is implemented from scratch.

The game is a simple. Humans and zombies move downward in two columns. Zombies (green) should get a screen tap but not humans. The Raspberry Pi camera takes pictures of the smartphone’s screen, to which a HSV filter is applied to filter out everything except green objects (zombies). That alone would be enough to get you some basic results, but not nearly good enough to be truly reliable and repeatable. Therefore, after picking out the green objects comes a whole chain of additional filtering. The details of that are covered on [Kristian]’s blog post, but the final report for the project (PDF) is where the real detail is.

If you’re interested mainly in seeing a machine pound out flawless victories, the video below shows everything running smoothly. The pounding sounds make it seem like the screen is taking a lot of abuse, but [Kristian] mentions that’s actually noise from the solenoids and not a product of them battling the touchscreen. This setup can be easily adapted to test out apps on different models of phones — something that has historically cost quite a bit of dough.

If you’re interested in the nitty-gritty details of the reasons and methods used for the computer vision portions, be sure to go through [Kristian]’s github repository where everything about the project lives (including the aforementioned final report.)

Continue reading “Abusing A Cellphone Screen With Solenoids Posts High Score”

Time Lapse Rig Puts GoPro Into Orbit – In Your Shop

The combination of time-lapse photography and slow camera panning can be quite hypnotic – think of those cool sunset to nightfall shots where the camera slowly pans across a cityscape with car lights zooming by. [Frank Howarth] wanted to replicate such shots in his shop, and came up with this orbiting overhead time-lapse rig for his GoPro.

[Frank] clearly cares about the photography in his videos. Everything is well lit, he uses wide-open apertures for shallow depth of field shots, and the editing and post-production effects are top notch. So a good quality build was in order for this rig, which as the video below shows, will be used for overhead shots during long sessions at the lathe and other machines. The gears for this build were designed with [Matthias Wandel]’s gear template app and cut from birch plywood with a CNC router. Two large gears and two small pinions gear down the motor enough for a slow, smooth orbit. The GoPro is mounted on a long boom and pointed in and down; the resulting shots are smooth and professional looking, with the money shot being that last look at [Frank]’s dream shop.

If you haven’t seen [Frank]’s YouTube channel, you might want to check it out. While his material of choice is dead tree carcasses, his approach to projects and the machines and techniques he employs are great stuff. We featured his bamboo Death Star recently, and if you check out his CNC router build, you’ll see [Frank] is far from a one-trick pony.

Continue reading “Time Lapse Rig Puts GoPro Into Orbit – In Your Shop”

Commanding Kerbals With A Physical Interface

Kerbal Space Program will have you hurling little green men into the wastes of outer space, landing expended boosters back on the launchpad, and using resources on the fourth planet from the Sun to bring a crew back home. Kerbal is the greatest space simulator ever created, teaches orbital mechanics better than the Air Force textbook, but it is missing one thing: switches and blinky LEDs.

[SgtNoodle] felt this severe oversight by the creators of Kerbal could be remedied by building his Kerbal Control Panel, which adds physical buttons, switches, and a real 6-axis joystick for roleplaying as an Apollo astronaut.

The star of this build is the custom six-axis joystick, used for translation control when docking, maneuvering, or simply puttering around in space. Four axis joysticks are easy, but to move forward and backward, [SgtNoodle] replaced the shaft of a normal arcade joystick with a carriage bolt, added a washer on one end, and used two limit switches to give this MDF cockpit Z+ and Z- control.

The rest of the build is equally well detailed, with a CNC’d front panel, toggle switches and missile switch covers, with everything connected to an Arduino Mega. This Arduino interfaces the switches to the game with the kRPC mod, which creates a script-driven interface to the game. So, toggling the landing gear switch, for instance, triggers a script which interfaces with KSP to lower your landing gear prior to a nice, safe landing. Or, more likely, a terrifying crash.

D.Va For Real: Playing An FPS With Flight Sticks

[Rudeism] loves playing Blizzard’s hit game Overwatch. He wanted to make his gaming experience a bit more realistic though. One of the characters is D.Va, who according to game lore is a member of the South Korean Mobile Exo-Force (MEKA). D.Va pilots her MEKA in game using two joysticks. Overwatch is a standard FPS with WASD and mouse controls, so the realism ends at the screen.

d.va-thumb[Rudeism] didn’t let that stop him. He used two flight sticks to create the  ultimate D.Va experience. [Twitch recording link – language warning] A commercial software package called Xpadder allowed him to map movements on the joystick to mouse and keystrokes. The left joystick maps to WASD, left shift, Q, and right click. The right stick corresponds to mouse movements, E, and left click.

This isn’t exactly the tank style steering we’re used to from classic mech games like Virtual-On, but it’s pretty good for a software solution. It makes us wonder what would be possible with a bit of hardware hacking – perhaps a Teensy handling the analog and button inputs.

People have been coming up with interesting ways to play video games for years. Check out this hack with the classic Microsoft Kinect, or these arcade hacks.

Via Reddit