Building Badges The Hard Way

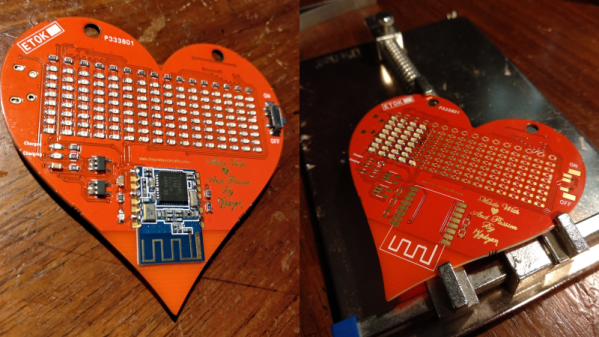
What’s a hacker to do to profess his love for his dearest beloved? [Nitesh Kadyan] built his lady-love this awesome LED pendant – the LED BLE Hearty Necklace Badge.

The hardware is pretty vanilla by today’s hacker standards. An ATMega328p  does most of the heavy lifting. An HM-11 BLE module provides connection to an Android mobile app. Two 74HC595 shift registers drive 16 columns of red LEDs and a ULN2803 sinks current from the 8 rows. The power section consists of a charger for the 320mAh LiPo and an LDO for the BLE module. All the parts are SMD with the passives mostly being 0603, including the 128 LEDs.
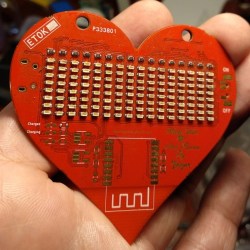
128 LEDs soldered wrong way around

[Nitesh] didn’t get a stencil made for his first batch of boards, so all the parts were painstakingly soldered manually and not in a reflow oven. And on his first board, he ended up soldering all of the LED’s the wrong way around. Kudos to him for his doggedness and patience.

The Arduino code on the ATmega is also quite straightforward. All characters are stored as eight bytes each in program memory and occupy 8×8 pixels on the matrix. The bytes to be displayed are stored in a buffer and the columns are left shifted fast enough for the marquee text effect. The Android app is built by modifying a demo BLE app provided by Google. The firmware, Android app, and the KiCAD design files are all hosted on his Github repository.

[Nitesh] is now building a larger batch of these badges to bring them to hillhacks – the annual hacker-con for making and hacking in the Himalayas. Scheduled for later this month, you’ll have to sign up on the mailing list for details and if you’d like to snag one of these badges. To make it more interesting, [Nitesh] has added two games to the code – Tetris and Snakes. Hopefully, this will spur others to create more games for the badge, such as Pong.

Continue reading “Building Badges The Hard Way”

Towards More Automated Printers

3D printers can be used in a manufacturing context. This might be surprising for anyone who has waited hours for their low-poly Pokemon print, but for low-volume plastic parts, you can actually run a manufacturing line off a few 3D printers. The problem with 3D printers is peeling the print off when it’s finished. If only there were a conveyor belt solution for a bed that wasn’t forgotten by MakerBot.

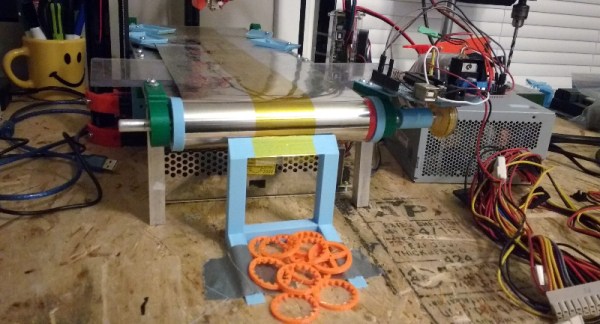
[Swaleh] may have a solution to the problem of un-automated 3D printers. He’s designing the WorkHorse 3D, a printer that uses a conveyor belt as a bed. When the print is finished, the conveyor belt rolls forward, depositing a printed part in a bin. It’s the solution to truly automated printing.

The use of conveyor belts to automate a batch of 3D prints isn’t a new idea. Way back in the Before Time, MakerBot released the Automated Build Platform, and used it in production to print off parts for Thing-O-Matics. This bit of Open Hardware was left by the wayside for some reason, and last year saw the invention of a new type of conveyor belt-based printer, The Infinite Build Volume Printer (for lack of a better name) from [Bill Steele]. This printer angles the print bed at 45 degrees, theoretically allowing for prints that are infinitely long. This idea was turned into the Printrbot Printrbelt, and the Blackbelt 3D printer was made public around the same time.

[Swaleh]’s printer is not of the infinite build volume variety. Instead of concentrating on creating long beams, most of the engineering work has gone into making a printer that’s designed to just push prints out. The conveyor belt bed is flat — and may unfortunately infringe on the MakerBot patents — but if you want a printer that’s designed to dump parts out like a very slow injection molding machine, this is the design you want.

The print queue application for this project is just a simple desktop app that serves as a buffer for G-code files. The app sends one G-code file off to the printer, rolls the bed forward, and queues up the next part. It’s simple, yes, but there aren’t too many things that do this now because there aren’t too many printers built to be factories. It’s impressive, and you can check out a few videos of this printer in action below.

Continue reading “Towards More Automated Printers”

Vastly Improving The Battery Life On Cheap Action Cams

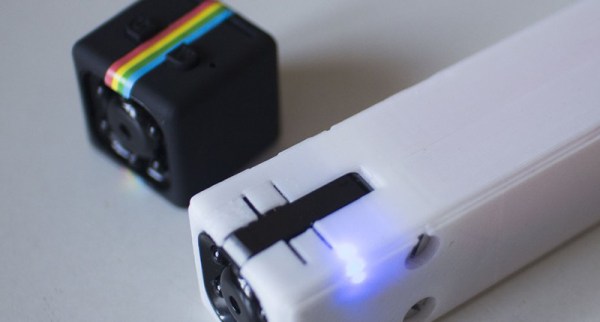
At one time, GoPro was valued at over eleven Billion dollars. It’s now on the verge of being a penny stock, because if surfers can make action cams and video editing software, anyone can. Action cams are everywhere, and one of the cheapest is the SQ11. It’s a rip-off of the Polaroid Cube, has a non-standard USB socket, a tiny battery, and the video isn’t that great. It only costs eight dollars, though, so [pixelk] decided to vastly expand the abilities of this cheap camera for a Hackaday Prize entry.

The major shortcoming of the SQ11 action cam is the tiny battery. Reportedly, it’s a 200 mAh battery, but the stated 1-2 hours of runtime bears no resemblance to reality. The solution to this problem, as with most things in life, is to throw some lithium cells at the problem.

[pixelk] disassembled the SQ11 action cam and 3D printed a much longer enclosure meant to fit a single 18650 battery. There’s a protection circuit, so that’s fine, but there’s still a problem: the charging circuit in the camera is tailored for a 200 mAh battery — charging an 18650 cell would probably take a day. That’s no problem, because this enclosure leaves the battery removable, for easy recharging in an external device.

Does this make the SQ11 a good camera? Marginally, yes. If you need to record video for hours and hours, you won’t be able to do better than an eight dollar camera and four dollars in parts.

Homebrew Not A Hakko

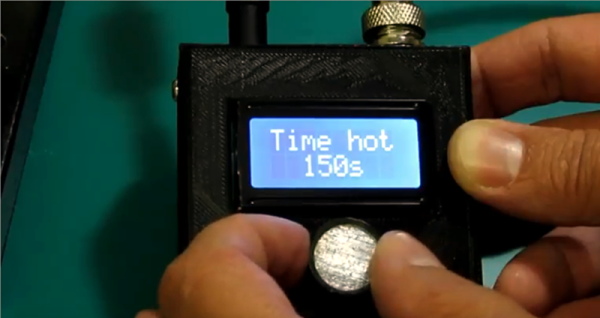
We don’t know if [Marius Taciuc] was thinking about how all Jedi make their own lightsabers as a rite of passage, but he decided that it was time to build his own soldering iron. He used a Hakko T12 tip which has a built-in thermocouple. However, he found that the information on the Internet about the tips was either incomplete or incorrect. Naturally, he figured it out and you can see the completed iron in the video, below.

The problem stems from the thermocouple type. Some sites he found identified it as a type K device. Others said it wasn’t, but didn’t say what kind it was. He took a container of oil and heated it to various temperatures and then measured it with both a commercial soldering iron and the T12 tip. By plotting the data against known thermocouple curves, he concluded the device was actually type C.

Continue reading “Homebrew Not A Hakko”

Checking The Weather Without A Window

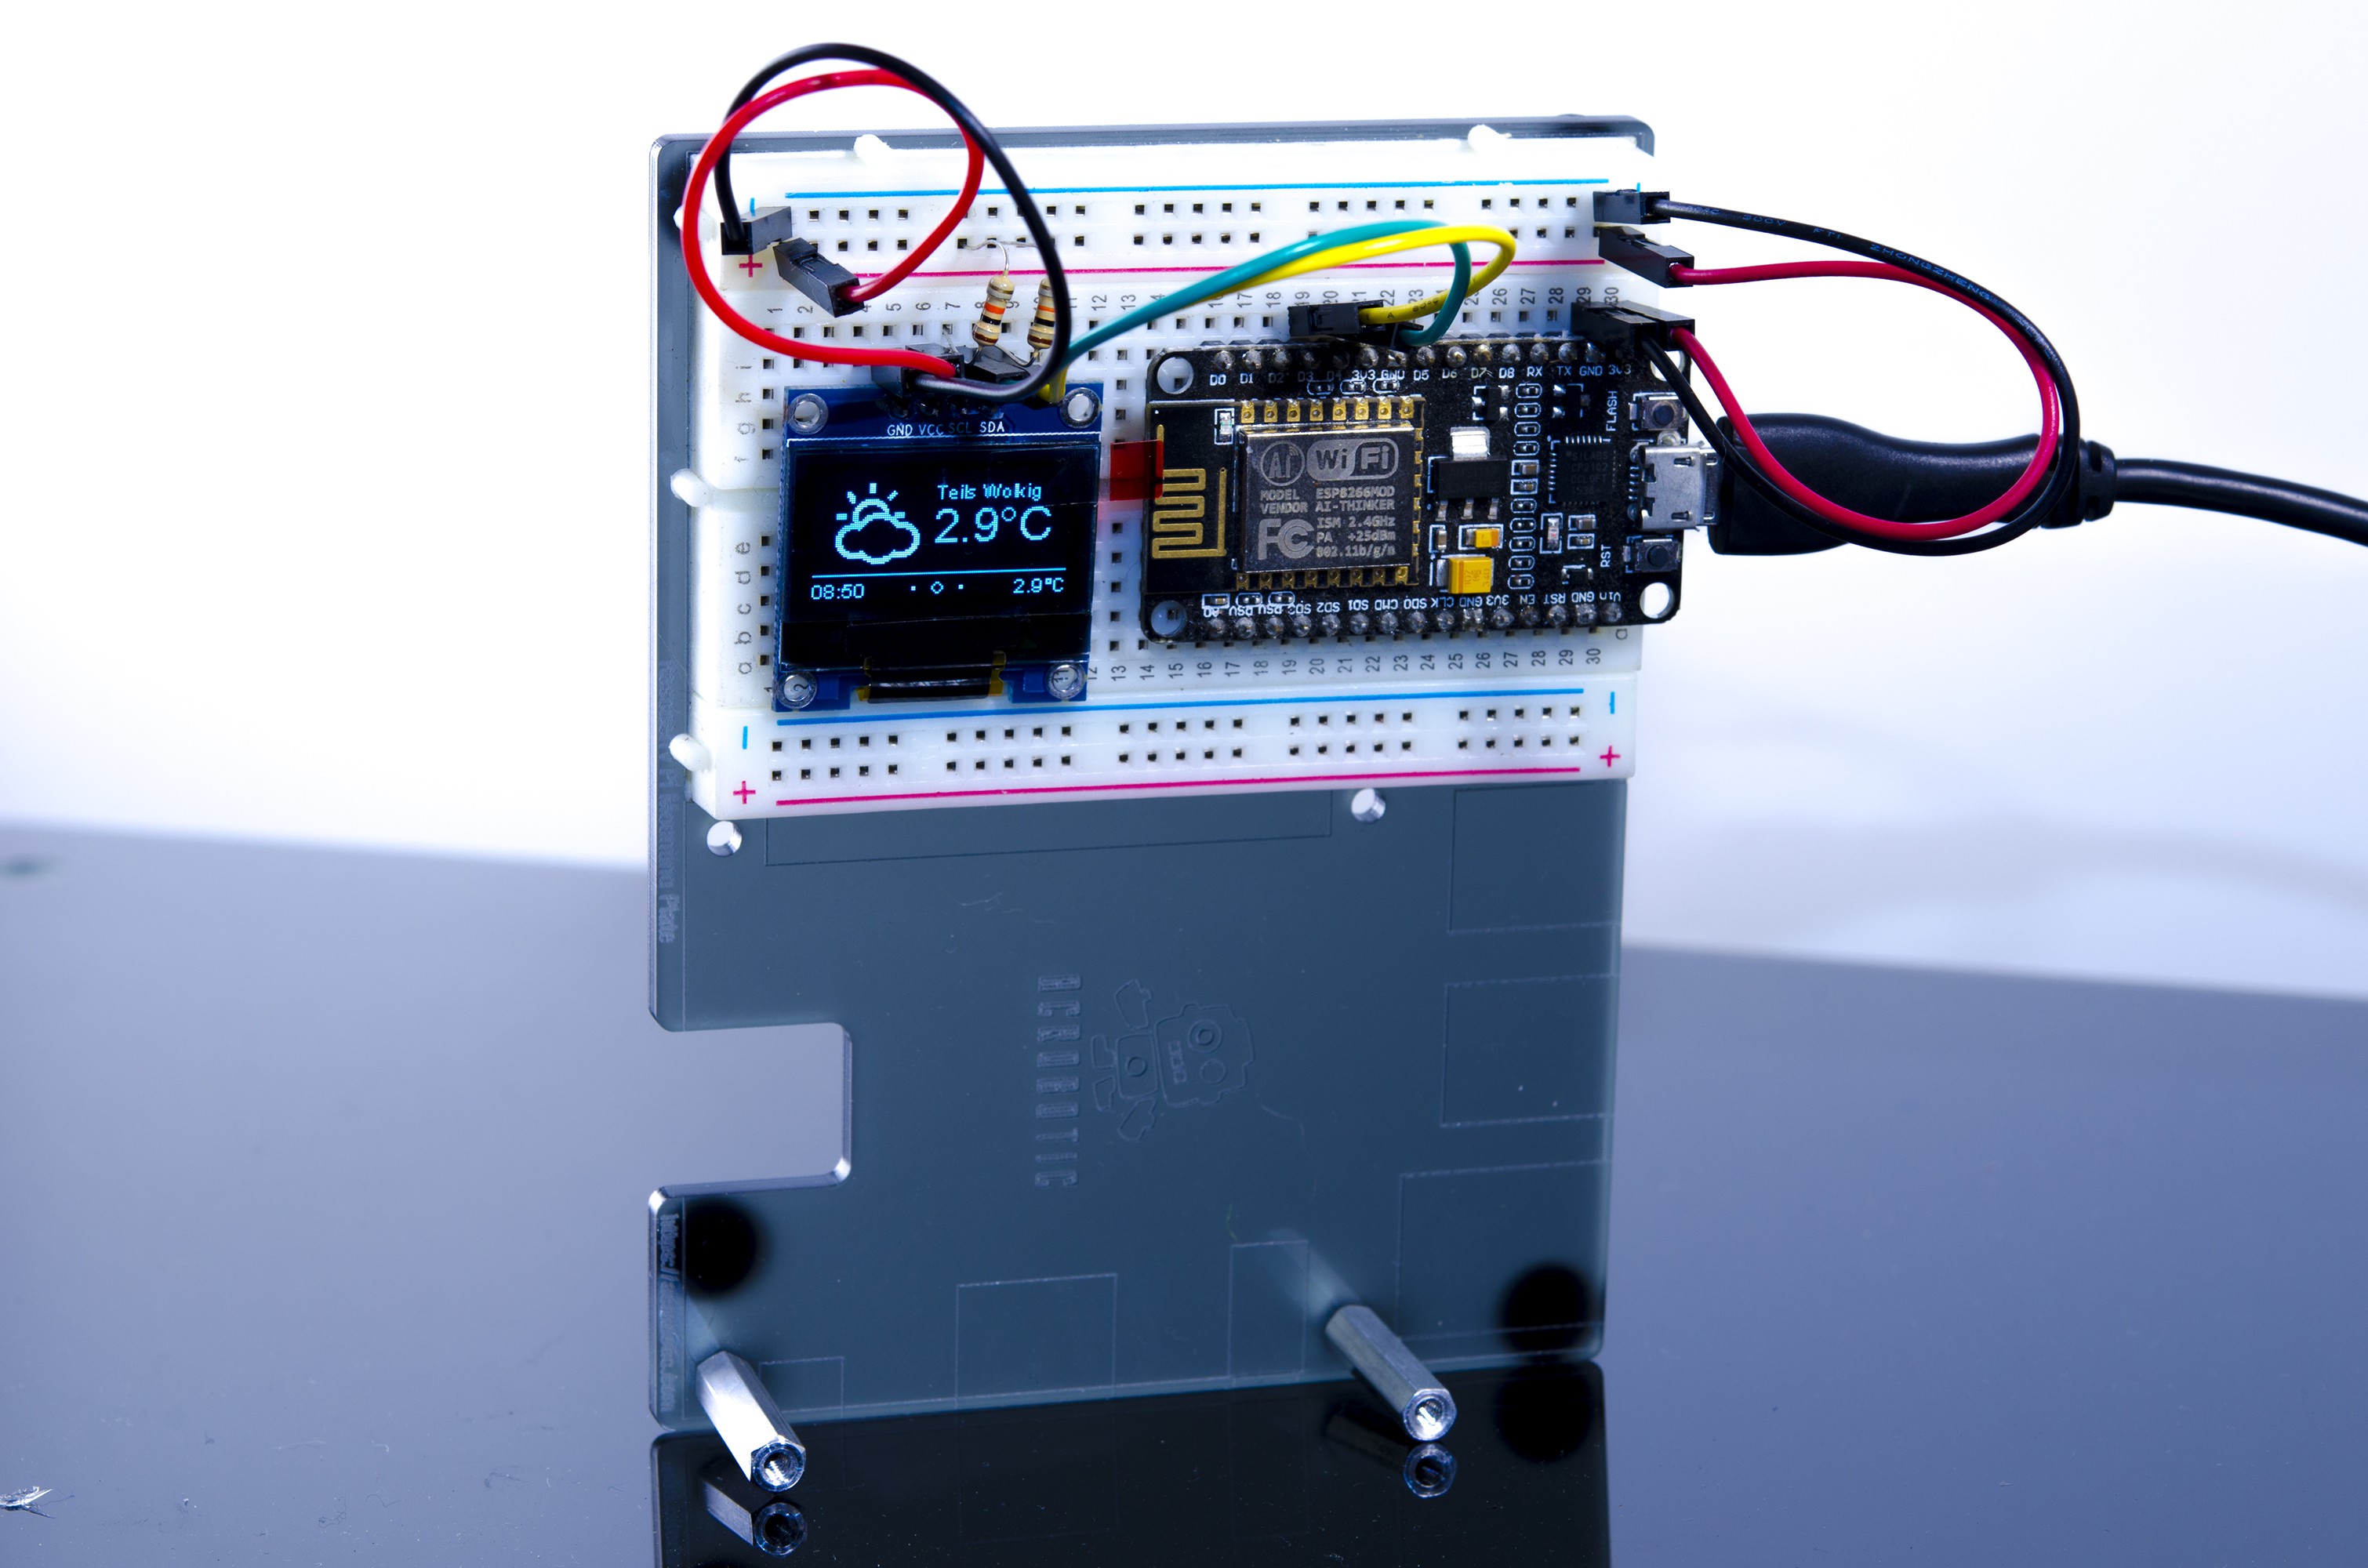
Making a weather display is great because it’s a simple project that shows off some skills and has an obvious daily use. So [ACROBOTIC Industries] decided to make an easy kit for the Hackaday Prize to make weather displays even more accessible.

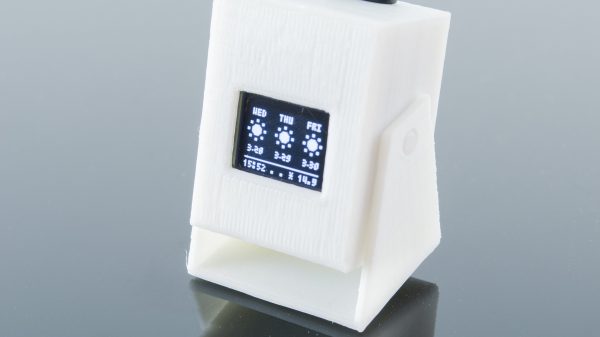
Calling it the ESPecter, [ACROBOTIC Industries] wanted to make this a simple project for anyone, regardless of skill with a soldering iron or Arduino toolkit. So they decided to base the guts on common components that can be put together easily, specifically a Wemos Mini D1 with an OLED shield as a bright display. They also designed a cool tiltable 3D-printed enclosure for this small device so that you can orient it to your eye level.

ESPecter breadboarded prototype.

While they already have a breadboarded prototype, and a 3D printed case, some software work remains to make the project really shine. They plan to add nice features like a web interface to configure location and network information, alerts, additional locations, and historical weather data. They also want to create a weather library to display well on a low-resolution screen and add battery operation.

We look forward to seeing the final version later in the Hackaday Prize!

This isn’t the first weather project we’ve seen around here. Other variants include mirror weather displays, an ESP8266-based weather monitoring station, a very low-power weather station, and this roundup of weather displays which might give you some inspiration.

A Mini-ITX PDP-11

The PDP-11 is perhaps the most important computer in history. This was the king of all minicomputers, and once you get past the amazing front panels of the 11/20, 11/40, and 11/70, you’ll find PDP-11s everywhere. Heathkit sold one. It was the smallest computer that could run Unix. There were desktop versions sold as DEC Professionals. I have been told Ticketmaster — the entire backend of all event ticket sales in the United States — still runs on PDP-11s.

One of the interesting bits of the PDP-11 is the miniaturization that happened over the course of its development. Over time, the Unibus processor cards of the earlier models were shrunk down into a single chip. This PDP-on-a-chip was then cloned by the Soviets, and like most vintage Eastern European electronics, they’re all readily available on eBay.

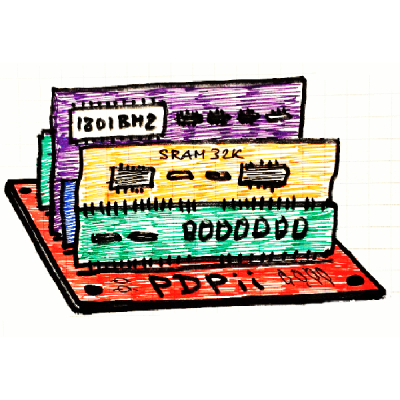
For his Hackaday Prize entry, [SHAOS] is taking one of these chips and turning it into a modern machine. The PDPii is a project to bring the PDP-11 back to life in the form of an Open Source motherboard with a Mini-ITX motherboard. Is it game-changing? No, not really; you could buy a desktop PDP-11 thirty years ago. This project, though, is taking new old stock chips you can buy for ten dollars and turning it into something resembling a modern system. Finally, Ticketmaster can upgrade.

The design of this project doesn’t quite meet the spec for the Mini-ITX form factor; it’s based off the RC2014 backplane Z80 computer, but desktop computer cases are cheap, as are power supplies, and I’m sure someone out there knows how to fit an eight inch floppy in a five and a quarter inch hole.

The key feature for this Mini-ITX backplane PDP-11 is a redesign of the Q-bus found in later PDPs to something that’s a bit smaller, a bit cheaper to manufacture, and still has all the relevant pins accessible. With some reconfiguring of the baroque DEC standards, [SHAOS] came up with the Bread-Board Friendly Q-bus Extended, or BBQ-Bus+. The next step for this project is gathering up a few PDP-11 compatible Russian КР1801ВМ2 CPUs and going to town on the architecture of what is probably the most replicated computer design ever.

Video Quick-Bit: Numitrons And Infinite Build Volumes

Majenta Strongheart takes a look at a couple of cool entries from the first round of the 2018 Hackaday Prize:

This is an infinite 3D printer. The Workhorse 3D is the way we’re going to democratize 3D printing. The Workhorse 3D printer does this by adding a conveyor belt to the bed of a 3D printer, allowing for rapid manufacturing, not just prototyping. [Swaleh Owais] created the Workhorse 3D printer to automatically start a print, manufacture an object, then remove that print from the print bed just to start the cycle all over again.

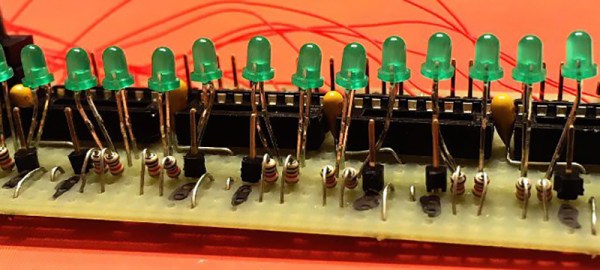
Check out this Numitron Hexadecimal Display Module from [Yann Guidon]. [Yann] is building an entire computer, from scratch, and he needs a way to display the status of various bits on a bus. The simplest way to do this is with a few buffer chips and some LEDs, but that’s far too easy for [Yann]. He decided to use Numitron tubes to count bits on a bus, from 0 to F. Instead of microcontrollers, he’s using relays and diode steering to turn those segments of the Numitron on and off.

Browse all of the entries here. Right now, we’re in the Robotics Module Challenge part of the Hackaday Prize, where twenty incredible projects will win one thousand dollars and move on to the final part of the Hackaday Prize where one lucky winner will win fifty thousand dollars for building awesome hardware. If that’s not incredible, I don’t know what is.