Catch A Rising Star With Arduino

Space is big. Really big. Yet on TV and movies, enemy spacecraft routinely wind up meeting at roughly the same spot and, miraculously, in the same orientation. If you’ve ever tried to find something smaller than the moon in a telescope, you’ll appreciate that it isn’t that easy. There are plenty of tricks for locating objects ranging from expensive computerized scopes with motors to mounting a phone with Google Sky or a similar program to your telescope. [DentDentArthurDent] didn’t use a phone. He used an Arduino with an outboard GPS module.

You still have to move the scope yourself, but the GPS means you know your location and the time to a high degree of accuracy. Before you start an observing session, you simply point the telescope at Polaris to calibrate the algorithm, a process which in the northern hemisphere is pretty easy.

Continue reading “Catch A Rising Star With Arduino”

Google Lowers The Artificial Intelligence Bar With Complete DIY Kits

Last year, Google released an artificial intelligence kit aimed at makers, with two different flavors: Vision to recognize people and objections, and Voice to create a smart speaker. Now, Google is back with a new version to make it even easier to get started.

The main difference in this year’s (v1.1) kits is that they include some basic hardware, such as a Raspberry Pi and an SD card. While this might not be very useful to most Hackaday readers, who probably have a spare Pi (or 5) lying around, this is invaluable for novice makers or the educational market. These audiences now have access to an all-in-one solution to build projects and learn more about artificial intelligence.

We’ve previously seen toys, phones, and intercoms get upgrades with an AIY kit, but would love to see more! [Mike Rigsby] has used one in his robot dog project to detect when people are smiling. These updated kits are available at Target (Voice, Vision). If the kit is too expensive, our own [Inderpreet Singh] can show you how to build your own.

Via [BGR].

Synthbike Rolls To The Beat

Modular synthesizers are some of the ultimate creative tools for the electronic musician. By experimenting with patch leads, knobs and switches, all manner of rhythmic madness can be conjured out of the æther. While they may overflow with creative potential, modular synths tend to fall down in portability. Typically built into studio racks and composed of many disparate modules, it’s not the sort of thing you can just take down the skate park for a jam session. If only there was a solution – enter the madness that is Synth Bike.

Synth Bike, here seen in the 2.0 revision, impresses from the get go, being built upon a sturdy Raleigh Chopper chassis. The way we see it, if you’re going to build a synth into a bicycle, why not do it with some style? From there, the build ratchets up in intensity. There’s a series of sequencer modules, most of which run individual Arduino Nanos. These get their clock from either a master source, an external jack, or from a magnetic sensor which picks up the rotation of the front wheel. Your pace dictates the tempo, so you’ll want to work those calves for extended raves at the park.

The features don’t stop there – there are drums courtesy of a SparkFun WAV Trigger, an arcade button keyboard, and a filter board running the venerable PT2399 digital delay chip. It’s all assembled on a series of panels with wires going everywhere, just like a true modular should be.

The best thing is, despite the perplexing controls and arcane interface, it actually puts out some hot tunes. It’s  not the first modular we’ve seen around these parts, either.


Reverse Engineering Nintendo Labo Waveform Cards

The Nintendo Switch portable gaming system is heavily locked down to prevent hacking, but the Labo add-on looks like it might be a different matter. The Labo is a series of add-on devices made of cardboard that does things like turn the Switch into a musical keyboard that plays a waveform on a card that you slot in. [Hunter Irving] decided to try a bit of reverse engineering on these cards to see if he could 3D print his own. Spoilers: he could.

[Hunter] started by taking one of the cards that come with the Labo and looking at the layout. These cards are, like the rest of the Labo, very simple: they are just shaped pieces of card that fit into the back of the keyboard add-on. When you press a button, the Switch camera reads the card to create the waveform. So, the process involved figuring out the required dimensions of the card to create a template. [Hunter] then created simple waveforms (square, sine, sawtooth) in Inkscape, and used this to create a 3D printable waveform card. A quick bit of 3D printing later, he had several cards ready, and these worked without problems. As well as the synthetic waveforms, he tried real ones, such as an organ, taking the waveform shape from the zoomed-in sample and using that to print. This post describes the process nicely and offers downloads of 9 sample cards and a template to create your own.

We suspect that this is only scratching the surface of what can be done with the Switch, Labo, and some ingenuity. Unlike the Switch itself, the Labo seems to be built for hacking, using simple, easy to use components to create surprisingly complex mechanisms that could be adapted for any number of purposes.

We’re sure this isn’t the only Labo hack we’ll be covering over the coming year. Not sure what all the fuss is about? Read our reporting on its arrival.

A Mini-ITX PDP-11

The PDP-11 is perhaps the most important computer in history. This was the king of all minicomputers, and once you get past the amazing front panels of the 11/20, 11/40, and 11/70, you’ll find PDP-11s everywhere. Heathkit sold one. It was the smallest computer that could run Unix. There were desktop versions sold as DEC Professionals. I have been told Ticketmaster — the entire backend of all event ticket sales in the United States — still runs on PDP-11s.

One of the interesting bits of the PDP-11 is the miniaturization that happened over the course of its development. Over time, the Unibus processor cards of the earlier models were shrunk down into a single chip. This PDP-on-a-chip was then cloned by the Soviets, and like most vintage Eastern European electronics, they’re all readily available on eBay.

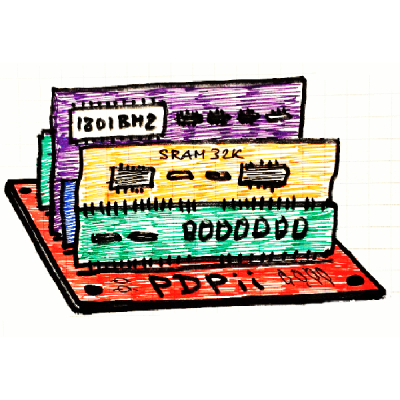
For his Hackaday Prize entry, [SHAOS] is taking one of these chips and turning it into a modern machine. The PDPii is a project to bring the PDP-11 back to life in the form of an Open Source motherboard with a Mini-ITX motherboard. Is it game-changing? No, not really; you could buy a desktop PDP-11 thirty years ago. This project, though, is taking new old stock chips you can buy for ten dollars and turning it into something resembling a modern system. Finally, Ticketmaster can upgrade.

The design of this project doesn’t quite meet the spec for the Mini-ITX form factor; it’s based off the RC2014 backplane Z80 computer, but desktop computer cases are cheap, as are power supplies, and I’m sure someone out there knows how to fit an eight inch floppy in a five and a quarter inch hole.

The key feature for this Mini-ITX backplane PDP-11 is a redesign of the Q-bus found in later PDPs to something that’s a bit smaller, a bit cheaper to manufacture, and still has all the relevant pins accessible. With some reconfiguring of the baroque DEC standards, [SHAOS] came up with the Bread-Board Friendly Q-bus Extended, or BBQ-Bus+. The next step for this project is gathering up a few PDP-11 compatible Russian КР1801ВМ2 CPUs and going to town on the architecture of what is probably the most replicated computer design ever.

Is It On Yet? Sensing The World Around Us, Starting With Light

Arduino 101 is getting an LED to flash. From there you have a world of options for control, from MOSFETs to relays, solenoids and motors, all kinds of outputs. Here, we’re going to take a quick look at some inputs. While working on a recent project, I realized the variety of options in sensing something as simple as whether a light is on or off. This is a fundamental task for any system that reacts to the world; maybe a sensor that detects when the washer has finished and sends a text message, or an automated chicken coop that opens and closes with the sun, or a beam break that notifies when a sister has entered your sacred space. These are some of the tools you might use to sense light around you.

Continue reading “Is It On Yet? Sensing The World Around Us, Starting With Light”

Writing On A Whiteboard, Performed By A Robot

For some of us here at Hackaday, school is but a very distant memory. All that teenage awkwardness we’d rather forget, synth pop, and 8-bit computers were cool the first time around, and our newer classrooms didn’t have blackboards any more. The Whiteboard Future Had Arrived, and it came with solvent-laden pens that our more rebellious classmates swore would get you high if you sniffed them for long enough. Innocent times. Kids nowadays probably get their lessons from iPads, but the whiteboard isn’t finished just yet. [f4hdk] has updated his board with Scribot, a whiteboard-writing robot arm driven by a couple of stepper motors and a nicely-engineered set of belts, that writes text from ASCII files in a custom-designed vector font.

At the end of the arm is a whiteboard marker, and in a neat twist it has an eraser on its rear end. A quick flip of the servo holding the marker, and it can rub out any of its work. Behind it all is an LPC1789 Cortex M3-based Mbed board with appropriate servo driver boards, and for those curious enough to take a second look there is a full code repository. The result as you can see in the video below the break is a very well-executed whiteboard writer. Your 1980s teacher might have grumbled at the new technology, but certainly couldn’t accuse it of doing a bad job!

Continue reading “Writing On A Whiteboard, Performed By A Robot”