This Is Your Last Chance To Design The Greatest In Open Hardware

This is the last weekend to get in on the Open Hardware Design Challenge, the first challenge of the 2018 Hackaday Prize. We’re looking for the boldest idea you can come up with. We want to see the beginnings of the next great bit of Open Hardware, and this is your chance to do it.

The Hackaday community has thrown itself into The Hackaday Prize and so far we have more than five hundred entries in the running to Build Hope and become the next great piece of Open Hardware. Next week, we’ll choose the top twenty projects to advance to the finals. Each of those twenty project will be awarded $1,000 and be in the running to win the Grand Prize of $50,000 and four other top cash prizes.

You still have time. This challenge doesn’t require a specific prototype — it’s all about great design. Demonstrate an uplifting use of technology and show a plan to build it. When you make it into the finals, you’ll have all summer to fabricate and refine your vision. This is your chance to be a hardware hero, so start your entry now.

Continue reading “This Is Your Last Chance To Design The Greatest In Open Hardware”
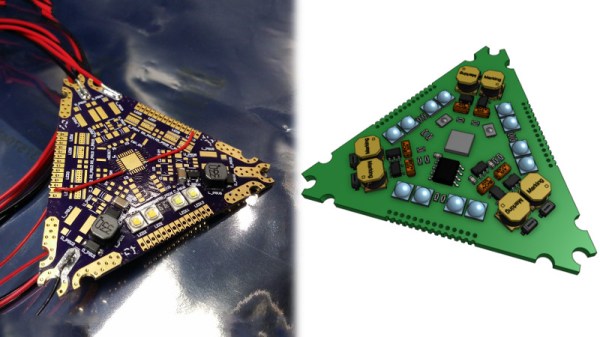
Courtesy of [david.reid]

Bent PETG Fills A Nixie Gap

Have you ever thought that Nixie tubes are cool but too hard to control with modern electronics? And that they’re just too expensive? [david.reid] apparently thought so and decided to create his own version of a Nixie tube, and it doesn’t get much cheaper than this.

PETG Nixie Tube

While working on a 3D printed locomotive with his son, [david.reid] used clear PETG (Polyethylene Terephthalate Glycol) 3D printer filament to move light from LEDs to various parts of the locomotive. He found this was a success, but roughed up the outside of the filament to see what would happen. Lo and behold, a warm glow appeared on the surface of the tube! Like any good hacker, his next thought was of Nixie tubes, as you have seen in many clocks.

His basic idea is that with a little heat you can bend the filament into any shape that you like ([david.reid] uses custom molds). You then use some sandpaper to roughen up the outside wherever you’d like light to show, and add an LED at the bottom to light it up!

[david.reid] isn’t the first person to modernize Nixie Tubes. Over the years, we’ve seen them combined with Wi-Fi boards, individual LED segments, or even laser cutters & WS2812s!

Now’s a great time to get started on a project for the Hackaday Prize! If you’re looking for somewhere to start, we’d love to at least see your own take on a clock!

Tesselated Worklights Are Nifty, Modular

Electric lighting – is there anything it can’t do? Coming in all manner of forms and flavours, you can get everything from a compact reading lamp to a blindingly powerful worklight for your garage. Generally, different lights are built in different ways to suit their purpose, but it’s not the only way to do things. Enter [slisgrinder] and the MOSAIC Lighting System.

At its heart, MOSAIC is a way of building lighting rigs out of individual modules. Where it gets interesting is the design – they’re triangles! The boards carry a variety of LEDs and are laid out in a fashion that allows the power and data connections to be made between adjacent cells by laying them out next to each other.  Many boards can be tesselated together to create larger, smaller, or unusually shaped arrays. The connections are well thought out, allowing the tiles to make a connection along any one of their 3 edges, regardless of orientation.

The project began out of a desire to grow okra in an otherwise inhospitable climate; to this end, there are both general work lighting modules as well as grow light versions with UV LEDs on board. The modules can be combined in different ways and command and control is done over RS-485.

It’s a tidy project that shows how a little thought can create a versatile design through the use of an unusual form factor. We’ve seen modular lighting projects before, too – like this entry to last year’s Hackaday Prize.

Automating The Design Of Word Clocks

Word clocks, or a matrix of light-up letters that spell out the time, are a standard build for all enterprising electronics enthusiasts. The trouble is finding the right way to drive a matrix of LEDs and the significant amount of brainpower that goes into creating a matrix of letters that will spell out the time without making it look like it’s supposed to spell out the time.

For his Hackaday Prize entry this year, [Stephen Legge] is creating a standard toolkit that makes word clocks easier to build. It’s a hardware and software project, allowing for LED matrices of any reasonable size, and the software to make a grid of letters that only spells out the words you want and not the four-letter ones you don’t.

The hardware for this project is built around the IS31FL3733 LED driver from ISSI. This is an interesting chip that takes I2C in and spits out a LED matrix with very few additional support components. This chip provides [Stephen] with a 12×16 single-color LED matrix, which is more than enough for a word clock.

Where this build gets slightly more interesting is the creation of a custom matrix of letters that will still spell out ‘quarter to noon’ when lit in the appropriate way. This is a big challenge in creating a customized word clock; you could always borrow the layout of the letters from another word clock, but if you want customized phrases, you’ll either have to sit down with a pencil and graph paper, or write some software to do it automatically.

It’s a great project, and since all of [Stephen]’s work is being released under Open Source licenses, it’s a great entry to the first portion of the Hackaday Prize where we’re challenging hardware creators to build Open Hardware.

Medium Machine Mediates Microcontroller Messages

Connecting computers to human brains is currently limited to the scope of science fiction and a few cutting-edge laboratories. Tapping into some nerves farther from our central wetware is possible and [Peter Buczkowski] shows us his stylish machine for implanting a pattern into our brains without actively having to memorize anything.

His Medium Machine leverages a TENS unit to activate forearm muscles in a pattern programmed into an Arduino. Users place their forearm across two aluminum electrodes mounted on a tasteful wooden platform and extend a single finger over a button. Electrical impulses trigger the muscles which press the button. That’s all. After repeating the pattern a few times, the users should be able to recite it back on command even if they aren’t aware of what it means. If this sounds like some [Johnny Mnemonic] memory cache, you are absolutely correct. This project draws inspiration from the [William Gibson] novel which became a [Keanu Reeves] movie.

Users can be programmed with a Morse code message or the secret knock to open an attic library or play a little tune. How about learning a piano song?

Continue reading “Medium Machine Mediates Microcontroller Messages”

Rotary Encoders Become I2C Devices

Rotary encoders are the bee’s knees. Not only do you get absolute positioning, you can also use a rotary encoder (with a fancy tact button underneath) for an easy UI for any electronics project. There’s a problem with rotary encoders, though: it’s going to use Gray code or something weird, and getting a rotary encoder to work with your code isn’t as easy as a simple button.

For his Hackaday Prize project, [fattore.saimon] has come up with the solution for using multiple rotary encoders in any project. It’s a board that turns a rotary encoder into an I2C device. Now, instead of counting rising and falling edges, adding a rotary encoder to a project is as easy as connecting four wires.

The project is built around the PIC16F18344, a small but surprisingly capable microcontroller that reads a rotary encoder and spits data out as an I2C slave device. Also on board are a few pins for an RGB LED, general purpose pins, the ability to set all seven bits of the I2C address (who wants 127 rotary encoders?), and castellated holes for connecting several boards together.

This project is an update of [fattore]’s earlier I2C Encoder, and there are a lot of improvements in the current version. It’s slightly smaller, has better connectors, and uses a more powerful microcontroller. That’s just what you need if you want a ton of rotary encoders for all those cool interactive projects.