Hack Your Brain To Stop Overeating

Sometimes the easiest advice can be the hardest to follow. For example: if you want to lose weight, you must eat right and exercise. You can avoid both and still lose weight by simply eating less, but that takes willpower.

Losing weight is one of the hardest things a person can do, because we have to eat to survive. That leaves the problem of stopping when we’re full. Here in the united states of high-fat foods and huge portions, that can be really, really difficult, as evidenced by the obesity statistics. But no matter where you live, it’s easy to ignore the ‘stomach full’ signal. It’s kind of slow, anyway. So how do you get yourself tuned into the signal? All it takes is a little classical conditioning.

Slim Band is simple, but effective. Basically, it’s a pack of breath-freshening strips strapped to a timer PCB and set into a watchband. Set the five-minute timer when you start eating, and when it goes off, take out a strip and mintify your mouth. By the time the minty-ness wears off, you should feel full enough to push your plate away. The convenience factor is a big plus—there’s no getting the phone out to set an alarm, or digging for mints in your pocket or purse.

Though the idea began as a personal improvement project, [Chaz] would like to see it widely adopted as a way of fighting obesity and evening out the world’s food distribution in the longer term. We would, too.

Open Source Smart Smoker Brings The Heat (Slowly)

Conceptually, cooking on a grill is simple enough: just crank up the flames and leave the food on long enough for it to cook through, but not so long that it turns into an inedible ember. But when smoking, the goal is actually to prevent flames entirely; the food is cooked by the circulation of hot gasses generated by smoldering wood. If you want a well-cooked and flavorful meal, you’ll need the patience and dedication to manually keep the fuel and air balanced inside the smoker for hours on end.

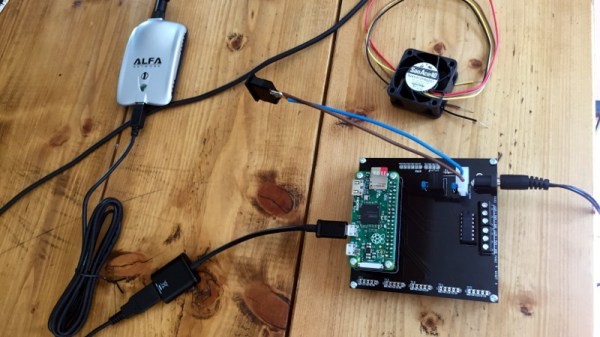
Or in the case of the Smokey Mc Smokerson, you just let the electronics handle all the hard stuff while you go watch TV. Powered by the Raspberry Pi Zero and a custom control board, this open source smoker offers high-end capabilities on a DIY budget. Granted you’ll still need to add the fuel of your choice the old fashioned way, but with automatic air flow control and temperature monitoring, it greatly reduces the amount of fiddly work required to get that perfect smoke.

[HackersHub] has been working on Smokey Mc Smokerson for a few months now, and are getting very close to building the first complete prototype. The initial version of the software is complete, and the classy black PCBs have recently arrived. Some simulations have been performed to get an idea of how the smoke will circulate inside of the smoker itself, built from a 55 gallon drum, but technically the controller is a stand-alone device. If you’re willing to makes the tweaks necessary, the controller could certainly be retrofitted to  commercially available smoker instead.

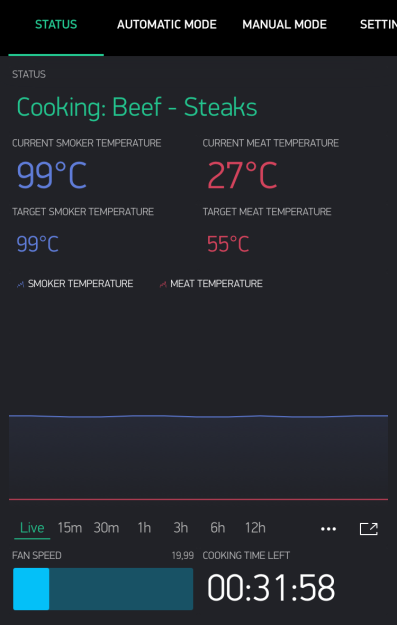
Ultimately, this project boils down to tossing a bunch of temperature sensors at the problem. The software developed by [HackersHub] takes the data collected by the five MAX6675 thermocouples and uses it to determine when to inject more air into the chamber using a PWM-controlled fan at the bottom of the smoker. As an added bonus, all those temperature sensors give the user plenty of pretty data points to look at in the companion smartphone application.

We’ve actually seen a fair number of technologically-augmented grills over the years. From this automotive-inspired “turbocharged” beast to a robotic steak flipper built out of PVC pipes, we can confidently say that not all hackers are living on a diet of microwaved ramen.

FiberGrid: An Inexpensive Optical Sensor Framework

When building robots, or indeed other complex mechanical systems, it’s often the case that more and more limit switches, light gates and sensors are amassed as the project evolves. Each addition brings more IO pin usage, cost, potentially new interfacing requirements and accompanying microcontrollers or ADCs. If you don’t have much electronics experience, that’s not ideal. With this in mind, for a Hackaday prize entry [rand3289] is working on FiberGrid, a clever shortcut for interfacing multiple sensors without complex hardware. It doesn’t completely solve the problems above, but it aims to be a cheap, foolproof way to easily add sensors with minimal hardware needed.

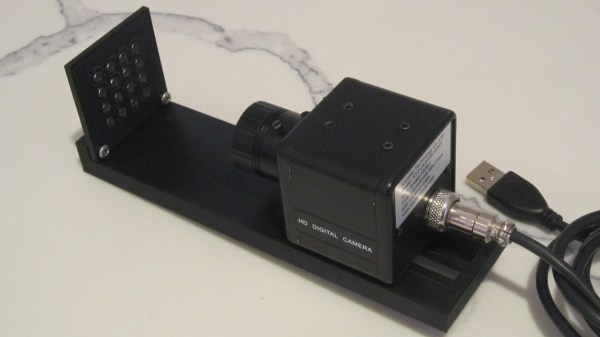
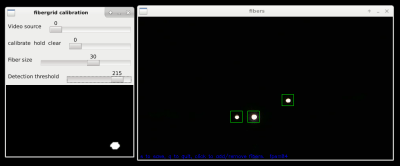
The idea is simple: make your sensors from light gates using fiber optics, feed the ends of the plastic fibers into a grid, then film the grid with a camera. After calibrating the software, built with OpenCV, you can “sample” the sensors through a neat abstraction layer. This approach is easier and cheaper than you might think and makes it very easy to add new sensors.

Naturally, it’s not fantastic for sample rates, unless you want to splash out on a fancy high-framerate camera, and even then you likely have to rely on an OS being able to process the frames in time. It’s also not very compact, but fortunately you can connect quite a few sensors to one camera – up to 216 in [rand3289]’s prototype.

There are many novel uses for this kind of setup, for example, rotation sensors made with polarising filters. We’ve even written about optical flex sensors before.

Cat Litter Tray Joins The Internet Of Things

Keeping a cat as a pet can be rewarding, but it’s always important to consider how to handle the mess – and we’re not just talking about the tea cups pushed off tables here. To handle just this task, [Igor] decided to hook his cat litter box up to the internet of things.

Monitoring the litter box brings several useful advantages. Load cells enable the weight of the litter tray to be monitored, allowing sand levels and the weight of the cats to be checked at regular intervals. Additionally, a door sensor keeps a record of comings and goings, giving an idea of how frequently the box has been used, and whether or not it may be time for cleaning. It’s all powered by an ESP32, hooked up to the Thingspeak platform. This allows for easy graphing and analysis of the data collected from the system. The electronics is then neatly installed in an attractive two-tone 3D printed enclosure with a pleasing cat motif.

It’s a great example of using some cheap off-the-shelf parts to ease the regular tasks of daily life. Building your own gear can be beneficial too, especially when Big Litter implements DRM on their hardware.

A Car Phone — No, Not That Kind

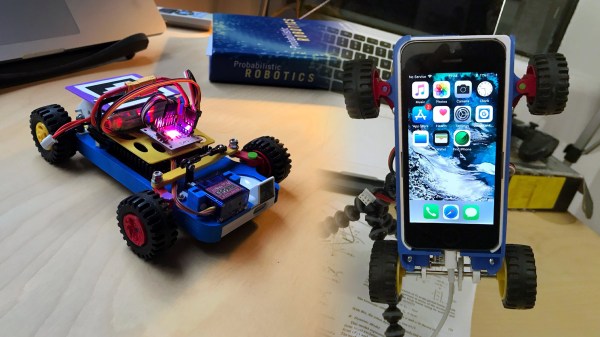
Autonomous vehicle development is a field of technology that remains relatively elusive to the average hacker, what with the needing a whole car and all. Instead of having to deal with such a large scale challenge, [Piotr Sokólski] has instead turned to implementing the same principles on the scale of a small radio-controlled car.

Wanting to lower the barrier of entry for developing software for self-driving cars, he based his design off of something you’re likely to have lying around already: a smartphone. He cites the Google Cardboard project for his inspiration, with how it made VR more accessible without needing expensive hardware. The phone is able to control the actuators and wheel motors through a custom board, which it talks to via a Bluetooth connection. And since the camera points up in the way the phone is mounted in the frame, [Piotr] came up with a really clever solution of using a mirror as a periscope so the car can see in front of itself.

The software here has two parts, though the phone app one does little more than just serve as an interface by sending off a video feed to be processed. The whole computer vision processing is done on the desktop part, and it allows [Piotr] to do some fun things like using reinforcement learning to keep the car driving as long as possible without crashing. This is achieved by making the algorithm observe the images coming from the phone and giving it negative reward whenever an accelerometer detects a collision. Another experiment he’s done is use a QR tag on top of the car, visible to a fixed overhead camera, to determine the car’s position in the room.

This might not be the first time someone’s made a scaled down model of a self-driving vehicle, though it’s one of the most cleverly-designed ones, and it’s certainly much simpler than trying to do it on a full-sized car in your garage.

Continue reading “A Car Phone — No, Not That Kind”

Candy-Colored Synth Sounds Sweet

Let’s face it, synthesizers are awesome. But commercial synths are pretty expensive. Even the little toy ones like the KORG Volca and the MicroKORG will run you a few hundred bucks. For the most part, they’re worth the price because they’re packed with features. This is great for experienced synth wizards, but can be intimidating to those who just want to make some bleeps and bloops.

[Kenneth] caught the mini-synth bug, but can’t afford to catch ’em all. After a visit to the Moog factory, he was inspired to engineer his own box based on the Moog Sirin. The result is KELPIE, an extremely portable and capable synth with 12 voices, 16 knobs, and 4 LED buttons. KELPIE is plug and play—power and a MIDI device, like a keyboard, are the only requirements. It has both 1/8″ and 1/4″ jacks in addition to a standard MIDI DIN connection. [Kenneth] rolled his own board based on the Teensy 3.2 chip and the Teensy audio shield.

Part of the reason Kenneth built this synthesizer is to practice designing a product from the ground up. Throughout the process, he has tried to keep both the production line and the DIYer in mind: the prototype is a two-part resin print, but the design could also be injection molded.

We love that KELPIE takes its visual design cues from the translucent candy-colored Game Boys of the late 90s. (We had the purple one, but always lusted after the see-through kind.)  Can we talk about those knobs? Those are resin-printed, too. To color the indicators, [Kenneth] used the crayon technique, which amounts to dripping molten crayon into the groove and scraping it off once hardened. Don’t delay; glide past the break to watch a demo.

Continue reading “Candy-Colored Synth Sounds Sweet”

Be Better Bracelet Breaks Bad Habits, Fosters Favorable Fixations

Do you want to be a better person? Maybe you want to curse less, drink more water, or post fewer inflammatory comments on the internet. You could go the old school route by wearing a rubber band around your wrist and snapping it every time you slip, or literally pat yourself on the back when you do the right thing. While these types of reinforcement methods may deter bad behavior and encourage good, they are quite lean on data. And who wants that?

After an unpleasant conference call, [Darian] cursed a blue streak that left his coworkers shocked and speechless. This inciting incident began the hero’s journey that will end with a kinder, gentler [Darian], as long as he has his trusty Be Better Bracelet. He tried involving Alexa when at home, and various apps elsewhere to track these venomous utterances, but he yearned for a single solution that’s always available.

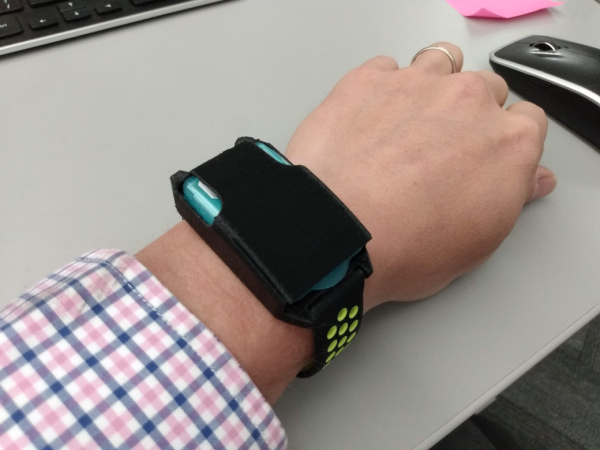
The sole purpose of this bracelet is low-cost, unobtrusive habit tracking. Though tied to a phone, it won’t tell time, predict the weather, or alert the user to incoming what-have-yous. It will simply record button presses, which are assigned meaning in the app settings. It’s up to the user to set goals, analyze the data, and reward or punish themselves accordingly.

[Darian] is still working out the design kinks to make this as small and cheap as possible. If you have suggestions, let him know.