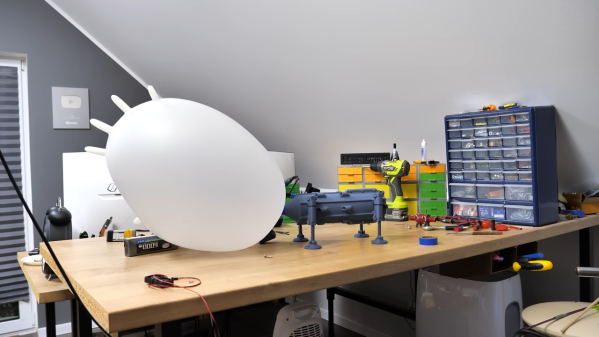
A 3D Printed Ratchet That Can Really Take The Torque

Printed tools aren’t exactly known for their durability, but [Gladius] shows us that with some thoughtful design, it’s possible to print a ratcheting wrench that can handle surprising amounts of torque.

Look closely, and you can see that the parts are almost entirely made up of perimeters (click to enlarge).

This particular wrench is inspired by NASA’s 3D printed ratcheting wrench, and also from an early 1900s design. It sports a 1/2 inch square socket into which modern adapters can be fitted, allowing those steel parts to do their job while the wrench itself delivers the muscle.

[Gladius] found that the strongest results came from slicing parts — especially the handle — so that they come out consisting almost entirely of perimeters, with virtually no traditional infill. Want to know more? There’s a discussion on reddit where [Gladius] goes into added detail about measurements and performance.

Over the years, we’ve seen our share of powerful prints. For example, what the Crimson Axlef*cker can do looks downright intimidating. Speaking of printing things that move, we want to remind you about this handy tip for easily and reliably joining motor shafts to printed parts by (mis)using jaw couplings.

Organizational Inspiration From The Discount Tool Company

When in need of any tool to get a job done quickly, or only for a small number of times, it’s great to have a local “discount tool” company locally for some working, yet often low-quality solution to whatever problem might arise. While there are some gems, most of these tools won’t last through heavy, sustained use like their more expensive counterparts will. On the other hand, there are other things to be had at these discount shops, such as inspiration for tackling a storage problem.

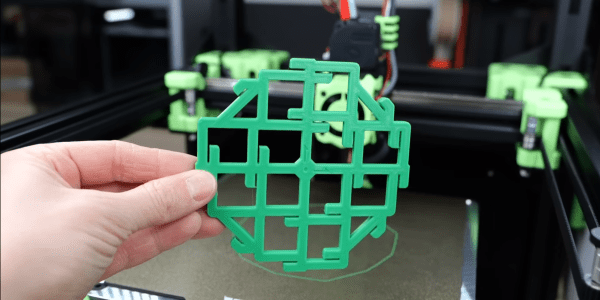
This particular storage system comes from Harbor Freight, and uses a set linked crosshairs, the center of which is hollowed out. A set of movable compartments sits on top with feet that can interlock inside the crosshairs. This allows much more efficient use of space within the toolboxes, but [Alan] wanted it to be useful for more that that. He designed and implemented the Storage Case Base Template (SCBT) which allows for a container of any size to be fitted with a similar crosshair network.

With this non-proprietary system implemented and printed, the original goal of reducing the clutter in [Alan]’s workspace was accomplished. The 3D printing files can be modified easily for any space, and are available both on Thingiverse and Printables. For some other ways of packing a lot into a small space, we featured this tiny workshop a while back that’s packed with storage hacks.

3D Printed Sorter Separates Spare Hex Nuts With A Shake

Got a pile of mixed hex nuts? Sort them in no time by printing [jonafriendj]’s nut sorter, which has options for pretty much any nut size you’d be after (it’s labeled metric, but actually includes Imperial sizes as well.)

Something to admire about the design is the handy little raised labels on each of the sieves, and the fact that all the parts print entirely without supports. Designing a part to play to a manufacturing method’s strengths (and avoid its weaknesses) is good DFM, or Design for Manufacturing.

With 3D printing being the boon that it is to workshops and hobbyists everywhere, it certainly pays to strive for good DFM, especially for designs meant to be shared with others. Sometimes good DFM takes a page from other manufacturing methods like injection molding, and we end up with things like using crush ribs on printed parts.

Want to see a demonstration of [jonafriendj]’s nut sorting design? Check out the short video embedded below the page break. If that leaves you wanting, take a look at a motorized, automated DIY solution.

Continue reading “3D Printed Sorter Separates Spare Hex Nuts With A Shake”

A Raspberry Pi Phone For The Modern Era

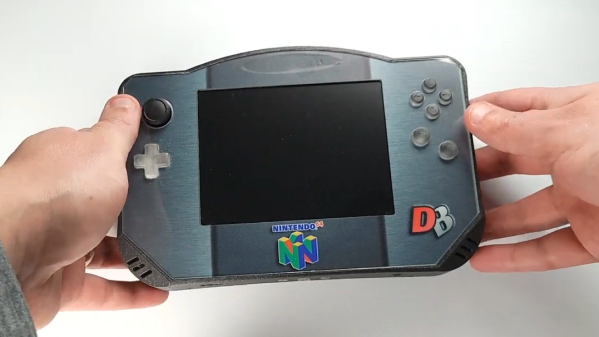
While it might seem like mobile phones are special devices, both in their ease of use and in their ubiquity in the modern culture, they are essentially nothing more than small form-factor computers with an extra radio and a few specific pieces of software to run. In theory, as long as you can find that software (and you pay for a service plan of some sort) you can get any computer to work as a phone. So naturally, the Raspberry Pi was turned into one.

[asherdundas], the phone’s creator, actually found a prior build based around the Raspberry Pi before starting this one. The problem was that it was built nearly a decade ago, and hadn’t been updated since. This build brings some modernization to the antiquated Pi phone, and starts with a 3D printed case. It also houses a touchscreen and a GSM antenna to connect to the cell network. With some other odds and ends, like a speaker and microphone, plus a battery and the software to tie it all together, a modern functional Raspberry Pi phone was created, with some extra details available on the project page.

The phone has the expected features — including calling, texting, and even a camera. A small WiFi USB dongle allows it to connect to the Internet too, allowing it to do all of the internet browsing a modern smartphone might want to do. The only thing that it might be pretty difficult to do is install Android apps, and although there are ways to get Android apps working in Linux, it’s not always strictly necessary to have this functionality.

Seven Segments, But Not As We Know Them

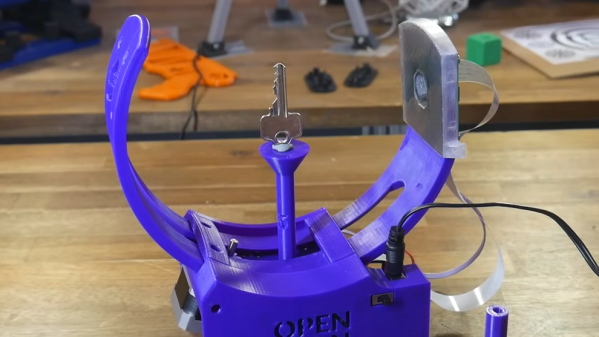
We’ve seen a lot of clever re-imagining of the classic 7-segment display, and proving there is still room for something new is [Jack]’s 7-segment “DigiTag” display.

This 3D printable device has a frame into which is slotted three sliders. These sliders can be adjusted individually, mixing and matching the visibility of colored and uncolored areas, to create digits 0-9. We’ve seen some unusual 7-segment-inspired displays before, using from one motor for the whole digit to ones that need one motor per segment, but nothing quite like this approach.

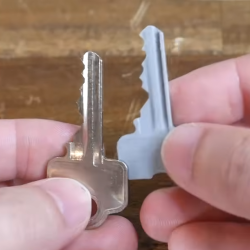
While this particular design relies on the user to manually “dial in” each digit, the resulting key-like assembly (and unique shape for each digit) seems like it could have some interesting applications — a puzzle box design comes to mind.

If you have any ideas of your own on how this could be used, don’t keep them to yourself! Let us know in the comments, below.

Casting Metal With A Microwave And Vacuum Cleaner

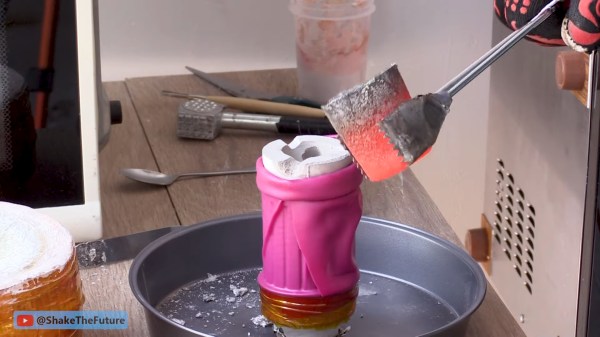
Metalworking might conjure images of large furnaces powered by coal, wood, or electricity, with molten metal sloshing around and visible in its crucible. But metalworking from home doesn’t need to use anything more fancy than a microwave, at least according to [Denny] a.k.a. [Shake the Future]. He has a number of metalworking tools designed to melt metal using a microwave, and in this video he uses them to make a usable aluminum pencil with a graphite core.

Before getting to the microwave kiln, the pencil mold needs to be prepared. A 3D-printed pencil is first created with the graphite core, and then [Denny] uses a plaster of Paris mixture to create the mold for the pencil. The 3D printed plastic is left inside the mold and placed in the first microwave kiln, which is turned on just enough to melt the plastic out of the mold, leaving behind the graphite core. From there a second kiln goes into the microwave to melt the aluminum.

Once the molten aluminum is ready, it is removed from the kiln and poured in the still-warm pencil mold. This is where [Denny] has another trick up his sleeve. He’s using a household vacuum cleaner to suck the metal into place before it cools, creating a rudimentary but effective vacuum forming machine. The result is a working pencil, at least after he wears down a few razor blades attempting to sharpen the metal pencil. For more information about how [Denny] makes these microwave kilns, take a look at some of his earlier projects.

Continue reading “Casting Metal With A Microwave And Vacuum Cleaner”

When 3D Printing Gears, It Pays To Use The Right Resin

There are plenty of resins advertised as being suitable for functional applications and parts, but which is best and for what purpose?

According to [Jan Mrázek], if one is printing gears, then they are definitely not all the same. He recently got fantastic results with Siraya Tech Fast Mecha, a composite resin that contains a filler to improve its properties, and he has plenty of pictures and data to share.

[Jan] has identified some key features that are important for functional parts like gears. Dimensional accuracy is important, there should be low surface friction on mating surfaces, and the printed objects should be durable. Of course, nothing beats a good real-world test. [Jan] puts the resin to work with his favorite method: printing out a 1:85 compound planetary gearbox, and testing it to failure.

The results? The composite resin performed admirably, and somewhat to his surprise, the teeth on the little gears showed no signs of wear. We recommend checking out the results on his page. [Jan] has used the same process to test many different materials, and it’s always updated with all tests he has done to date.

Whether it’s working out all that can go wrong, or making flexible build plates before they were cool, We really admire [Jan Mrázek]’s commitment to getting the most out of 3D printing with resin.