[Mark Rehorst] has been busy with his Ultra MegaMax Dominator (UMMD) design for a 3D printer, and one of the many things he learned in the process was how not to design a 3D printed belt clamp. In the past, we saw how the UMMD ditched the idea of a lead screw in favor of a belt-driven Z axis, but [Mark] discovered something was amiss when the belts were flopping around a little, as though they had lost tension. Re-tensioning them worked, but only for a few days. It turned out that the belt clamp design he had chosen led to an interesting failure.
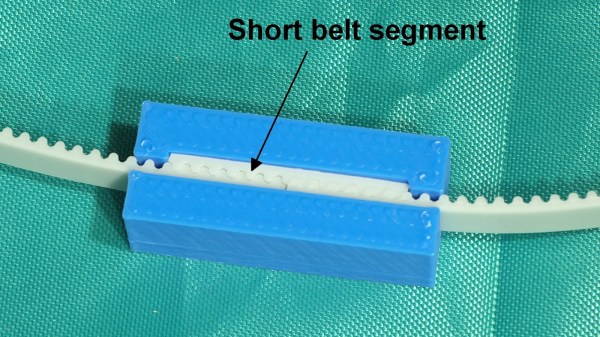
 The belts used were common steel-core polyurethane GT2 belts, and the clamp design uses a short segment of the same belt to lock together both ends, as shown above. It’s a simple and effective design, but one that isn’t sustainable in the longer term.
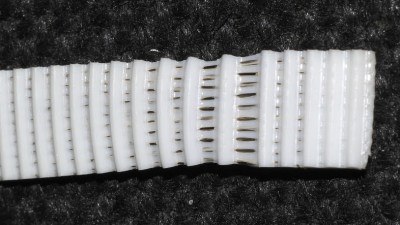
The problem was that this design led to the plastic portion of the belt stretching out and sliding over the internal steel wires. The stretching of the polyurethane is clear in the image shown here, but any belt would have had the same problem in the clamp as it was designed. [Mark] realized it was a much better idea to use a design in which the belts fold over themselves, so the strain is more evenly distributed.
[Mark] has been sharing his experiences and design process when it comes to building 3D printers, so if you’re interested be sure to check out the UMMD and its monstrous 695 mm of Z travel.