3D-Printed Parts Don’t Slow Down This Speedy Printer

Truth be told, we generally find speed sports to be a little boring. Whether it’s cars going around in circles for hours on end or swimmers competing to be a few milliseconds faster than everyone else, we just don’t feel the need for speed. Unless, of course, you’re talking about speedy 3D printers like “The 100”, which claims to produce high-quality prints in a tenth the time of an ordinary printer. In that case, you’ve got our full attention.

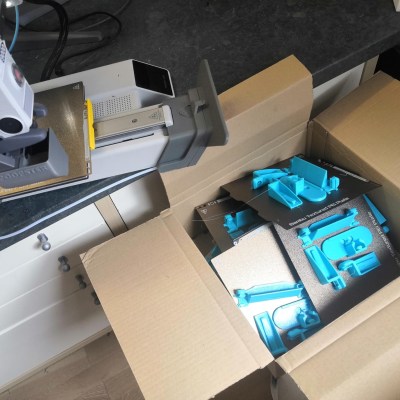
What makes [Matt the Printing Nerd]’s high-speed printer interesting isn’t the fact that it can do a “Speedboat Run” — printing a standard Benchy model — in less than six minutes. Plenty of printers can do the same thing much, much faster. The impressive part is that The 100 does it with a 3D-printed frame. In fact, most of the printer’s parts are 3d printed, a significant departure from most speed printer builds, which generally shy away from printed structural elements. [Matt]’s design also aims to keep the center of gravity of all the printer’s components within a very small area, which helps manage frame vibrations that limit print quality. The result is that the CoreXY gantry is capable of a speed of 400 mm/s and an eye-popping 100,000 mm/s² acceleration. What also sets [Matt]’s printer apart is that The 100 is designed to be a daily driver. It has a generous 165 mm x 165 mm print bed, which is far more useful than a bed that’s barely bigger than a standard Benchy.

The video below has much more details on the open-source build, plus some nice footage of some speed runs. The quality of the prints, even done at speed, is pretty impressive. Perhaps there is a point to speed sports after all.

Continue reading “3D-Printed Parts Don’t Slow Down This Speedy Printer”

Powercore Aims To Bring The Power Of EDM To Any 3D Printer

The desktop manufacturing revolution has been incredible, unleashing powerful technologies that once were strictly confined to industrial and institutional users. If you doubt that, just look at 3D printing; with a sub-$200 investment, you can start making parts that have never existed before.

Sadly, though, most of this revolution has been geared toward making stuff from one or another type of plastic. Wouldn’t it be great if you could quickly whip up an aluminum part as easily and as cheaply as you can print something in PLA? That day might be at hand thanks to Powercore, a Kickstarter project that aims to bring the power of electric discharge machining (EDM) to the home gamer. The principle of EDM is simple — electric arcs can easily erode metal from a workpiece. EDM machines put that fact to work by putting a tool under CNC control and moving a precisely controlled electric arc around a workpiece to machine complex shapes quickly and cleanly.

Compared to traditional subtractive manufacturing, EDM is a very gentle affair. That’s what makes EDM attractive to the home lab; where the typical metal-capable CNC mill requires huge castings to provide the stiffness needed to contain cutting forces, EDM can use light-duty structures and still turn out precision parts. In fact, Powercore is designed to replace the extruder of a bog-standard 3D printer, and consists almost entirely of parts printed on the very same machine. The video below shows a lot of detail on Powercore, including the very interesting approach to keeping costs down by creating power resistors from PCBs.

While we tend to shy away from flogging crowdfunded projects, this one really seems like it might make a difference to desktop manufacturing and be a real boon to the home lab. It’s also worth noting that this project has roots in the Hackaday community, being based as it is on [Dominik Meffert]’s sinker EDM machine.

Continue reading “Powercore Aims To Bring The Power Of EDM To Any 3D Printer”

Giant 3D Printed Excavator Is Awesome, But Needs Work

Many of us adored big construction machinery as children. Once we got past the cute, tiny age, it became uncool to gasp with shock and awe at diggers and bulldozers for some reason . [Ivan Miranda] still digs the big rigs, though, and built himself a giant 3D printed excavator that looks like brilliant fun. 

Why did Lego never make MegaTechnic blocks? [Ivan] shows us the true potential of bigger building blocks.
The build relies on [Ivan]’s giant 3D-printed Lego-like assembly kit. It lets him simply bolt together a bunch of plastic girders to make the key parts of the excavator, including the base and the digger arm itself. The digger arm is controlled with linear actuators of [Ivan’s] own design, which uses servos and threaded rod to do the job. They’re not as cool as hydraulics or pneumatics, but they get the job done well. For propulsion, [Ivan] built a tracked drive system again using his unique Lego-like blocks. The tracks were tedious to assemble, but add a lot to the excavators Awesomeness Quotient (AQ).

The overall build is quite slow, and more than a little fragile. It’s not quite ready for hardcore digging tasks. In reality, it’s serving as a test bed for [Ivan]’s 3D-printed building blocks that get better every time we see them. Video after the break.

Continue reading “Giant 3D Printed Excavator Is Awesome, But Needs Work”

The underside of the rotational base of the Gen5X 3D printer. A belt connects a pulley on the bottom of the stage to a stepper motor on the right side. The carriage for the stage looks organic in nature and is printed in bright orange PLA. The stage can rotate within the carriage which is mounted on two stainless steel rods connected to teal mounting points on either side of the printer (ends of the X-axis).

5-Axis Printer Wants To Design Itself

RepRap 3D printers were designed with the ultimate goal of self-replicating machines. The generatively-designed Gen5X printer by [Ric Real] brings the design step of that process closer to reality.

While 5-axis printing is old hat in CNC land, it remains relatively rare in the world of additive manufacturing. Starting with “a set of primitives… and geometric relationships,” [Real] ran the system through multiple generations to arrive at its current design. Since this is a generative design, future variants could look different depending on which parameters you have the computer optimize.

The Gen5X uses the 5 Axis Slicer from DotX for slicing files and runs a RepRap Duet board with Duex expansion. Since the generative algorithm uses parametric inputs, it should be possible to to have a Gen5X generated based on the vitamins you may have already. With how fast AI is evolving, perhaps soon this printer will be able to completely design itself? For now, you’ll have to download the files and try it yourself.

If you want to see some more printers with more than 3-axes, check out the RotBot or Open5X.

Continue reading “5-Axis Printer Wants To Design Itself”

Mechanical Keyboard Is Also A Mouse

The mechanical keyboard community is a vibrant, if not fanatical, group of enthusiasts determined to find as many possible ways of assembling, building, and using as many high-quality keyboards as possible. With so many dedicated participants, most things that can be done with a keyboard already have been done. So when something as unique as this split keyboard that also doubles as a mouse pops up, we take notice.

The keyboard is a custom build from [Taliyah Huang] which uses a pair of Arduinos, one in each half of the keyboard, to communicate key and mouse information to a third Arduino which is plugged in to her laptop. The right-hand half of the keyboard also includes the circuitry from an optical mouse, which gets powered up when the caps lock button is held down. When activated, this allows the keyboard to be used as a mouse directly. It also includes support for most Mac gestures as well, making it just as useful as a trackpad.

While there were some problems with the design, including being slightly too tall to be ergonomic and taking nearly 24 hours of soldering to complete, the prototype device is an interesting one especially since it allows for full control of a computer without needing a dedicated mouse. For other unique mechanical keyboard concepts, we recently featured this build which takes design and functionality cues from the Commodore 64.

Continue reading “Mechanical Keyboard Is Also A Mouse”

3D Printer Spool Roller Is Built For Giant Spools Of Filament

Most 3D printers come with a pretty basic filament holder — often little more than a bar to hang the spool on. [Ivan Miranda]’s 3D printers run bigger spools than most, though, so he had to craft an altogether more serious solution.

Unlike most of [Ivan]’s creations, the spool holder isn’t actually 3D printed. For this job, he turned to a laser cutter instead, cutting the parts out of 5 mm plywood. A handful of layers of wood bolt together to form the frame. The frame holds several bearings for the outer rims of the spool itself to ride on, allowing it to spin freely as the extruder tugs on the filament. Reducing the rolling resistance of the spool is key when working with such large, heavy spools, and reduces the chances of the filament not feeding properly.

It’s a tidy example of a tool built quickly and easily using a laser cutter. It pays to remember that while 3D printers are great, a laser cutter can often turn out parts in a short fraction of the time.

Continue reading “3D Printer Spool Roller Is Built For Giant Spools Of Filament”

Making The One Ring By Electroplating Gold On A 3D Print

Electroplating is a great way to add strength or shine to a 3D print. However, we don’t see too many people trying it with gold. [HEN3DRIK] isn’t afraid to experiment, though, and pulled off some amazing, high-quality jewelry-grade plating!

The design for the project was the so-called Ring of Power from Lord of the Rings. The print was created on a resin printer at a high quality level, washed thoroughly to remove any remaining resin, and then cured. The print was then post-processed with sandpaper to make it as smooth as possible. Conductive paint was then applied, ready to take on the plating layers. [HEN3DRIK] first started by plating copper to build up a tough base layer, then nickel to prevent mixing between the copper and gold. The gold is then finally plated on top. Plating the copper is done with the ring constantly rotating to get as even a coat as possible. In contrast, the gold plating is done with a brush to avoid wasting the highly-expensive plating solution.

The final result is a gleaming gold ring that probably feels strangely light in the hand. The technique is time consuming, thanks to the need to plate multiple layers, but the results are to die for. We’ve seen [HEN3DRIK]’s fine work before, too. Video after the break.

Continue reading “Making The One Ring By Electroplating Gold On A 3D Print”