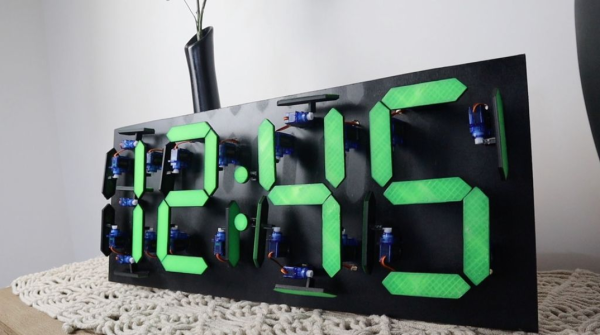
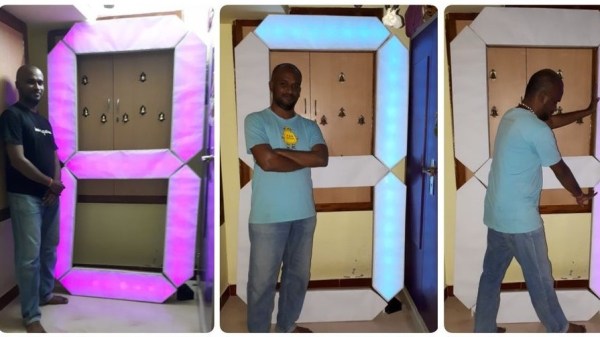
Time is something uniquely important to humans, and they remain the only creatures on the planet to build devices to regularly track its progress. [Ivan Miranda] is one such creature, and built a giant 7-segment clock for his workshop that really ties the room together.
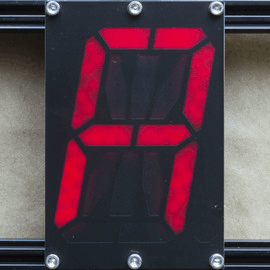
The clock is a testament to [Ivan]’s design skills in the 3D printed space. Taking advantage of his large format printer, each segment consists of a front panel, large single-piece diffuser, LED carrier, and backing plate. There are plenty of nice touches, from the interlocking ridges between each digit, to integral printed arrows on the inside that guide installation of the LED strips. Fit and finish approaches the level of a commercial product, a reward for [Ivan]’s years of practice in the field.
Electronically, an ESP8266 runs the show, synchronizing the time over its in-built WiFi connection. Each segment contains 9 WS2812B LEDs, wired up in a single long strip that’s addressed by the microcontroller. This means that the segments can be lit up to any color of the rainbow, though [Ivan] is a man who best appreciates the look of classic red.
[Ivan]’s long been a proponent of big 3D-printed builds — his tank-tracked electric skateboard is a particularly good example. Video after the break.
Continue reading “Big Workshop Clock Is 3D Printing Done Right”


 Each module is composed a very boring PCBA base layer which should be inexpensive from the usual sources, even when ordering one
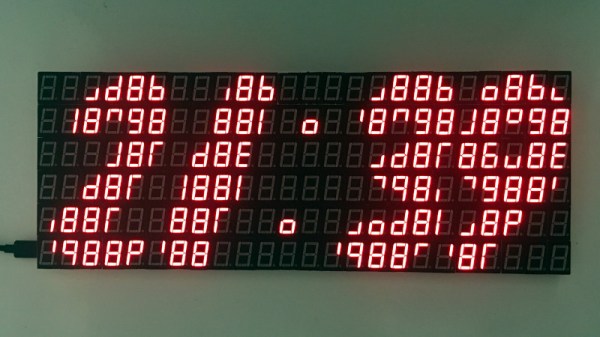
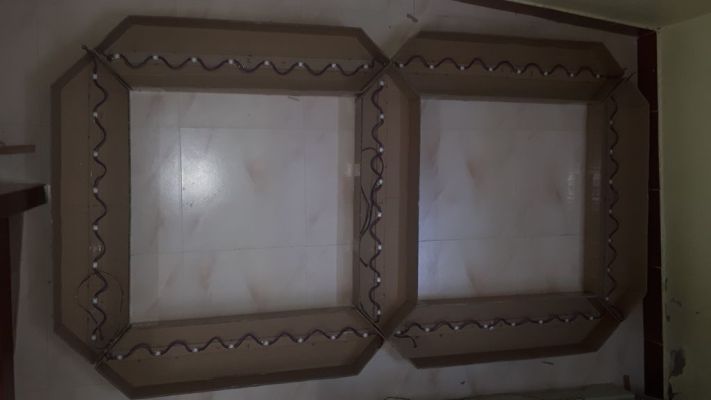 Apparently, the plan is to build a giant clock so he started off by making the first digit. To keep it cheap and simple the segments are made from corrugated cardboard which was carefully cut, folded, and then glued together. The light-diffusing lid is simply made from white paper. He used the ubiquitous WS2812B strips to light up the segments, but things turned out to be more complicated as he was not able to get enough strips to fill up all the segments. This forced him to cut up the strip into individual pieces and space them out by reconnecting the LEDs with wires. Cutting, stripping, and soldering 186 wires took him almost 10 hours. An Arduino Uno serves as the brains of the device and there is a nice Android app to control it via Bluetooth.